Table of Contents
- 1. This document: Introduction to Newspeak on Webassembly (Wasm)
- 2. Changelog: last change 2023-12-11
- 3. TODOs
- 4. Terminology and notation
- 5. Perhaps the best high level summary of Newspeak
- 6. Newspeak: A quickstart. Explore the IDE. Then develop CounterApp, package it and deploy it
- 7. Newspeak: An ide-driven journey leading to Hello World
- 7.1. Motivation of writing this journey
- 7.2. Dependencies and modularity: Important but hard to "get" at first
- 7.3. Starting the journey
- 7.4. Namespaces and Modules
- 7.5. Class structure, primary factory methods, platform and manifest, modules API
- 7.5.1. Section TL;DR:
- 7.5.2. Top level classes in the IDE - expanded
- 7.5.3. Newspeak class structure
- 7.5.4. Primary factory methods
- 7.5.5. The manifest object
- 7.5.6. The platform object
- 7.5.7. Common and distinct roles of platform and manifest in modules
- 7.5.8. Newspeak platform and manifest objects summary
- 7.6. Modules: Application, Library, TestConfiguration, General
- 7.7. Newspeak recipy for writing modules API
-
- 7.7.0.1. 1. General module with NO dependencies: API of module with no dependencies
- 7.7.0.2. 2. General module with dependencies: API of module with dependencies
- 7.7.0.3. 3. Library module: API of module that needs to be distributed for use in other modules
- 7.7.0.4. 4. Application module: API of module that needs to be distributed as an App
- 7.7.0.5. TODO 5. Test module: TODO
- 7.7.0.6. TODO 6. Test module configuration: TODO
-
- 7.8. Hello World in Newspeak - several versions
- 8. Newspeak: Using it online or installing it locally
- 9. Newspeak: Script which builds deployable vfuel files
- 10. IN-PROGRESS Programming in Newspeak
- 10.1. The Newspeak IDE
- 10.2. Saving changes in Newspeak
- 10.3. Exemplars: Enabling liveliness everywhere
- 10.3.1. Exemplars motivation
- 10.3.2. Exemplars documentation
- 10.3.3. A class with an exemplar
- 10.3.4. Exemplars role
- 10.3.5. How does the BankAccount class look in the IDE with and without an exemplar?
- 10.3.6. More details on exemplars
- 10.3.6.1. The presence of an exemplar factory makes the IDE to create the instance and show the instance browser
- 10.3.6.2. Can there be multiple exemplars in a comment?
- 10.3.6.3. Are the exemplars always extracted from the comment before the " = (..)" section defining the primary factory method, instance method or class method, OR can they be at any position in the code?
- 10.3.6.4. Exemplars using block and value: How would an exemplar for a more complex object look like?
- 10.3.6.5. What is the purpose of the exemplar on the primary factory method?
- 10.3.6.6. The exemplars are evaluated "as if in a Workspace"
- 10.4. Access control and access modifiers in Newspeak
- 10.4.1. Introduction
- 10.4.2. Access control context, description and terminology
- 10.4.3. Slides 61, 62, 63: Rules for accessing members above and below the class in the nesting hierarchy
- 10.4.4. Slides describing Newspeak virtual method call lookup: 'lexical chain first, inheritance chain second'
- 10.4.5. Worked accessibility examples, using rules from slides 61, 62, 63
- 10.5. Debugging in Newspeak
- 10.6. Ampleforth and HTML documents in Newspeak
- 10.7. Examples of applications written in Newspeak
- 10.8. IN-PROGRESS-NOW Snippets of wisdom from various sources
- 11. IN-PROGRESS Q&A - answers should be either here directly, or link to an earlier section
- 11.1. Section goals and resources
- 11.2. Newspeak: The price of being principled. The hard parts: namespace, manifest, platform, module, convention methods, packaging. What are these things?
- 11.2.1. What is a module?
- 11.2.2. What is a platform?
- 11.2.3. What is a manifest?
- 11.2.4. What is a namespace?
- 11.2.5. What is #packageUsing: manifest and #packageLibraryUsing: manifest?
- 11.2.6. What is #main: platform args: args and #buildUsing: platform?
- 11.2.7. Use case and lifecycle for packaging and building: #packageUsing: manifest, #packageLibraryUsing:, #main: platform args: args and #buildUsing: platform
- 11.2.8. What makes the [deploy] [configuration] [run] and [debug] buttons to show in IDE on the class line?
- 11.2.9. What are serialization methods and formats?
- 11.3. How do I save my changes?
- 11.4. How would I build and deploy a Newspeak application?
- 11.5. How do I bring dependencies into modules to be distributed?
- 11.6. When or why to refresh the online IDE?
- 11.7. Why do some classes show the [deploy] [run] [debug[ links?
- 11.8. Why do some test classes show the [run tests] [show tests] links?
- 11.9. How would I create and distribute a Newspeak Application to run on the web, on mobile, or on desktop?
- 11.10. How does Ampleforth work to create live literate Newspeak demos such as http://bracha.org/Literate/literate.html?
- 11.11. How does Newspeak display something in DOM and HTML?
- 11.12. What are Newspeak "Exemplars"?
- 11.13. Why are slot instances sometimes using uppercase name?
- 12. The Newspeak UI, HopscotchForHTML5: Analysing it by code browsing; Discovering Subject, Model, Presenter, Fragment; Writing CheckedItemApp sample App
- 12.1. Discovery of the HopscotchForHTML5 class basics
- 12.2. The formulaic required repetitive methods of #isMyKind: and #isKindOfX
- 12.3. The Subject class: primary factory method, instance methods, how Subject knows Presenter
- 12.3.1. Chapter goal: Overview of the Subject class
- 12.3.2. The primary factory method public class Subject onModel: aModel = (..)
- 12.3.3. The unimplemented (abstract) methods: Subject>>#createPresenter and Subject>>#isMyKind: otherSubject
- 12.3.4. The method Subject>>#presenter creates the subject's presenter by calling the Subject>>#createPresenter, then associate the instances
- 12.3.5. Chapter conclusion about principles of writing rudimentary Hopscotch UI
- 12.4. The Presenter class: primary factory method, instance methods, how Presenter knows Subject
- 12.4.1. Chapter goal: Overview of the Presenter class
- 12.4.2. The primary factory method class Presenter onSubject: aSubject = Fragment (..)
- 12.4.3. The unimplemented (abstract) methods: Presenter>>#definition and Presenter>>#isMyKind: fragment
- 12.4.4. Instance methods on Presenter that create instances of Fragments
- 12.4.5. Presenter extends Fragment
- 12.5. The Fragment class
- 12.6. Summary of Subject and it's model, Presenter and Fragment, their associations, and their lifecycle
- 12.7. Back to HopscotchForHTML5 and how it relates to HopscotchForHTML5Runtime
- 12.8. Using Hopscotch discovery a Model-Presenter-Subject Application, the CheckedItemApp
- 12.8.1. Chapter goal
- 12.8.2. 1. Start coding the Application class CheckedItemApp
- 12.8.3. 3. Write code for CheckedItemUI, the class showing the UI
- 12.8.4. 4. Integrate the CheckedItemUI into the CheckedItemApp
- 12.8.5. 5. Complete code and UI of the CheckedItemApp
- 13. Analyzing classes HopscotchForHTML5, Browsing, etc
- 14. Elements of GUI in HopscotchForHTML5
- 14.1. TL;DR: The top level class
HopscotchForHTML5is the Newspeak GUI library. - 14.2. Hopscotch
DropDownMenuFragment: A drop down menu, created usingPresenter#dropDownMenu:menu- 14.2.1. TL;DR: To create a drop down menu we need two objects, a menu label/actions list, and a dropDownMenuFragment fragment
- 14.2.2. Hopscotch
DropDownMenuFragment: Story of adding it to aMyWidgetPresenter#definition, and how it works at runtime.- 14.2.2.1. Write the GUI in our application: Code in
MyWidgetPresenter#definition - 14.2.2.2. Processing during the call to
MyWidgetPresenter#definition - 14.2.2.3.
Fragment#createVisual: Processing during GUI DOM composition (when Newspeak code is converted to DOM document) - 14.2.2.4. DOM is ready, code execution after user click on the menu IMG (the
DropDownMenuFragment#imagevisual) - 14.2.2.5. The menu
DropDownMenuFragmentDOM element is poped up, waiting for user click on one menu item. Actions after user click on one menu item
- 14.2.2.1. Write the GUI in our application: Code in
- 14.1. TL;DR: The top level class
- 15. Todos todo-00
- 16. IN-PROGRESS-NOW Current work : Classes of objects available in Workspace. Add to a new Zoo
- 17. IN-PROGRESS-NOW HopscotchForHTML5 API notes
1. This document: Introduction to Newspeak on Webassembly (Wasm)
TL;DR: The purpose of this document is to help myself starting with Newspeak version 3 (year 2021-2023, runs on Webassembly). Newspeak is a modern, principled platform and language: dynamic, reflective, modular. It supports both object-oriented and functional styles. But having reached here, you probably already know that much. Hopefully this document can help other reader's as well.
Much of this document is collected from Newspeak sources listed below. Any errors, misunderstandings or potential misrepresentations are mine.
- The Newspeak google groups posts at https://groups.google.com/g/newspeaklanguage
- The Newspeak core site at https://newspeaklanguage.org/
- Gilad Bracha's Room 101 blog at https://gbracha.blogspot.com/
- Newspeak code on Github https://github.com/newspeaklanguage/newspeak
- Primordialsoup (the VM) code on Github https://github.com/newspeaklanguage/primordialsoup. Only needed if we want to build the VM, not necessary for Newspeak development.
2. Changelog: last change 2023-12-11
| Date | Author | Change | ||
|---|---|---|---|---|
| 2021-05-02 | Gilad Bracha | Important clarifications and help throughout the document | ||
| 2021-05-04 | Milan Zimmermann | Expanded on using the Newspeak IDE, mostly in the section 6.1 | ||
| 2021-06-07 | Milan Zimmermann | Wording changes and clarifications in several sections | ||
| 2021-07-05 | Milan Zimmermann | Reworked the saving paragraph: "lastSaved" vs "backup" in 10.2 | ||
| 2021-07-16 | Milan Zimmermann | Added section Newspeak: An ide-driven journey leading to Hello World | ||
| 2021-07-28 | Milan Zimmermann | Added sections How does Ampleforth work to create live literate Newspeak demos such as http://bracha.org/Literate/literate.html? and How does Newspeak display something in DOM and HTML? | ||
| 2021-08-10 | Milan Zimmermann | Added section The Newspeak UI, HopscotchForHTML5: Analysing it by code browsing; Discovering Subject, Model, Presenter, Fragment; Writing CheckedItemApp sample App | ||
| 2021-08-15 | Milan Zimmermann | Added section Exemplars: Enabling liveliness everywhere | ||
| 2021-08-15 | Milan Zimmermann | Added section Newspeak terminology | ||
| 2021-10-25 | Milan Zimmermann | Added section Access control and access modifiers in Newspeak | ||
| 2023-10-02 | Milan Zimmermann | Added sections Newspeak: Script which builds deployable vfuel files Ampleforth and HTML documents in Newspeak. Newspeak: The price of being principled. The hard parts: namespace, manifest, platform, module, convention methods, packaging. What are these things? Lots of cleanup | ||
| 2023-12-11 | Milan Zimmermann | Added sections on Mirrors | ||
3. TODOs
- change this document: The class
HopscotchForHTML5Runtimeno longer exists, replaced withRuntimeForHopscotchForHTML. Go over any places referring to it, simplify, and fix. - distinguish "General Module" (does not need platform) and "General Module Using Platform" with factory GM usingPlatform: platform
- Add a HelloWorld using Subject and Presenter like the one in Newspeak on Squeak and add code to https://github.com/mzimmerm/newspeak-doc/tree/main/newspeak---a-few-notes-code/hello-world/6-as-general-module-with-GUI-using-platform similar to https://github.com/mzimmerm/newspeak-doc/tree/main/newspeak---a-few-notes-code/hello-world/5-as-general-module-to-dom
4. Terminology and notation
4.0.1. Newspeak code example
A snippet of Newspeak code. Simplified from https://raw.githubusercontent.com/newspeaklanguage/newspeak/master/CounterUI.ns.
The comments obscure the code but provide syntax guidence.
(* This is a comment in Newspeak. It can span across many lines *)

(* Declaration of a top level class "CounterUI"
   ALONG WITH it's primary factory method (constructor in other OO) method "usingPlatform: platform".
*)
class CounterUI usingPlatform: platform  = (
  (* Slots are declared inside bars | .. |.
     A Slot is like a instance member in other OO, in Newspeak it is always a getter, potentially setter (if slot is mutable).
  *)
  |
  (* "Subject" and "Presenter" are immutable slots
  *)
  private Subject = platform hopscotch Subject.
  private Presenter = platform hopscotch Presenter.
  |
) (
  (* "Counter" class is an inner class of "CounterUI"
  *)
  public class Counter = (
    (* count is a mutable slot. It also defines it as type Integer. Type is optional. *)
    | public count <Integer> ::= 0. |
  ) (
  )
  (* "CounterPresenter" class is another inner class of "CounterUI",
     ALONG WITH method "onSubject: subject".
     The syntax " = Presenter onSubject: subject" makes Presenter a superclass of CounterPresenter,
     without any keywords.
   *)
  class CounterPresenter onSubject: subject = Presenter onSubject: subject () (
    (* "definition" is a method, the carret ^ means "return"
    *)
    definition = (
      (* method "definition" returns a row of widgets *)
      ^row: {
          (* "subject" in "subject count" is a member on super "Presenter". *)
          label: subject count.
          mediumBlank.
          button: 'increment' action: [updateGUI: [subject increment]].
          button: 'decrement' action: [updateGUI: [subject decrement]].
          button: 'reset' action: [updateGUI: [subject clear]].
          }.
    )
  )
  (* "CounterSubject" class is another inner class of "CounterUI". See "CounterPresenter" for comments
  *)
  public class CounterSubject onModel: model <Counter> =  Subject onModel: model () (
    createPresenter ^ = (
      ^CounterPresenter onSubject: self
    )
    public decrement = (
      model count: count - 1
    )
    public increment = (
      model count: count + 1
    )
    public count ^ <Integer> = (
      ^model count
    )
    public clear = (
      model count: 0
    )
   )
  )
4.0.2. Notation used in this document: how do we express a class name, a message (function, method) name, or a slot name?
This is a brief introduction to explain a notation used in this document.
Newspeak is a class based, and message based system. All runtime operations are message sends (method calls).
- What do we mean by a 'message'? Think of it as a method or function name with parameter names (method signature).
- What do we mean by a 'message send'? Think of it as calling (invoking) a method on an object.
In fact, we may use 'method name' and 'message name' interchangeably, although it is not quite precise. We also may use the terms 'send a message', 'call a method' or 'invoke a method' interchangeably.
Here is the notation we want to introduce: When you see in text, something like Rectangle>>#initWidth: width andHeight: height, it means: "class Rectangle has a method named initWith:andHeight, with first parameter named width and second parameter named height".
If you see just #initWidth: width andHeight: height it means the same as above, but we assume the class name "Rectangle" on which the method is declared, is clear from the context, and the meaning is same as above.
The parameter names are not part of the signature (a unique method name), and are often not included in the method signature. If the parameter names are not included, we shorten the signature to Rectangle>>#initWidth:andHeight: or #initWidth:andHeight:.
Examples of this notation:
Rectangle>>#initWidth width :andHeight: heightRectangle>>#initWidth:andHeight:#initWidth:andHeight:#main: platform args: args#usingPlatform: platformNumber>>squeared- in this example, note there is not colon:at the end of the signature. The messagesquaredis unary (does not accept a parameter) acts only on the Number instance, returning the squared value of theNumberinstance.squared- as above, butNumberis clear from the context in the text.
4.0.3. Newspeak terminology
Newspeak is different. Below we list terms that are generally used in documentation and in this document. This section sort of jumps ahead of the gradual introduction to Newspeak, but should help when reading the text.
- Top level class : Class that appears on the top level class list in the IDE. Top level class has no enclosing class.
- Module Declaration : Source code of a top level class.
- Module Definition or Module class : The class object of a top level class. This is the object that has the primary factory method defined below.
- Module : Instance of a top level class. When talking about API, we sometimes use the term module instead of module declaration.
- Slot : Equivalent of an instance variable (instance slot) or a local variable (local slot) in other languages. In Newspeak, everything is a message send, so a slot is a getter (immutable slot) or also a setter (mutable slot). Example:
|mySlot =:: 1|declares a mutable slot,|mySlot = 1|declares an immutable slot. See the local and instance slot sections below for more details. - Instance slot declaration : Name on the left of an expression between the bars
| |located inside the primary factory method. Instance slot is an equivalent of a member variable in other OO languages, and it's scope is the instance, with some small but important context differences due to class nesting. The slot name can have the symbol=,=::or nothing to the right of the slot name.|mySlot =:: 1|is a declaration of a mutable slot namedmySlot.|mySlot = 1|is a declaration of an immutable slot namedmySlot(in either example, initialized to1at the point of the declaration).|mySlot|is a declaration of an immutable slot, which can be initialized later in code. The::expresses mutability in Newspeak. Read it as 'the name on the left is set to the value on the right'. - Local slot declaration : Similar to instance slot declaration, except the local slot is declared in (and its scope is) the body of an instance method or a factory method (but NOT in the primary factory method body, that is reserved for instance slots). Equivalent of a local variable in other languages.
Primary factory method : The method that allows to accept parameters (capabilities), declare instance slots, and produce an instance of a class. In practical terms, looking at code, the primary factory method is the method starting on the same line where the class code starts. Also, the primary factory method is the only place in which we can declare instance slots. The 'class factory object' in code, is referenced using the uppercase class name. An example of a primary factory method named
#usingPlatform: platform andA1: A1on classA2:(* The string "usingPlatform: andA1:" is the primary factory method signature. The primary factory method is declared as follows: *) class A2 usingPlatform: platform andA1: A1 = ( (* Section 1. Primary factory method slots and body.*) |slots| (* .. instantiation code here .. *) )- Implementation detail: The 'primary factory method' is in fact a method on a "special" object, not a method on the class. The class declaration above creates a "special" object termed 'class factory object' that provides the means of producing instances of the class. The 'class factory object' supports at least one message that produces new instances (of the class). This message on the 'class factory object' is the 'primary factory method'. But for practical purposes, we can think of the 'primary factory method' as a class method that produces instances of a class.
- So code such as
AMyApp packageUsing: manifestinvokes the factory method#packageUsingon the 'class factory object' ALSO namedAMyApp, and it produces an instance of theclass AMyApp. We can use use it to store the produced instance in code such asmyAppInstance:: AMyApp packageUsing: manifest.
- So code such as
- Implementation detail: The 'primary factory method' is in fact a method on a "special" object, not a method on the class. The class declaration above creates a "special" object termed 'class factory object' that provides the means of producing instances of the class. The 'class factory object' supports at least one message that produces new instances (of the class). This message on the 'class factory object' is the 'primary factory method'. But for practical purposes, we can think of the 'primary factory method' as a class method that produces instances of a class.
Factory method : The method that produces an instance but cannot declare instance slots. Note the distinction from primary factory method above. In practical terms, looking at code, factory method is the method in the class code section after the ":" - in this example, in section 3. Below is an example of factory method named
#factoryMethod1on classA2:class A2 usingPlatform: p andA1: A1 = ( (* Section 1. Primary factory method slots and body. *) |slots| (* .. instantiation code here .. *) ) ( (* Section 2. instance methods and nested classes *) ) : ( (* Section 3. factory methods *) factoryMethod1 = ( (* Code returning instance, but cannot declare slots. *) ) )- Class factory object : The user accessible object that represents the class in the language. This object provides the factory methods (both primary factory methods and factory methods). From user's perspective, the class factory object, class object, and class are all informal names for the same thing! This is slightly different for the language implementor, for whom the class factory object is distinct from the class - see the section below.
Note on the terms factory method, primary factory method and constructor.
- Readers familiar with object oriented languages can think of the term "factory method" as "constructor". (The short term "factory" is sometimes used instead of the term "factory method").
- The Newspeak term "primary factory method" may not exist in other OO languages, but it is very important in Newspeak, as it is the only method that can declare instance slots. A Newspeak class must have exactly one "primary factory method".
- While the role of a "primary factory method" in Newspeak is similar to "constructor", Newspeak intentionally chooses to avoid the name "constructor" for several reasons. Perhaps the core reason is that "constructor" suggests constructing (creating) something, which is not always a correct connotation. For example, a constructor may return an existing object from a cache, for which the name is misleading. Hence, Newspeak uses the term factory method (factory in brief) instead of the term constructor.
Incomplete resources for terminology:
4.0.3.1. Terminology differences for language user vs. language implementor
In a language implementation, there is likely a representation of the class, that probably points to a mixin and a superclass. For the language implementor, this representation of class is called a class factory object. This object is distinct, from the user accessible object that represents the class in the language. So the term class factory object is used to distinguish it from the class itself, but that is a distinction for the implementor, not the user.
Informally, when speaking from the language user's perspective, we often refer to this user accessible object as the class, or the class object, or the class factory object (all names for the same thing).
So I suppose when talking about the language, we should use the term "class" or perhaps "class object" for this thing.
4.0.3.2. Furter notes on terminology
See the Newspeak specs, section 6.4. Also see 3.5 which discusses methods and what defines them (mixins) as opposed to their declarations (again, essentially source).
5. Perhaps the best high level summary of Newspeak
For me it is this article's summary is perhaps the best high level summary of Newspeak: Modules as Objects in Newspeak. Let me paste it here removing references that would not make sense in another context:
Like Self, all computation - even an object's own access to its internal structure is performed by invoking methods on objects. Newspeak is class-based. Classes can be nested arbitrarily. Since all names denote method invocations, all classes are virtual; in particular, superclasses are virtual, so all classes act as mixins. Unlike its predecessors, there is no static state in Newspeak, nor is there a global namespace. Modularity in Newspeak is based exclusively on class nesting. There are no separate modularity constructs such as packages. Top level classes act as module definitions, which are independent, immutable, self-contained parametric namespaces. They can be instantiated into modules which may be stateful and mutually recursive.
This is a beautiful summary. But it is also not easy to "visualize" how is this tranfered to practice in Newspeak.
This document is both a personal experience of learning Newspeak, an an attempt of making sense of the practical ways the above text means for a Newspeak user.
6. Newspeak: A quickstart. Explore the IDE. Then develop CounterApp, package it and deploy it
TL;DR: This quickstart section provides an incremental introduction to Newspeak. First, we introduce the Newspeak online IDE, then we build and deploy a sample Newspeak app called CounterApp. A spoiler: we can look ahead and run the app we will be building - the CounterApp - online at https://newspeaklanguage.org/samples/primordialsoup.html?snapshot=CounterApp.vfuel.
6.1. Run the online version of the Newspeak IDE. Read docs, watch videos
TL;DR: This section introduces the online version of Newspeak IDE, and how to use it.
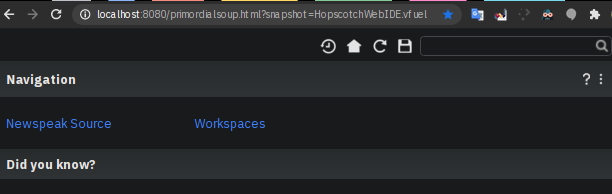
This is a brief section. Starting with Newspeak is easy. We just point the browser to https://newspeaklanguage.org/samples/primordialsoup.html?snapshot=HopscotchWebIDE.vfuel.
In more detail, let us try the following:
- Action: In a new browser tab, open the Newspeak online IDE at https://newspeaklanguage.org/samples/primordialsoup.html?snapshot=HopscotchWebIDE.vfuel
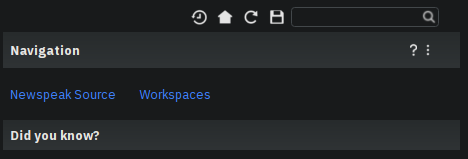
- Result: The Newspeak IDE opens, similar to
- Action: To edit source code: Click the "Newspeak Source" link
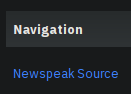
- Result: A new page opens, showing Newspeak classes, similar to
- Note: The blue links are classes. To view, or change them, click the class link
- Action: Click the "+" beside the "Root" to add a class.
- Result: A class editor opens, with a template of a new class declaration (class source code; the IDE uses the term class definition). At first, let's just create a dummy class by editing the template
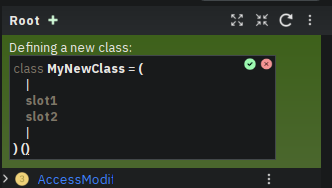
- Action: Click the checkbox on the top right
 to "Accept" the new class declaration. Note: Clicking the "Accept" button is important. If you make any code changes, or workspace code changes, do not forget to click "Accept", otherwise your changes will be lost immediately after moving away from the source editing page. See the discussions in Chapter Saving changes in Newspeak.
 - Result: The class now appears in the list of classes (may need to scroll down, classes are sorted alphabetically)

- Action: Return back to the main page by pressing the browser "Back" button, to get back to
- To run some Newspeak expressions, click the "Workspaces" link

- Result: A new page opens, similar to
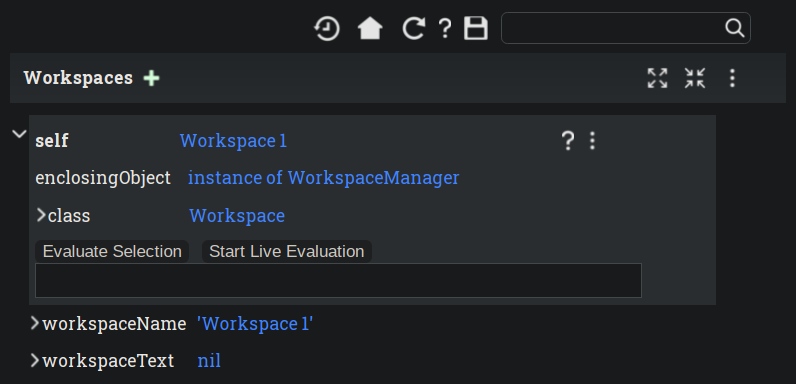
- Result: A new page opens, similar to
- To run some simple one-liner code, type for example "1+2" into the text field, and press keyboard Shift + ENTER. This will evaluate the expression and print a result "3"
- Result: expression "1+2" was evaluated to "3"
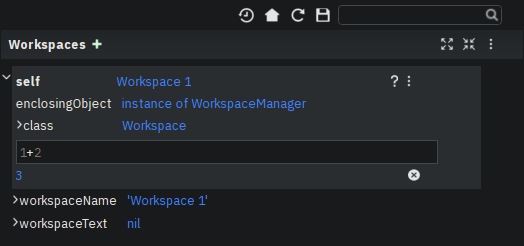
- Result: expression "1+2" was evaluated to "3"
- To run multi-line Newspeak code, type the code line by line. Press keyboard ENTER to open new lines. When ready to run the code, highlight all lines, then press keyboard Shift + ENTER to run the code. Another term for running code like this, is "evaluating all highlighted lines". The image below shows the Workspace after the Shift + ENTER was pressed, showing the evaluated code, and the result of the evaluated code:
2.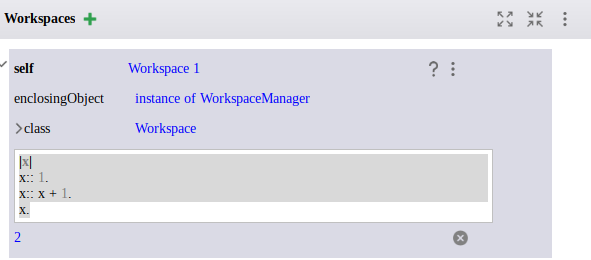
- The image above uses a white-mode image, as the dark-mode pages do not show highlight too well.
- When running multi-line code, we can paste it from outside, instead of typing it.
- To save our changes "now", click the diskette "Save" button
 . The changes are saved in the browser local storage. See Notes below for discussion on the details.
Notes:
- We are now using Newspeak, in its full power.
- The browser tab opened on https://newspeaklanguage.org/samples/primordialsoup.html?snapshot=HopscotchWebIDE.vfuel IS the Newspeak live IDE.
- Everything we do in the IDE is alive, changes and actions have immediate responses in the running system.
Saving your changes:
Any changes we make (for example: we add a class, we change a class, evaluate something in the workspace) are stored in the browser local storage in two entries: "lastSaved" and "backup". The "Accept" button saves the changes in local storage under the key "backup", while the "Save" button , saves the changes under the key "lastSaved". See Chapter Saving changes in Newspeak for details.
Documentation:
- Some selected documentation sites and videos:
- The core site for all Newspeak is https://newspeaklanguage.org/. It has papers, talks, demos, and repo links.
- A great start would be the last 2 videos on the "talks" tab https://newspeaklanguage.org/talks.html
- Live IDEs in the Web Browser: What's Holding Us Back - https://youtu.be/CJX_6B24Hho
- What is a Live Programming System? - https://youtu.be/VUfZ1sL4aps
Summary:
- This section showed the simplest way of starting with Newspeak - we just point the browser to https://newspeaklanguage.org/samples/primordialsoup.html?snapshot=HopscotchWebIDE.vfuel and start using it.
- In "Workspaces", we can experiment with Newspeak expressions, or snippets of code.
- In "Newspeak Source", we can experiment with adding Newspeak classes, or creating a Newspeak app, such as the app created in the next section.
Potential "gotchas":
- If you make code changes, do not forget to click the "Accept" button . Otherwise your changes will be lost immediately after moving away from the source editing page.
- What is the difference between The "Save" button , and the "Accept" button ?
- The "Accept" button is needed to save your changes beyond moving away from the editor. For example, if you make a change to a class method, and do not click "Accept", your changes will be lost after pressing the browser "Back" button, browser "Reload" - generally any state changes.
Next:
In the next section we show how to create a simple CounterApp in Newspeak.
6.2. Code, run, and debug the CounterApp in Newspeak
TL;DR: This section describes coding, running, and deploying a Newspeak Application with UI. We name the Application CounterApp. CounterApp is also the name of one of it's top level classes. To concentrate on the IDE handling applications, we use pre-existing code for the CounterApp, provided in https://raw.githubusercontent.com/newspeaklanguage/newspeak/master/CounterUI.ns, and https://raw.githubusercontent.com/newspeaklanguage/newspeak/master/CounterApp.ns. To skip the coding details above, we can download, then "Compile file(s)" to load the fully finished code from there; the loaded classes will appear in the IDE. Then we can browse, run, or deploy the Application. It's running UI looks like this: 
Prerequisites:
- We will simply borrow the code without talking about it until later. Download the files
CounterApp.nsandCounterUI.nsfrom Github to the local filesystem. To do that, just click https://raw.githubusercontent.com/newspeaklanguage/newspeak/master/CounterUI.ns, then https://raw.githubusercontent.com/newspeaklanguage/newspeak/master/CounterApp.ns, then right-click and select "Save as…" to save each file.- Either way, note the location of the two files.
Notes:
- We deploy the
CounterApp, in this section using the online Newspeak at https://newspeaklanguage.org/samples/primordialsoup.html?snapshot=HopscotchWebIDE.vfuel - However, a local Newspeak webserver could be used instead.
- If we wanted to deploy the
CounterAppin "production", we would need a local Newspeak server - because there is no way to deploy the app to the online Newspeak site. - Deployment of the
CounterAppto "production" requires our "own" Newspeak, such as the local Newspeak webserver. See 6.3 for how to install Newspeak locally.
- If we wanted to deploy the
- We may ask, "what is an Application in Newspeak"? In a nutshell, an "Application" is an instance of a class - obviously. But which class, and what does the class need, to be able to "live" or "run" inside a Newspeak IDE or Newspeak runtime? Read the steps below for details.
6.2.1. Steps: To create and run the CounterApp (from existing code that we borrowed from Github), follow the Action/Result steps below:
- Action: In a new browser tab, open the online Newspeak IDE at https://newspeaklanguage.org/samples/primordialsoup.html?snapshot=HopscotchWebIDE.vfuel
- Result: The Newspeak IDE opens, similar to
- Note: The "Did you know" section is a ever-changing hint system
- Action: Click "Newspeak Source" in
- Result: A new page opens, showing Newspeak classes, similar to
- Note on the result: In the result, you should NOT see classes named
CounterApporCounterUI. If you do, you have most likely run through this tutorial before, and the classes are already in your browser local storage. To clean any local changes saved locally for the online Newspeak, you can clean them in the browser local storage, or click the 3-dot on the class line, and Remove the class.
- Note on the result: In the result, you should NOT see classes named
- Motivation for the next action: We want to build the sample app
CounterApp. We choose to build it simply by downloading and compiling existing source files in the Newspeak github repo. - Action: In the top right of the page (in the same line where we see "Root +")
 , click the vertical 3-dot button on the far right.
 - Result: A popup
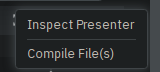 shows
shows - Action: Click "Compile File(s)". This will ask us to select files stored on disk, and compile them.
- Result: OS file browser opens, and ask us to select files in the operating system file browser.
- Action: Navigate to the directory where we checked out the Newspeak github repo, OR where we saved the source for the
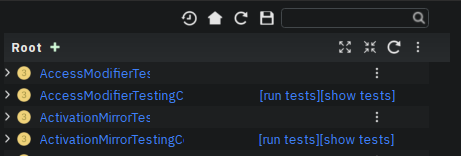
.nsfiles (see Prerequisites of this section). SelectCounterApp.nsandCounterUI.ns - Result: The classes from the selected
.nsfiles compile, and show in your IDE. In your class list (the list under Root +), you should now see a section similar to this
- Note 1: We have loaded the code of the
CounterApp.nsandCounterUI.nsclasses into Newspeak by running "Compile file". Alternatively, we could have added the classes through the IDE by clicking the "Root-+" button and typing or pasting the code in.
Instead, we choose to load pre-existing files at the moment to concentrate on the process, not the code.
and typing or pasting the code in.
Instead, we choose to load pre-existing files at the moment to concentrate on the process, not the code. - Note 2: click the
CounterApporCounterUIlink. This shows the corresponding class. - Note 3: The
CounterAppshows links to[deploy] [configuration] [run] [debug]. Why do only the "app" classes such asCounterApp(and no other classes) show the[deploy] [configuration] [run] [debug]links in the Newspeak IDE? The IDE decides to show those links based on the presence of a convention method#packageUsing: manifest. See Newspeak modules API summary for what makes a module an App, a Library, or a TestConfiguration, and how the IDE handles the API.
- Note 1: We have loaded the code of the
- Action: To save the classes we added, (
CounterApporCounterUI) in the browser local storage explicitly "now", click the diskette "Save" button - Result: The two classes are stored in the browser local storage. To read more about details of the browser local storage, see Chapter Saving changes in Newspeak.
- Action: click the [run] link beside the
CounterApp. This runs the code in the app (specifically, theCounterUIcode). - Result: The counter app opens and runs in the same browser tab; it should look like this: The code presents a counter (integer), and 3 buttons, which actions are to "increment", "decrement" and "reset" the counter.
- Action: click "increment"
- Result: counter increments by one.
- Note: We can click [debug] instead of [run] and a debugger will open.
Summary:
- We have shown how to code, run, and debug, a Newspeak app
CounterAppin "development mode", inside the online Newspeak IDE. - Newspeak online is similar to (but we dare say superior to) running, in "development mode", a Java, Android or Flutter application in IntelliJ, Eclipse, Visual Studio, Atom, Emacs, vi, or any IDE.
- Your changes are always stored, as long as you "Accept". See Chapter Saving changes in Newspeak for saving changes details.
Next:
- Let's pretend the CounterApp is useful, usable, and production ready.
- How do we deploy it for us to use it as a browser app "in production mode"? Read the Chapter Deploy CounterApp as standalone app into local Newspeak webserver section.
6.3. Download, install, and start a local Newspeak webserver
TL;DR: This section describes:
- How to download, install, and start a local Newspeak webserver.
- How opening a browser tab at http://localhost:8080/primordialsoup.html?snapshot=HopscotchWebIDE.vfuel runs the local version of the Newspeak IDE (reaching the just installed local Newspeak webserver).
Prerequisites:
- Python is installed on your system. This is needed for the
serve.shscript to run an HTTP server.
Notes:
- You can use a server of your choice instead of the Python server needed by
serve.sh. Just place all the files downloaded in the sections below to your server's serving directory. - You can potentially skip this section. However, if you want to deploy a Newspeak app such as the
CounterApp, this section is needed.
Action steps to download, install, and start using a local Newspeak webserver
- First, you may want to review the Newspeak downloads page at https://newspeaklanguage.org/downloads.html, in particular the For all platforms link.
- Next, to install and start a local Newspeak webserver, you can
- Either download and unzip the file servable.zip from the link above (https://github.com/newspeaklanguage/newspeaklanguage.github.io/raw/master/servable.zip) to any directory, then start the Newspeak server by running
serve.shfrom the extracted file. Or run the following commands from the command line (this assumes your directory from which Newspeak is served is
$HOME/software/newspeak/my-serve-http:MY_SERVE_NEWSPEAK=$HOME/software/newspeak/my-serve-http mkdir --parent $MY_SERVE_NEWSPEAK || echo Unable to create directory $MY_SERVE_NEWSPEAK cd $MY_SERVE_NEWSPEAK curl --location https://github.com/newspeaklanguage/newspeaklanguage.github.io/raw/master/servable.zip --output $MY_SERVE_NEWSPEAK/servable.zip unzip -o servable.zip # The directory just above "servable" must be the directory # where we saved the zip file, see above. cd servable # Make serve.sh executable, and start the Newspeak local server. chmod u+x serve.sh ./serve.sh
- Either download and unzip the file servable.zip from the link above (https://github.com/newspeaklanguage/newspeaklanguage.github.io/raw/master/servable.zip) to any directory, then start the Newspeak server by running
- Expected Result: "serving at port 8080". Note: In servable.zip there is a file
server.py, which defines the Newspeak server port. The port is set to 8080. Edit the file and change port if needed.
To use the local Newspeak webserver, navigate browser to http://localhost:8080/primordialsoup.html?snapshot=HopscotchWebIDE.vfuel. This should open the locally hosted Newspeak IDE, started using the ./serve.sh command.
Your browser should show a page similar to
Note: The use of the local version is the same as the use of the online version. We can now start editing Newspeak code by clicking on the "Newspeak Source" link.
Summary:
- In this section we installed the local Newspeak webserver, and started using the served Newspeak IDE.
- The installation method described here is the Installation method 2 (local Newspeak webserver)
Next: Chapter Deploy CounterApp as standalone app into local Newspeak webserver
6.4. Deploy CounterApp as standalone app into local Newspeak webserver
TL;DR: This section describes
- How to create and deploy the
CounterAppinto the local version of Newspeak. - That the deployment is achieved by creating a deployable file,
CounterApp.vfuel, in the online Newspeak at https://newspeaklanguage.org/samples/primordialsoup.html?snapshot=HopscotchWebIDE.vfuel and placing the createdCounterApp.vfuelin the running local Newspeak webserver. - How to run the
CounterAppfrom the local Newspeak webserver, by accessing theCounterApp.vfuelfrom the local HTTP server.
Prerequisites:
- We have followed the online section 6.2. In that section, we have downloaded (from Newspeak Github) and compiled two classes
CounterAppandCounterUIwhile attached to the online Newspeak.- This statement requires a "fine point" explanation.
- In the earlier section 6.2, the two classes,
CounterAppandCounterUI, were saved to the browser local storage. - In this current section, we re-attach to online Newspeak at https://newspeaklanguage.org/samples/primordialsoup.html?snapshot=HopscotchWebIDE.vfuel.
- As explained in Chapter Saving changes in Newspeak, the changes we made in the online version are still stored locally in the browser local storage.
- So, when we re-attach to online Newspeak in this section, the classes
CounterAppandCounterUIare still available. We use them to "create the CounterApp" (by saving it "as victory fuel" - that is, as fileCounterApp.vfuel) which is the app. - This app - the file
CounterApp.vfuel- can then be copied to the serving directory of local Newspeak, and can be opened from there.
- In the earlier section 6.2, the two classes,
- This statement requires a "fine point" explanation.
- We have installed the local version of Newspeak by following the section 6.3.*
Notes:
- We will create the deployable file,
CounterApp.vfuelusing the online Newspeak at https://newspeaklanguage.org/samples/primordialsoup.html?snapshot=HopscotchWebIDE.vfuel - However, apps can NOT be deployed to the online version, since that would require write access to the newspeak web site. We can do the coding and create the deployable .vfuel file online (as described above), but the actual deployment and running of the standalone app has to be done in a Newspeak webserver we control. We will show how to create a standalone local Newspeak webserver just a bit later.
- We will deploy the deployable file with the standalone
CounterApp.vfuel, into the local Newspeak webserver as http://localhost:8080/primordialsoup.html?snapshot=CounterApp.vfuel. (this link will only work when we finish all steps in this section)
One more "fine point" note:
- This flipping between the online Newspeak and local Newspeak could be confusing. We could have started by downloading Newspeak locally, and follow the whole tutorial in local Newspeak. However, we thought that may discourage some people who want to "take the shortest path", and start online.
Steps: Now we have introduced the context, we start the core of this section: We create the deployable file, CounterApp.vfuel and deploy it to the local Newspeak, by following the Action/Result steps below:
- Action: Navigate to the online version of Newspeak at https://newspeaklanguage.org/samples/primordialsoup.html?snapshot=HopscotchWebIDE.vfuel and click the "Newspeak Source"
- Result: Under "Root" you should see an alphabetically organized list of classes, similar to ,
- Note: If you followed the online section 6.2, there should be
CounterAppandCounterUIclasses in the alphabetic list.
- Note: If you followed the online section 6.2, there should be
- Action: In the class list, find the
CounterApp, and click the [deploy] to the right of the "CounterApp" - Result: a popup showing deployment options, starting with
asVictoryFuel:
- Action: Select
asVictoryFuelWithMirrors. We choose the option 'asVictoryFuelWithMirrors' if our app uses the GUI (there's some mirror dependency in the UI) and 'asVictoryFuel' otherwise. - Result: After a long wait, a file named
CounterApp.vfuelis created, and asked to be saved. - Action: Save the file
CounterApp.vfuelon our disk to the directory where local Newspeak was deployed - for example$HOME/software/newspeak/my-serve-http/servable - Result: The counter app is now deployed to the local Newspeak webserver!
To prove the counter app is now deployed to the local Newspeak webserver, do the following:
- Action: Open a new browser tab, and navigate to the just saved application
CounterApp.vfuelin the local Newspeak webserver as http://localhost:8080/primordialsoup.html?snapshot=CounterApp.vfuel - Result: In the new tab, you should see the "locally deployed"
CounterAppis now running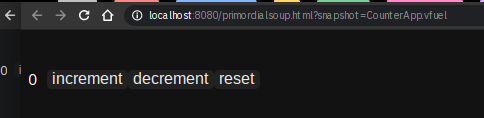
Summary:
- In this section, using the online Newspeak, we built our "Newspeak production deployable" file
CounterApp.vfuel, and deployed it to the local Newspeak version at http://localhost:8080/primordialsoup.html?snapshot=CounterApp.vfuel.
Next: This is the end of coding, building and running the CounterApp
7. Newspeak: An ide-driven journey leading to Hello World
7.1. Motivation of writing this journey
On this journey, I would like to walk back and capture some of my surprises, gotchas, but also amazement of simplicity during a journey of my first week (stretched over 2 months) starting with Newspeak. But hopefully I manage to organize this journey into a somewhat streamlined story. Actually "the first week" is not completely correct. I did first discover Newspeak long time ago, almost when it started, read available articles back then, and covered the syntax which helped. But I did not have time back then to get my hands on it properly.
Most learning, and often "unlearning" for me was the discovery different the Newspeak platform is, compared to most mainstream platforms, such as Java, Python, C++, even Smalltalk (with Smalltalk, Newspeak shares syntax and extreme late boundedness).
At this moment I should give readers some links to jump off here and do this alone. If you found this, you probably already searched to learn about Newspeak. But I hope, if you get back here after googling and reading the links, the rest of this text may still be helpful :) .. so, some selected links:
- First of all, the home of the Newspeak language https://newspeaklanguage.org/ has links to all documentation, videos, installers and more.
- Second, to run Newspeak online, navigate to https://newspeaklanguage.org/samples/primordialsoup.html?snapshot=CounterApp.vfuel.
- Next, if I was to:
- recommend selected few documents, it could be
- The Newspeak programming platform, an older document, briefly introduces both the syntax, and the core principles of Newspeak.
- Newspeak by example which is a live document, introduces the syntax of Newspeak, sort of a Jupyter notebook for Newspeak: reader can type and evaluate Newspeak expression in a web page, interleaved with document text.
- recommend a hands-on Newspeak introduction, it could be
- Either use (still relevant where not Squeak dependent) Newspeak on Squeak - A Guide for the Perplexed
- Or follow the hands-on section Newspeak: A quickstart. Explore the IDE. Then develop CounterApp, package it and deploy it.
- recommend selected few documents, it could be
Getting back to my first week journey; it is unfair to hikers, as my journey was at times, that of a wanderer almost lost in a forest; haphazardly reading all I can get my hands on, trying code snippets things in the IDE, re-tracing running and deploying the existing CounterApp, and overall, taking one step forward, then two steps back as the step forward discovered more unknowns.
Some concrete talk please!
OK. But first one more paragraph of meta-talk. Just a heads up, I will start using the word platform a lot. Let me try explain what I mean by platform or language platform. Often we think of learning a "computer language" as learning its syntax. But syntax is only a small part of being able to be productive in the language. There are all those things around the syntax, that are needed to be comfortable and productive with a "computer language": How is it installed, how we create projects to start writing a useful program, the core idioms, how to use programs written by other people in that language (the libraries), how the programs we write are packaged and send to users to use (building, packaging and installing apps), how to secure the resulting program. It is all these things listed in the long sentence that I mean by the "language platform" or "platform".
Newspeak syntax is not a major obstacle. Well, it is quite different too, even for someone knowing Smalltalk, which Newspeak shares syntax with. But one can get syntax basics from the links above. Also, Newspeak syntax is a bit like speaking English. Just different from the mainstream. I will not address syntax too much here.
Newspeak is a principled language and platform (in the sense described). Gilad Bracha and collaborating authors describe several principles (adherence to which removes many mainstream platforms' weaknesses). Those principles are described in the above linked paper The Newspeak programming platform and other documents.
As this section title states, Newspeak is different. Being different is not for fun. Newspeak must be different to implement its core principles
- Dynamicity
- Modularity (including how dependencies are provided)
- Classes can be nested (nesting provides the core of modularity)
- Security
- Reflectivity
- intentional lack of static state
- support for both object-oriented and functional styles
- the only operation is a message send
I will add one multi-item principle.
- Everything in the Newspeak language is an object (instance of a class).
- Most(?) mainstream languages use separate concepts for packages, apps, modules, namespaces, classes. They also use the filesystem a lot.
- All concepts in the item above exist in Newspeak, but they are all implemented by objects.
But, given a Newspeak object, how do we know it is a module, a library, or an application? The distinction between them is determined by:
- the object's position in the class nesting and
- presence of certain API (convention methods such as
#main:platform args:args. This is discussed in Newspeak modules API summary and other sections leading to it.
Given a Newspeak object, how does it acquire it's dependencies (objects it depends on to be functional)? This is one core point discussed at length in this text. See Dependencies and modularity: Important but hard to "get" at first the links therein, and sections afer.
"Being different" does came at a steep initial learning curve (for me at least).
7.2. Dependencies and modularity: Important but hard to "get" at first
This section is only a quick "look ahead summary" to provide more motivation and contex for the rest of the parent chapter.
Due to Newspeak's modularity, the process of bringing dependencies into a Newspeak program is different from mainstream language platforms. Because of it, large parts of this text deals with the topic of dependencies.
As a look ahead summary we can say that
- Every computation in Newspeak starts at an instance of a top level class. Instances of top level classes are called modules.
- Modules can be packaged and distributed.
- Dependencies are also modules (which some distributed module depends on).
- The
manifestandplatformobjects are the vehicles of bringing dependencies to objects by passing them to modules' "convention methods". - From modules, the dependencies are also available to the distributed module's nested classes and objects.
Later sections decribe the process of bringing dependencies into a Newspeak programs. We use the manifest passed to module APIs, from the manifest, dependency classes are stored on slots ("imported"), later picked up from slots when needed to instantiate. Modules: Application, Library, TestConfiguration, General, the recipy section Newspeak recipy for writing modules API, and the Hello World in Newspeak - several versions and other sections are largely about bringing dependencies into modules and objects.
7.3. Starting the journey
To do anything useful with Newspeak, we have to use the IDE. There is no command line per se (there is, but it is inside the IDE. It is called the Workspace). So let us open the Newspeak IDE to look around. Navigate to https://newspeaklanguage.org/samples/primordialsoup.html?snapshot=CounterApp.vfuel.
We see something like
Click the "Newspeak Source" link.
Each paragraph below is devoted to a feature that was surprising (to me) or unusual in some way.
7.4. Namespaces and Modules
7.4.1. Top level classes in the IDE
Top level classes in the IDE are crucial because their instances are Newspeak modules. A Module can play a role of an Application or Library.
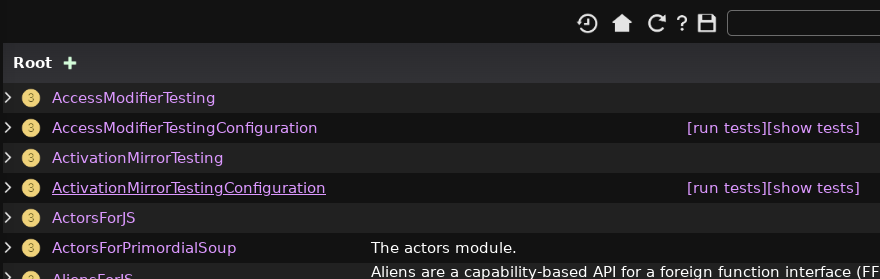
I the IDE, click on the "Newspeak Source" button. We see the word Root on top left, and below, a list of class names.
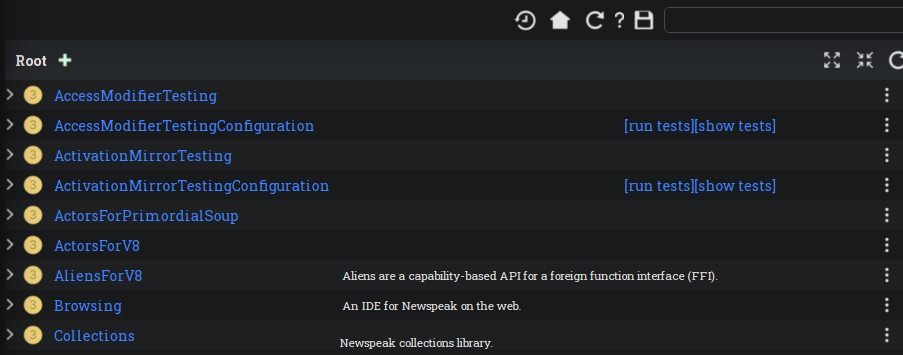
First: what is the "Root" on the top? According to documentation, this is the IDE's top namespace - Root is the name of the namespace.
In Newspeak, each class in the screenshot above (AccessModifierTesting, and below) is called a top level class, and it belongs to the Root namespace of the IDE. Each instance of a top level class is referred to as a module, see Discussion of Modules.
7.4.2. Discussion of Modules
In software in general, Modules are related to namespaces in a way that we cannot precisely define here. See Discussion of Namespaces as well. But we can say this about modules: Modules are meant to be artifacts providing some useful non trivial functionality, without needing any help - apart from the help of "dependencies" - that is, help of other modules intended to provide some "sub functionality". There must be a way to package and distribute modules.
In Newspeak, modularity is one of the key concepts. Modules, the key constructs of modularity, are based on class nesting.
Lets again quote from Modules as Objects in Newspeak:
In Newspeak, nor is there a global namespace. Modularity in Newspeak is based exclusively on class nesting. There are no separate modularity constructs such as packages. Top level classes act as module definitions, which are independent, immutable, self-contained parametric namespaces. They can be instantiated into modules which may be stateful and mutually recursive.
Newspeak uses the following definitions (from the section Newspeak terminology):
- Module declaration is the source code of any top level class
- Module definition or Module class is any top level class object. We will use the terms interchangeably depending on context.
- Module or Newspeak module is an instance of any top level class.
So, an instance of any class shown on the top level in the IDE is a module.
Newspeak Module is not only an empty new term. It turns out, that, by nesting other classes, modules also satisfy what we normally want from software modules: they are self-contained elements of data and functionality which can be distributed or executed, given expected API. To understand more about how expected API determines a module's role, see Newspeak modules API summary. In addition, Newspeak modules cannot cross-access each other when deployed - unless one module explicitly requests another module or module class during packaging and building.
7.4.3. Discussion of Namespaces
Namespaces in softwware in general provide grouping and organization of artifacts used in programs (packages, classes, or functions). A Java namespace example would be "org.mypackage". All classes in that package belong to the namespace "org.mypackage". Python concept of a package is similar.
Most platforms and languages have a concept and need for a global namespace. How can we describe it? Perhaps a good high level description of a global namespace would go like this: In a program, we want to use other programs, classes, functions, or what have you, created by other developers, at compile time or runtime, depending on the platform. If our Java program is in the "org.mypackage" and a class "org.mypackage.MyClass wants to use "org.apache.SomeClass", then at compile time or at runtime, the platform (Java, but e.g. Python is equivalent) has to find "org.apache.SomeClass". How does it do that? By looking through CLASSPATH or PYTHONPATH. The CLASSPATH or PYTHONPATH play the role of the global namespace! All other namespaces, such as "org.apache" belong to the global namespace. In a Java or Python program, any class and it's instance at runtime has access to artifacts on the CLASSPATH or PYTHONPATH. For example, this code
// In org.mypackage.MyClass:
Object newObject = Class.forName("org.apache.SomeClass").newInstance();
Creates an instance of "org.apache.SomeClass" at runtime by finding it on CLASSPATH - on the global namespace of Java. As long as the classloader can find "org.apache.SomeClass" on the CLASSPATH, and SomeClass has the default constructor, an instance can be created - without "org.apache.SomeClass" ever being imported to the code. Instances of classes in "org.mypackage" can create instances of classes in "org.apache" and vice versa, without importing each other. This is why the availability of the global namespace harms modularity, as it enables "hidden dependencies" like the one described in this short Java example!
The Newspeak language does not have a global namespace but the Newspeak IDE does have a global namespace - the Root on top of the IDE we have seen in the previous chapter. There is some discussion regarding why that is in Namespaces and existence of global namespace in the IDE.
The consequence of no global namespace in the language is that, at runtime (outside of IDE), a Newspeak module class must declare it's dependency on another module class (or module) explicitly, by storing the dependency module definition (or dependency module) on it's module slot! This storing of a dependency on a slot can be looked at as "importing" the dependency. Example of code where showing all classes needed at runtime are "imported" by holding on to them on module slots:
- In 4. Hello World Application using 3rd party dependency the
HelloTranslatorLibholds on to theHelloTranslator - In 4. Application module: API of module that needs to be distributed as an App
TranslatorWithDepAppholds on to theTranslatorWithDep, andTranslatorNoDep.
The dependency management goes deeper: A distributable module (Application or Library object), when instantiated and serialized on the source system, 'carries along', ALL imported dependencies on it's module slots - classes or instances of other classes from it's slots. After deserialization on the target system, it has all the code and objects it needs to work on the target system. (The Platform object is an exception: it is assumed to exist on both the source the target platform with same API, and it is not a part of the serialized artifact.)
For the more complete language discussion of what a namespace is, and why a global namespace is not needed in the Newspeak language, see https://gbracha.blogspot.com/2008/12/living-without-global-namespaces.html.
7.4.4. Namespaces and existence of global namespace in the IDE
The existence of the Root namespace in the Newspeak IDE describes one of my surprises - although I realized only later that I should be surprised. I should have been surprised because there are many places in the Newspeak documentation describing that "Newspeak has no global namespace". So I was wondering why this "Root", is not a global namespace? Turns out that it is! But there is an important distinction, the Newspeak language does not have a global namespace while the Newspeak IDE does - it's name is "Root".
Next we can ask, why does the Newspeak IDE need a global namespace (Root), while the Newspeak language does not have one, in fact very intentionally does not have one? The reason is, when working in the IDE, we want cross-access between the module classes (the top level classes). At runtime, that is, after packaging and deployment of any Newspeak module (outside the IDE), only the modules intended to be used by other modules should be available! Modules cannot freely cross-use each other, because there is no global namespace to find each other (or each other's class). If a moduleA needs to use moduleB, moduleA must explicitly ask to include moduleB's definition (the class of moduleB) at the packaging stage. See also the text and links in Dependencies and modularity: Important but hard to "get" at first.
7.5. Class structure, primary factory methods, platform and manifest, modules API
7.5.1. Section TL;DR:
This section starts an IDE-guided step by step discovery of some core aspects we encounter when we first dig into the IDE and the classes on top: Newspeak class structure, app and library API, platform and manifest.
7.5.2. Top level classes in the IDE - expanded
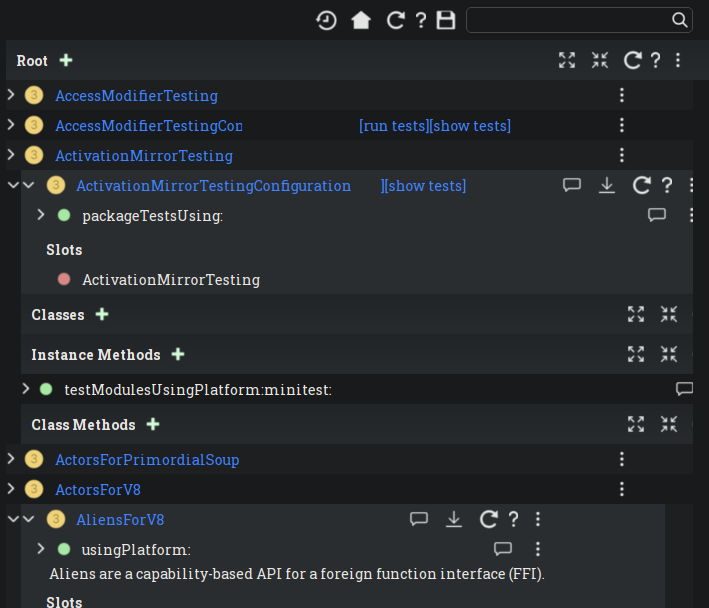
Let us expand each top level class in the "sources" screenshot above. We expanded two classes (named ActivationMirrorTestingConfiguration and AliensForV8) in the screenshot below:
Continue reading what we can learn from looking at the expanded classes.
7.5.3. Newspeak class structure
Let's examine the structure of top level classes in the Root list
 etc.
etc.
Let's drill into the ActivationMirrorTestingConfiguration as an example. Clicking on the module name link, an ObjectPresenter presents an instance of the class. Why to present an instance, and not a class? The motivation is liveliness, spoken about in many places here. Anyway, this is what we are shown:
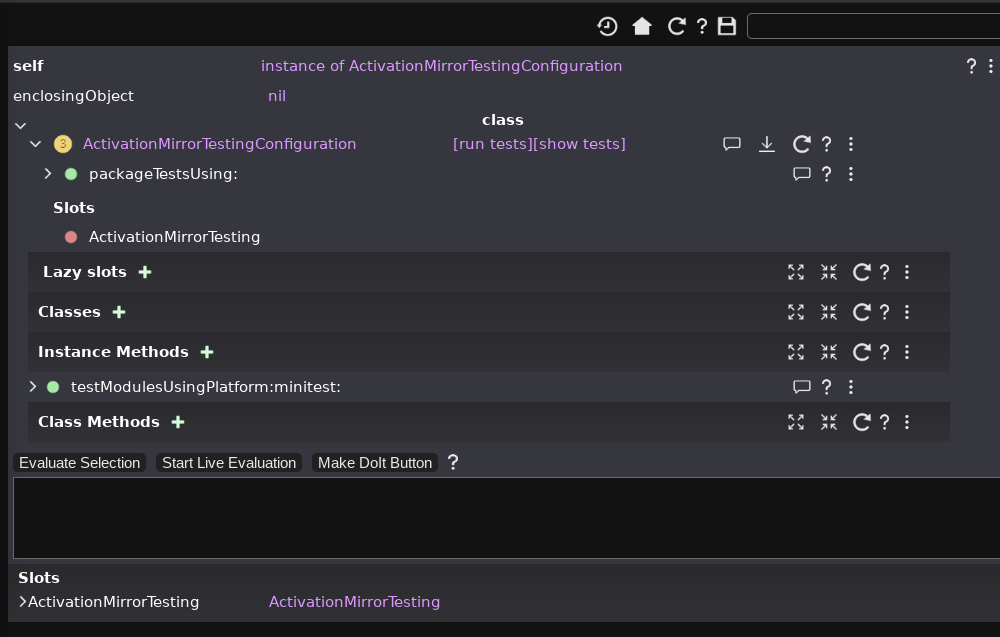
The structure is described below:
- The line starting with self shows the instance.
- There is a collapsible class name section for the class,
ActivationMirrorTestingConfigurationwith two sub items- on top there is the
#packageTestsUsing: manifest. This is a method which can be viewed as the "core" or "primary" constructor. In Newspeak, the method is called the Primary factory method, or short Primary factory. - a list of
Slots. Slots are like "member variables". Slots can only be created in the primary factory method!
- on top there is the
- a list of
Classes. Those are nested classes of the classActivationMirrorTestingConfiguration - a list of
Instance methods. Those are methods we can call on instances of ActivationMirrorTestingConfiguration - a list of
Class methods. Those are methods we can call on the class ActivationMirrorTestingConfiguration. They are called factory methods, and they serve as "alternative constructors".
There is a plus ("+ ") symbol in the header of some of them. The reason there is no plus ("+ ") symbol beside slots, is that slots can only be added in the code of the primary factory method. Add a slot from the primary factory method code, and the added slot name will show in the IDE.
7.5.4. Primary factory methods
We mentioned the methods on the first line of the class declaration such as class ActivationMirrorTestingConfiguration packageTestsUsing: manifest are termed the primary factory methods.
The core role of a primary factory method is to produce instances (and declare and initialize their slots). The difference between a primary factory method and a factory method or an instance method is that ONLY primary factory method can declare in initialize slots!
Newspeak language implementation detail: We also mentioned that the primary factory methods are methods on special objects, the 'class factory object'(s). One such special object is created for each class declaration: for example, when a class declaration AMyClass new = ()() is loaded or saved in the IDE, one instance of the 'class factory object' named AMyClass is created. The role of the special object AMyClass is to produce instances of class AMyClass.
The platform objects (objects that represent the Newspeak system), and possibly the dependencies (classes that need to be "imported" from the manifest) are passed to the primary factory method and held on slots. From there, they are available to all nested classes and nested objects of the top level instance!
The primary factory method names on the top level classes have eerily similar signatures. I was asking myself why, what do they have in common. So I listed examples of the primary factory method names. Here is the list of the primary factory methods on some top level classes:
class AccessModifierTesting                 usingPlatform:       platform  testFramework: minitest = (| etc
class AccessModifierTestingConfiguration    packageTestsUsing:   manifest = (| etc
class ActivationMirrorTesting               usingPlatform:       platform minitest: m = (| etc
class ActivationMirrorTestingConfiguration  packageTestsUsing:   manifest = (| etc
class ActorsForPrimordialSoup               usingPlatform:       platform = (| etc
class AliensForV8                           usingPlatform:       platform = ( etc
class Browsing                              usingPlatform:       platform ide: webIde = ( etc
class Collections                           usingPlatform:       platform = ( etc
class CollectionsForPrimordialSoup          usingInternalKernel: ik = ( etc
class CombinatorialParsing                  usingPlatform:       platform = ( etc
class RuntimeForV8                          packageUsing:        manifest = ( etc
class Streams                               usingPlatform:       platform = ( etc
We can see that the primary factory methods accept, at first position, one of 2 arguments
platformmanifest
If the constructor first argument is platform, the constructor name always starts with
#usingPlatform: platform
If the constructor first argument is manifest, the constructor name is always one of
#packageUsing: manifest#packageTestsUsing: manifest(for tests only)
Clearly, platform and manifest, must be significant!
What are those objects? And what do they contain, why are they significant, and what role do they play in Newspeak?
7.5.5. The manifest object
7.5.5.1. What is in the manifest object?
So what is in the manifest, why it is significant, and what role does it play in Newspeak?
We can look at the code, and ask what Newspeak passes into the manifest parameter. We find that there is only one place that calls #packageUsing: manifest, and it passes for manifest the value of object ide namespacing manifest. So we can examine what ide namespacing manifest contains. In Workspace, let us evaluate it:
ide namespacing manifest
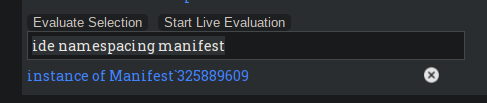
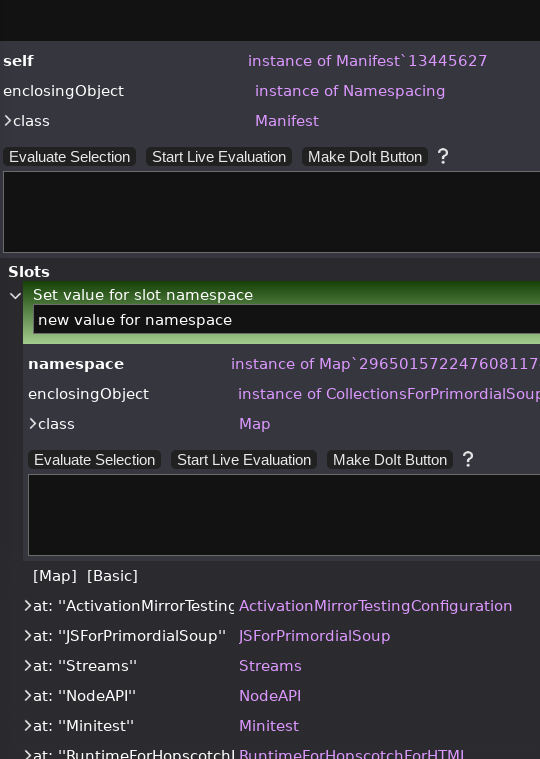
Drilling into the instance, we can see it is a map:
 etc
etc
Sorting the map entries by the key, we can see the map elements:
at: AccessModifierTesting   AccessModifierTesting
at: AccessModifierTestingConfiguration   AccessModifierTestingConfiguration
  etc
By looking at the IDE, we see that the manifest is a map containing all top-level classes in the IDE - that is, all module classes known to the IDE!
So we have a experiment based answer to what the manifest object contains.
But what is the manifest good for? We discuss that further down, but as a look ahead: the values of the manifest map are classes that can be "imported" and "kept" during packaging of a module!
7.5.5.2. Why is the manifest object significant, and what role does it play in Newspeak?
OK, so from the previous chapter we know the manifest object that is passed to "convention methods"
#packageUsing: manifest#packageTestsUsing: manifest(for tests)
is a map of all top-level classes in the IDE.
See Chapter Common and distinct roles of platform and manifest in modules for a discussion the significance and role of the manifest object.
7.5.6. The platform object
7.5.6.1. What is in the platform object?
We can ask, as we did for manifest: What is in the platform, why it is significant, and what role does it play in Newspeak?
We can look at the code, and ask what Newspeak passes into the platform parameter when passing it to the often-present top level classes' primary factory #usingPlatform: platform.
This is little harder than with manifest, so let's cheat a bit. In a Workspace, let us evaluate platform
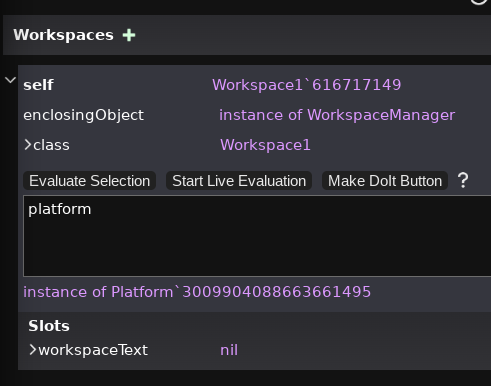 Drilling into the link "instance of Platform`number", we see a list of instances.

The slots hold instances of objects that sound "important", system like. The slots list sorted:
 1 kernel       instance of Kernel
 2 collections  instance of CollectionsForPrimordialSoup
 3 mirrors      instance of MirrorsForPrimordialSoup
 4 victoryFuel  instance of PrimordialFuel
 5 actors       instance of ActorsForPrimordialSoup
 6 js           instance of JSForPrimordialSoup
 7 fonts        instance of FontsForHTML5
 8 graphics     instance of GraphicsForHTML5
 9 text         instance of TextModule
10 local        instance of Platform`3009904088663661495
11 hopscotch    instance of HopscotchForHTML5
All the instances in slots are modules (instances of other top level classes) which the platform provides for other modules when other modules are constructed using the platform!
Classes of those platform slots also exist in the manifest object. But manifest has many more classes! The platform object only contains slots with instances of top classes which can be considered available on any Newspeak system - whether it is Newspeak in the browser, Newspeak as an application on Windows, Linux, MacOS, Newspeak on top of Squeak, or perhaps directly on the metal. We can term those classes informally system classes or platform classes - hence the name platform for the object containing slots with the "system" or "platform" class instances.
A platform object is an instance of a class Platform which we can expand, and see that Platform is an inner class in RuntimeForHopscotchForHTML:

7.5.6.2. The class Platform in RuntimeForHopscotchForHTML
Drilling into the Platform in RuntimeForHopscotchForHTML
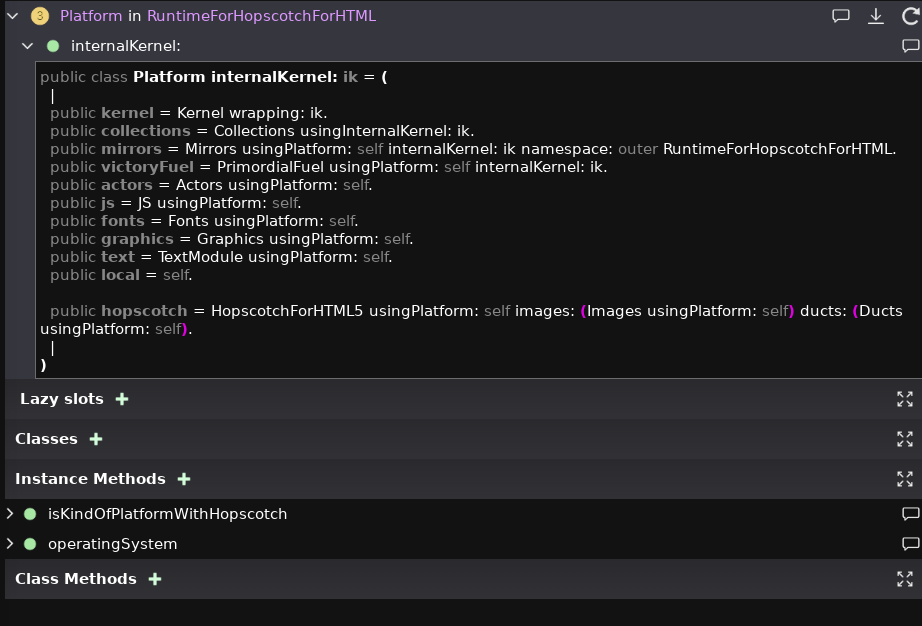 we see the slots declarations, which values we have already seen in the
 platform instance in the platform instance section.
For searchability, here are the slot declarations sorted as text:
public class Platform internalKernel: ik = (
  |
   1 public actors = Actors usingPlatform: self.
   2 public collections = Collections usingInternalKernel: ik.
   3 public fonts = Fonts usingPlatform: self.
   4 public graphics = Graphics usingPlatform: self.
   5 public hopscotch = HopscotchForHTML5 usingPlatform: self images: (Images usingPlatform: self) ducts: (Ducts usingPlatform: self).
   6 public js = JS usingPlatform: self.
   7 public kernel = Kernel wrapping: ik.
   8 public local = self.
   9 public mirrors = Mirrors usingPlatform: self internalKernel: ik namespace: outer RuntimeForHopscotchForHTML.
  10 public text = TextModule usingPlatform: self.
  11 public victoryFuel = PrimordialFuel usingPlatform: self internalKernel: ik.
  |
)
7.5.6.3. Other Platform classes (apart from class Platform in RuntimeForHopscotchForHTML)
If we search the Newspeak code, we would find multiple Platform classes in Newspeak. Usually, they are a subclasses of modules which name starts with the word Runtime or DeploymentManager:
./out/BootstrapRuntimeForSqueak.           ns: class Platform usingVmMirror: vmm = (
./out/DeploymentManager.                   ns: ^'public class Platform internalKernel: ik = (|
./out/DeploymentManager.                   ns: ^'public class Platform usingVmMirror: vmmirror = (
./out/RuntimeForCroquet.                   ns: public class Platform internalKernel: ik = (
./out/RuntimeForElectron.                  ns: public class Platform internalKernel: ik = (|
./out/RuntimeForHopscotchForHTML.          ns: public class Platform internalKernel: ik = (
./out/RuntimeForJS.                        ns: class Platform usingVmMirror: vmmirror = (
./out/RuntimeForJSWithMirrorBuilders.      ns: class Platform usingVmMirror: vmmirror = (
./out/RuntimeForPrimordialSoup.            ns: public class Platform internalKernel: ik = (|
./out/RuntimeForSqueak.                    ns: class Platform usingVmMirror: vmm = (
./out/RuntimeWithMirrorsForPrimordialSoup. ns: public class Platform internalKernel: ik = (|
- The section above analyzed
RuntimeForHopscotchForHTML>>Platform- this class has primary factory
#internalKernel:which defines slots which are instances such as: - kernel, collections, actors, js etc
- Instance of such platform is passed to module factory methods
usingPlatform: platform. From there, modules can pull and create their own slots for collections classes, js classes, etc!!
- this class has primary factory
All top level classes with name starting with Runtime have an inner class Platform. Each such inner class has a primary factory Runtime(etc)>>Platform#internalKernel OR Runtime(etc)>>Platform#usingVmMirror which pulls from the internalKernel something like the following (example from evaluating platform in the top Workspace) which yields Platform in RuntimeForHopscotchForHTML
7.5.6.4. Why is the platform object significant, and what role does it play in Newspeak?
OK, so we know what is in the platform object that is passed to
#usingPlatform: platform
See Chapter Common and distinct roles of platform and manifest in modules for a discussion the role of the platform object.
7.5.7. Common and distinct roles of platform and manifest in modules
TL;DR: Recall that a module is an instance of a top level class in IDE. A module can be classified ad General, Application, or Library module - see the Newspeak modules API zoo.
manifestis used by Application and Library modules for packaging (creation and serialization for distribution). The manifest is passed to the Application and Library primary factory. The primary factory pulls (imports) from themanifestall class declarations the instance depends on. All imported classes are stored on the Application and Library instance slots, in which they are serialized and distributed. This allows any Newspeak Application or Library to be a self-contained package (serialized instance), which includes everything it depends on.platformis needed at runtime whenever an instance needs access to another module (top level class). In Newspeak, the only way for module to gain another module is through platform. Also see the section Modules: Application, Library, TestConfiguration, General.
Why are the platform and manifest objects so important to appear again and again in the top level classes' factory parameters, as seen in Primary factory methods ?
The answer is somewhat common for manifest and platform, so we describe their role in this common section.
The common need for both manifest and platform stems from modularity. But what does that mean?
In Newspeak terminology, we saw that the modules are DEFINED AS instances of top level classes.
And we saw that there is no global namespace in Newspeak. Modules need other objects (dependencies) to do useful work. In Newspeak, for a module to "contain" ANY dependency, such dependency must be on the module instance slot (slot is like a member variable). Also, at the point of the module construction we MUST supply such dependency. Because only the primary factory can define slots, the module primary factory must be passed everything the module needs from outside.
This is where platform and manifest come in. They are "special" in the sense that they supply objects and classes needed by the module. But each is needed at a special point of the module lifecycle:
- The manifest object is needed at packaging step on the system where we create the package: manifest is passed to the module packaging method such as
#package(Something)Using: manifestwhich packages dependencies that need to be carried over from the system we are packaging on, to the module artifact that is copied to the deployment platform. - The platform object is needed on the deployment step on the deployment system, to instantiate the module by
#(buildSomething)usingPlatform: platformor perform the module work and passed there to the runtime method such as ormain: platform args: args.
We can reword the above as follows:
We already know that any Newspeak object can have only one "slot declaring constructor" (called primary factory) in it's API. But, as a module needs both platform and manifest, how can we ensure a module has both available? This is done by convention methods, that are either a primary factory or a regular instance method, depending whether the module is an App, Library, and Test configuration module OR a General module.
- App, Library, and Test configuration modules (but not "General modules") have a primary factory passing a
manifestin it's API. This primary factory is named similar to#package(Something)Using: manifest. This factory is called on the system where we create the package to "import" objects and/or their classes during packaging (by placing them to the package artifact which can be delivered over to the runtime system). - Any "General" modules (not App, Library, or Test configurations) have a factory passing a
platformin it's API. This primary factory is named similar to#(buildSomething)usingPlatform: platform. This factory is called on the runtime system for module instantiation. An App, Library, and Test configuration module (where the primary factory is already taken by presence of method passing platform such as#package(Something)Using: manifest) would typically also have this method in it's API, but NOT as a factory, rather as an instance method.
To read more details about which method is used on which module type, and why, follow the next section Modules: Application, Library, TestConfiguration, General.
7.5.8. Newspeak platform and manifest objects summary
In a nutshell,
- We need manifest classes for packaging. Manifest provides the classes needed to "bring along" (import) in the package. Those "bring along" or "import" classes may not exist on the end-user system, so they need to be added to the package!
- We need platform for execution. Platform provides instances of "system classes". Those "system classes instances" are assumed to exist on the end-user system, so we do not need to bring them along in the package!
7.6. Modules: Application, Library, TestConfiguration, General
TL;DR: This section is the core reason why I started writing the top section 7. It exploits the role/s (aka /abilities, aka requirements) any program in most languages on most Operating systems performs: a program must be able to start execution, then instantiate, load or link libraries, then use them. In addition, any program should be packageable for distribution. Libraries are shareable artifacts. In Newspeak, programs, libraries, even tests, are instances of top level classes (modules). In Newspeak, each role a particular module performs, is enabled by providing the module with a "convention method" which performs the role. This section is about the /role/s and the "convention method" signatures for Newspeak modules.
Terminology: We use the name role/s for what is above described as /role/s (aka /abilities, aka requirements).
7.6.1. Application and library in computing
In computing, any program in most languages on most Operating systems must be able to start execution, then load or link libraries, then use them; in addition, any program should be packageable for distribution. We term each such ability a role. In computing, we tend to separate artifacts into (executable) Application and (linked) Libraries. We can itemize such roles as follows.
- An Application must be able to start execution on the platform to which it is targeted (here, platform in the sense of "Linux platform", "Android platform", "Windows platform", and in our situation, the "Newspeak platform").
- A Library must be able to be load and link other libraries, at least in principle, by the caller Application or another Library on that platform. The library used by an Application or another Library is often called a dependency. The term used implies that the Library is found and connected to the Application or Library which is using it. We can call this ability buildDependencies
- In addition, we should be able to package both the Application and the Library for distribution (deployment). Packaging includes instantiation and serialization.
So an Application needs to provide a facility (API, method) to perform /role/s 1 and 3. A Library needs to provide a facility to perform /role/s 2 and 3.
From the generic /role/s above, both Application and Library need some way to perform the /role/s. Methods perform /role/s, so we need some "convention methods" to perform the roles 1, 2, 3. Such "convention methods" represent a public API, described in the following section.
7.6.2. Application and library API in computing
Following the basic /role/s from the previous section 7.6.1 in mainstream computing, we need "convention methods" to perform the /role/s 1, 2, 3 in the previous section. We choose to name such "convention methods" as follows: (the names are arbitrary, but conventional, and represent the APIs understood on the platform)
- For an App:
- To perform role 3, instantiateForPackaging, let's call the method
#package. - To perform role 1, start execution, let's call the method
#main
- To perform role 3, instantiateForPackaging, let's call the method
- For a Library:
- To perform role 3, instantiateForPackaging, let's call the method
#packageLibrary - To perform role 2, buildDependencies, let's call the method
#build
- To perform role 3, instantiateForPackaging, let's call the method
A mainstream system has the advantage of access to a global namespace - generally a filesystem via a PATH, CLASSPATH, PYTHONPATH or similar. We discussed that earlier as well. Inside any of these methods, during execution, the program can look and find various artifacts it needs on the platform. If we start the method equivalent to "#main" in Python, inside #main there may be a line of code such as from graphics import Rectangle. So we need the Rectangle class. No problem, we go to the classpath, find the namespace graphics, there lives the module graphics, and the class Rectangle is there. We load it and continue.
7.6.3. Application and library modules in Newspeak
In Newspeak, everything is done via objects. So Application and Library must be an object. Further, Newspeak starts all operations on the instances of top level classes, that is, on modules. For terminology, see Newspeak terminology, also Discussion of Modules.
But Newspeak cannot load anything globally. If the API for the Application and library was as defined above in Application and library API in computing, applications would not run as there would be no way to bring anything from a construct such as the CLASSPATH. In more detail if the App's #main method defined above was to run, and Newspeak would discover the equivalent of "import" (which is slot creation in primary factory methods), it would not be able to find the "imported" dependency module. It does not have the global namespace or access to the PATH, CLASSPATH, PYTHONPATH or similar.
The solution is, during instantiation of Newspeak Application and Library objects, all the runtime dependencies (or rather their classes) are passed to the primary factory methods and stored on slots, to be "carried along" in the objects for serialization and distribution. The dependencies are passed to the factory methods in the manifest object, which has all the top level classes in it. See The manifest object.
Once an Application and Library object exists, it is serialized on the source system, and sent to a different (target) system where it is deserialized. At that point, on the target system, it needs to be used to be useful. Newspeak defines methods for such use. These methods accept an object which is TYPICALLY NOT part of the serialized instances: The platform object. It encapsulates the common capabilities of the Newspeak system on all systems (platforms, hence the name). See The platform object.
Nespeak extends the signatures of /role/s 1, 2, 3 from previous chapter to provide the "carry over" (imported) classes from manifest, and system classes from platform, Newspeak uses the following signature names:
- For an App:
- To perform role 3, instantiateForPackaging, Newspeak uses the primary factory method
#packageUsing: manifest. - To perform role 1, start execution, Newspeak uses the instance method
#main: platform args: args
- To perform role 3, instantiateForPackaging, Newspeak uses the primary factory method
- For a Library:
- To perform role 3, instantiateForPackaging, Newspeak uses the primary factory method
#packageLibraryUsing: manifest - To perform role 2, buildDependencies, Newspeak uses the instance method
#buildUsing: platform
- To perform role 3, instantiateForPackaging, Newspeak uses the primary factory method
These four methods are core "convention methods" for all Newspeak modules which we want to behave as either Apps or Libraries.
See also How do I bring dependencies into modules to be distributed?
7.6.4. Newspeak modules API summary
This section is a summary and reference of Application, Library, and Test configuration modules API in Newspeak. It is sort of the pinnacle of the parent section about Apps and Libraries.
As explained in the previous section, in Newspeak, compared to a mainstream platform which has access to global namespace, we have to change the API signatures described in Application and library API in computing by passing the platform and the manifest object. We also change the signatures to match actual Newspeak names.
Here are the APIs which define whether a Newspeak module is an App, a Library, a TestConfiguration, or a General module. The /role/s 1, 2, 3 refer to the /role/s (roles) in Application and library API in computing. Please note that Newspeak is not using the terms "App module", "Library module", "General module", or "TestConfiguration module". I find such classification of modules useful though.
- Newspeak Application module is defined by the presence of:
- Primary factory method
#packageUsing: manifestwhich performs role 3, instantiateForPackaging.- Implementations should
- pull needed classes from the manifest and place then on slots. optionally instantiate the classes from manifest unless they need platform.
- instantiate Libraries from manifest and store resulting objects on slots using
a3RdPartyDependency = A3RdPartyDependency>>#packageLibraryUsing: manifest.
- Implementations should
- Instance method
#main: platform args: argswhich performs role 1, start execution.- Implementations should instantiate, from slot classes and platform objects, all object needed to run the app, then call methods on them which perform "running the app"
- Primary factory method
- Newspeak Library module is defined by the presence of:
- Primary factory method
#packageLibraryUsing: manifestwhich performs role 3, instantiateForPackaging.- Implementations should do the same as Application does in
#packageUsing: manifest- see above.
- Implementations should do the same as Application does in
- Instance method
#buildUsing: platformwhich performs role 2, buildDependencies- Implementations should build, then return a working instance of the module we want to distribute, NOT the Library instance on which this #buildUsing is defined!! See example in How do I bring dependencies into modules to be distributed?
- Important note: If we want to distribute an existing module MyModule1 (this may or may not be a library module!), we have to either:
- Convert MyModule1 to MyLibrary1
- create a separate top level Library Module, MyModule1Lib for the purpose of distributing MyModule1. The #buildUsing: implementation we are talking about here, is the "MyModule1Lib>>#buildUsing:" method! - NOT the "MyModule1>>#buildUsing:" method, as this may not even exist on MyModule1!
- Primary factory method
- Newspeak TestConfiguration module by convention ends with "Configuration", and is defined by the presence of:
- Primary factory method
#packageTestsUsing: manifestwhich performs role 3, instantiateForPackaging- Implementations should put on slot the class of the Module being tested.
- Instance method
#testModulesUsingPlatform: p minitest: mwhich performs role 2, instantiate,- Implementations should call return instance of the tested class. Example:
^{AccessModifierTesting usingPlatform: platform testFramework: minitest}
- Implementations should call return instance of the tested class. Example:
- Note: Tests, by convention, need two classes to be created. If class MyTestModule has the test methods, MyTestModuleConfiguration must be created. This is the class we are talking about in this section. There are no "convention methods" on the test module MyTestModule.
- Primary factory method
- Newspeak General module is any other module - any module that does not have any of the above API. General modules do not have any convention API name.
- However, we often find they have a primary factory method named similar to
#usingPlatform: platform [and: otherObjects]which create a working instance. Note that the [and: otherObjects] portion is completely free, it can be named differently.- These modules can for example be
- modules we distribute using the Library Distribution module
- tests we run using the TestConfiguration module
- These modules can for example be
- However, we often find they have a primary factory method named similar to
Note that on Application and Library modules, the methods which perform the packaging, are primary factory methods (manifest is passed to them), while the methods which perform execution or build are instance methods (platform is passed to them). The reason is, a primary factory method is the only method which can store stuff in slots! So any classes needed to be "carried along" for packaging (pulled from manifest then "imported" on the target platform during construction), must be placed on slots during the primary factory method call.
Note that the IDE uses the presence of certain methods to show appropriate action links. For example,
- If the method
#packageUsing: manifestexists in the module, IDE shows links to [deploy] [configurations] [run] [debug] - If the method
#packageTestsUsing: manifestexists in the module, IDE shows links to [run tests] [show tests]
7.6.5. Newspeak modules API zoo
TL;DR: This section shows a table of Newspeak "Module type"s in rows, and "convention method" signatures each "Module type" must provide. Given a "convention method" signature, we know the role or /role/s the method performs. The table is a summary of conclusions of the above section Newspeak modules API summary. For motivation of the need for "convention methods", see the top section 7, in particular it's subsection Modules: Application, Library, TestConfiguration, General,
In general computing there are artifacts, performing /role/s of applications, libraries, and tests. In Newspeak, equivalents of such artifacts are uniform: they are all instances of a specific module. We say that a module instance has a "Module type" in Newspeak, if the module instance has all required "convention method"s for all /role/(s) required by the "Module type".
Terminology: "Module type" is not a formal term in Newspeak. We use the term "Module type" to group module instances according to their "convention methods" - in other words, according to their role/s. Also, in text, we use the brief /Application module instead of Application module type, General module instead of General module type etc.
The table below summarizes, for each "Module type" in Newspeak, the "convention methods" names and the /role/(s) each such method performs.
| Module type | Convention primary factory method. | Note | Sep | Convention instance method. | Notes: What the code in column "Instance method" typically does |
|---|---|---|---|---|---|
| Roles=instantiateForPackaging | Role=buildDependencies(Library), execute(Application), | ||||
| Library (no example in code) | #packageLibraryUsing: manifest | - | #buildUsing: platform | ||
| Application | #packageUsing: manifest | - | #main: platform args: args | instantiates classes on slots then calls methods to run app | |
| TestConfiguration | #packageTestsUsing: manifest | - | #testModulesUsingPlatform: platform minitest: m | instantiates Test classes and returns their list (does not run) | |
| Module type | Convention primary factory method. | - | Convention instance method | ||
| Role=instantiate | - | is not required, so no defined role | |||
| General, needs platform + [other module] | #usingPlatform: platform [andModule: m1] (or similar) | Note: name is completely free | - | not required | |
| General, needs only other module | #usingModule: m1 (or similar) | Note: name is completely free | - | not required | |
| General, with no needs (dependencies) | #new | - | not required | ||
| Test | #usingPlatform: platform testFramework: minitest | runs tests | - | not required |
Notes:
- The headings for "Module type" Library, App, and TestConfiguration are separated from the headings for "Module type" General, and Test as the /role/s differ:
- The modules of type Library, App, TestConfiguration require multiple roles, provided by two required "convention method"s for each type.
- The modules of type General and Test only requires the /role/=instantiate, provided by only one required "convention method" for each type.
- For any Application module: When we click the [run] button in the IDE, the IDE calls the Application's primary factory method
#packageUsing: manifest, then the instance method#main: platform args: argswhich runs the app in the IDE. Similarly, when we click on the [deploy] button in the IDE, the same methods are (eventually) called, followed by calling serialization methods, which serialize the instance to bytes and save them as.vfuelfile. - A Library module and an Application module play a similar role. However, an Application module is intended to be packaged, distributed and executed as a standalone App, while an Library module is intended to be packaged, distributed and included in Application modules or other library modules.
- For any General module: The method signatures ARE NOT FIXED BY CONVENTION, they are only softly conventional. That helps humans to distinquish their invocations from nested classes. The signature
#usingPlatform: platform [andModule: m1]is an example of a primary factory method which is passed the platform and a dependency which is module m1. TestRunner.nsis later packaged(instantiated), then calledmain:args:which runs Test instances returned from#testModulesUsingPlatform: platform minitest: m
7.6.6. Recipies for modules creation and conversion, by module type
TL;DR: This section provides some guidance of how to code each module type, and convert between them. Conversion is sometimes needed when a General module grows useful and we want to convert it to an Application or Library module.
7.6.6.1. Application module recipy
We can provide a "recipy" for how any Application module should be written:
- In the primary factory method
#packageUsing: manifest, store all needed "carry along" classes from the manifest map on the slots (those slots are "imports") - In the instance method
#main: platform args: args- First use all (imported) classes on slots to instantiate them:
- For each slot which is a General module class, call its primary factory methods, to build the module (dependency). The General module primary factory signature may be similar to
#usingPlatform: platform [andModule: m1], or#usingModule: m1, or just#new. - For each slot which is a Library module class, call its build instance methods, named similar to
#buildUsing: platform, to build the 3rd party module (dependencies)
- For each slot which is a General module class, call its primary factory methods, to build the module (dependency). The General module primary factory signature may be similar to
- Next, on the instances created just before, call appropriate methods to run the Application. If the application has a UI, it usually needs to instantiate its Model and Subject, then invoke code similar to
platform hopscotch HopscotchWindow openSubject: subjectInstance. See, for example, When the app runs in the #main:args: method, instantiate the CheckedItemUI.
- First use all (imported) classes on slots to instantiate them:
7.6.6.2. A recipy to convert a General module to an Application or Library module
Often, we start developing a module (more precisely, a module declaration, the source of a top level class) for "internal" use, with no need to "ship" it as an Application or a Library for others to use. Such module would be built as a General module with methods described above in Newspeak modules API zoo. Later, we may decide to make this module available to others as a library or an app. This step of converting a General module available as a Library or an Application, requires adding specific API methods, which identify the General module we started with as an Application module or a Library module.
Note that initially, our General module has a primary factory method named similar to #usingPlatform: platform:. From the API naming "convention" in Newspeak modules API zoo, we can deduce a "recipy" to convert a General module to an Application or a Library, as follows:
- App: If we want to convert a General module to an Application, we need to
- move the primary factory method from the General module to an instance method
#main: platform args: args. - add a primary factory method
#packageUsing: manifestand store any needed classes from manifest. The code of this new primary factory method should generally declare a slot for each class that will be needed at runtime, "import" (pull) the class from the manifest, and store it on the slot.
- move the primary factory method from the General module to an instance method
- Library: If we want to convert a General module to a Library, we need to
- move the primary factory method to an instance method named
#buildUsing: platform - add a primary factory method
#packageLibraryUsing: manifest.
- move the primary factory method to an instance method named
7.6.6.3. A recipy to wrap a General module to an Application or Library module
An alternative to the previous section could be, that the General module class we created remains unchanged, and we add a "wrapper" Library module or a "wrapper" Application module. In this situation, our original General module code remains unchanged.
Becaus unlike the previous section, we are adding new top level modules, let's give the modules names. Let us assume the original General module is named MyModule and has a primary factory method, named #usingPlatform: platform:, and instance method #doWork which performs work for some role useful for client applications.
If we want to wrap
MyModuleas an App, we could add the Application class wrapper similar toclass MyModuleApp packageUsing: manifest = ( | MyModule = manifest MyModule. | ) ( public main: platform args: args = ( |myModule| myModule:: MyModule usingPlatform: platform. myModule doWork. ) )If we want to wrap
MyModuleas a Library, we could add the Library class wrapper similar toclass MyModuleLib packageLibraryUsing: manifest = ( | MyModule = manifest MyModule. | ) ( public buildUsing: platform = ( |myModule| myModule:: MyModule usingPlatform: platform. ^myModule. ) )
7.7. Newspeak recipy for writing modules API
Sections above attempted to discover and describe modules API, see Newspeak modules API summary. This section will attempt to give a "recipy" for the method signatures each module type (Library module, General module, Application module) requires.
7.7.0.1. 1. General module with NO dependencies: API of module with no dependencies
General module is the most simple case. If our module does not need any dependencies, not even from common classes such as collection:
We need to:
- provide a primary factory method
#new
7.7.0.1.1. Example:
class TranslatorNoDep new = ()
(
    public translate: text = (
      text = 'Hello World' ifTrue: [^ 'Hallo Welt'.].

      ^ 'unable to translate'.
    )
)
Note: Because #new is default, no need to name it. An equivalent would be
class TranslatorNoDep = ()
(
    public translate: text = (
      text = 'Hello World' ifTrue: [^ 'Hallo Welt'.].

      ^ 'unable to translate'.
    )
)
7.7.0.2. 2. General module with dependencies: API of module with dependencies
If our module need some other module from IDE, such as collections, we have to pass it the platform object, and potentially other objects or classes our module depends on.
We need to:
- provide a primary factory method
#usingPlatform: platform - OR if another module is needed, provide a primary factory method such as
#usingPlatform: platform andModule: translator
7.7.0.2.1. Example: TranslatorWithDep
class TranslatorWithDep usingPlatform: platform andModule: translator = (
  |
  List = platform collections List.
  translator = translator.
  |
)
(
    public translate: fromRevertedList = (
      |sortedList|
      sortedList:: List new.
      sortedList add: (fromRevertedList at: 2).
      sortedList add: (fromRevertedList at: 1).

      ^ translator translate: ((sortedList at: 1), (sortedList at: 2)).
    )
)
and we can use this in workspace as:
|sortListTranslator|
sortListTranslator:: TranslatorWithDep  usingPlatform: platform andModule: (TranslatorNoDep new).
sortListTranslator translate: {' World'. 'Hello'}.
Note that the TranslatorNoDep class could be passed instead of the instance; obviously the slot translator in TranslatorWithDep would have to be a class, instantiated in #translate:
7.7.0.3. 3. Library module: API of module that needs to be distributed for use in other modules
API for a module intended to be distributable as a library: In Newspeak, this means such module must be both packageble and distributable - the roles of "packageble" and "distributable" are achieved by implementing the 2 methods below. We call such modules informally Library modules.
In the previous section, we introduced a general module TranslatorWithDep. If we needed this module to be used as a library we could use one of two methods:
- we either "convert"
TranslatorWithDepinto a library, - or we add a "wrapper library",
TranslatorWithDepLib, which will be the module used for distribution.
In this example, we show the second method - we add a "wrapper library", TranslatorWithDepLib for TranslatorWithDep in two steps
- We add a separate module - the wrapper library with a descriptive name (to make clear it is a library),
TranslatorWithDepLib - In the new
TranslatorWithDepLib, add the following API methods:- primary factory method
#packageLibraryUsing: manifest, which allows to "import" theTranslatorWithDepand the other needed dependencyTranslatorNoDep - Instance method
#buildUsing: platform, which allows dependencies to be pulled at construction time
- primary factory method
Note that in this case, TranslatorWithDepLib#buildUsing: platform must not be added any other arguments. Any "carry along" (imported) classes that may be needed at build time, must be saved on slots in the TranslatorWithDepLib#packageLibraryUsing: manifest primary factory method. See also Newspeak modules API zoo.
7.7.0.3.1. Example: TranslatorWithDepLib, a library wrapper for TranslatorWithDep:
To create a packageble and distributable library module for the above TranslatorWithDep, create this library module
class TranslatorWithDepLib packageLibraryUsing: manifest = (
  |
  TranslatorWithDep = manifest TranslatorWithDep.
  TranslatorNoDep   = manifest TranslatorNoDep.
  |
)
(
  public buildUsing: platform = (
     |revertedTranslator|
     revertedTranslator:: TranslatorWithDep
                    usingPlatform: platform
                    andModule: (TranslatorNoDep new).
     ^revertedTranslator.
  )
)
Note how the library must store any "carry along" (imported) classes on slots during packaging, then instantiate them during building.
Also note how the passing of platform moves from the primary factory in the module, to the instance method in the library:
- In the module
TranslatorWithDep, it is on the primary factory method #usingPlatform: platform: - To the distribution library
TranslatorWithDepLib, it is on the instance method #buildUsing: platform.
Although intended for distribution, for testing this process, the library can be used in workspace as
|sortListTranslatorLib sortListTranslator |
(* this would run on the developer's packaging system *)
sortListTranslatorLib:: TranslatorWithDepLib packageLibraryUsing: ide namespacing manifest.

(* this would run on end-user runtime system *)
sortListTranslator:: sortListTranslatorLib buildUsing: platform.

sortListTranslator translate: {' World'. 'Hello'}.
(* Expected result: 'Hallo Welt' output string just below the Workspace line *)
7.7.0.4. 4. Application module: API of module that needs to be distributed as an App
This next step describes an example of a module which is intended to be distributable as an App. In Newspeak, this means such module must be both packageble and runnable - the roles of "packageble" and "runnable" are achieved by implementing the 2 methods below. We call such modules informally App modules.
If we need our module TranslatorWithDep to be packagable as an App:
- Generally, add a separate module with a descriptive name - to make clear this separate module is an App, end the name with the string 'App'.
- In this separate module, provide the following API:
- primary factory method
#packageUsing: manifest - Instance method
#main: platform args: args
- primary factory method
Note 1:
We sometimes see Newspeak Application modules lacking the #main: platform args: args method. Such modules are used as library modules.
Note 2:
Compare the parallel role between the following methods for a Library module and an Application module:
| Library module standard method | is | Application module standard method | is | |
|---|---|---|---|---|
| #packageLibraryUsing: manifest | primary factory | - role is instantiate for packaging - | #packageUsing: manifest | primary factory |
| #buildUsing: platform | instance method | - role is build - | #main: platform args: args | instance method |
The primary factory methods for Library and Application have similar names, both serve to package the library or the app on the "source" system.
The instance methods serve to build (for Library) or execute (for App).
If an Application uses a Library, the library's (build) #buildUsing: platform would be called in the App's #main: platform args: args method to build (create) the library's instance.
7.7.0.4.1. Example:
We will create an Application module TranslatorWithDepApp, which is a bit more complex App, in the sense it uses a pre-existing library module, TranslatorWithDep, defined in 3. Library module: API of module that needs to be distributed for use in other modules.
To create a packageble and runnable Application module TranslatorWithDepApp, it must have a primary factory method #packageUsing: manifest and an instance method #main: platform args: args. The Application must also store at it's slots everything the TranslatorWithDep needs for it's instantiation. Here is how the code may look:
class TranslatorWithDepApp packageUsing: manifest = (
  |
  TranslatorWithDep = manifest TranslatorWithDep.
  TranslatorNoDep   = manifest TranslatorNoDep.
  |
)
(
  public main: platform args: args = (
     |revertedTranslator|
     revertedTranslator::  TranslatorWithDep
                    usingPlatform: platform
                    andModule: (TranslatorNoDep new).

    (revertedTranslator translate: {' World'. 'Hello'}) out.
  )
)
Note how the Application stores any "carry along" (imported) classes from the manifest on slots during packaging in the packageUsing: manifest factory, then instantiate the "carry along" classes in #main: platform args: args at runtime. For a library, this happ build time).
Also note when we converted the General module to an App:
- In the General module
TranslatorWithDep, theplatformobject is passed to the primary factory method#usingPlatform: platform:. - In the Application module
TranslatorWithDepApp, theplatformobject is passed to the instance method#main: platform args: args.
See the section A recipy to convert a General module to an Application or Library module for a general recipy to convert a General module such as TranslatorWithDep to an Application such as TranslatorWithDepApp.
Also note, as you add the Application class TranslatorWithDepApp in the IDE, (using the "+ " button ), the IDE shows [deploy] [configurations] [run] [debug] links beside it, recognizing the top level class as an App.
7.7.0.5. TODO 5. Test module: TODO
7.7.0.6. TODO 6. Test module configuration: TODO
7.8. Hello World in Newspeak - several versions
7.8.1. Section Summary
This section will show several versions of a 'Hello World' program in Newspeak. Each version uses a different method. The initial versions are due to Gilad Bracha's answer on the Newspeak group https://groups.google.com/g/newspeaklanguage/c/Cq2Ej0_THew
All 'Hello World' programs are created in the Newspeak online IDE at https://newspeaklanguage.org/samples/primordialsoup.html?snapshot=HopscotchWebIDE.vfuel, then following the steps.
7.8.2. 1. Hello World from Workspace
Workspace is like the command line or REPL in Newspeak. We can send 'Hello World' from there as a String>>#out message.
Steps to run Hello World from Workspace
- Open Workspace
- Type there (including quotes)
'Hello World from Workspace' out - Select the text
- Press "Shift+Enter" - this takes the selected text and evaluates it's expressions. The single expression is the message
#outsend to the string object. - Notice that 'Hello World from Workspace' appears both right below the line, and also at the bottom of the page. The text at the bottom of the page was appended at the end of the DOM. We will see text showing at the bottom of the page again in all non-Application examples.
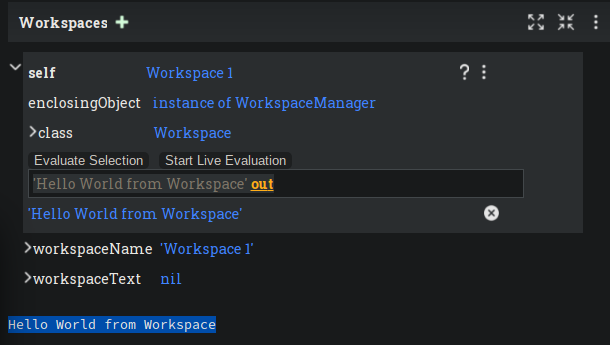
7.8.3. 2. Hello World from general module
TL;DR: In this section, we will build a Hello World which is a module (an instance of top level class as we know already). The code for this module is already in https://github.com/mzimmerm/newspeak-doc/tree/main/newspeak---a-few-notes-code/hello-world/2-as-general-module. To skip the coding details above, we can download the .ns file(s), then "Compile file(s)" to load the fully finished code from there; the loaded class will appear in the IDE.
The Newspeak modules API summary section would classify this module as "General" module, because it does not have any of the special "convention methods" in it's API. The only method of this class is it's default primary factory method #new.
Continuing with the painfully detailed steps to create the Hello World general module in the Newspeak IDE:
- In "Newspeak Source", on the top left, click the "+ " button next to the link "Root"
- In the popup, select "Add Class"
Replace the text under "Defining a new class" with
class HelloWorldGeneralModule = ( (* If we Accept this class declaration, or if we click on the class link, the "Hello World" string shows on the bottom. - How did it get there? - After click on the class link, the IDE prepares some things to present the class. In the IDE, the class is presented inside an instance of the class. So, the IDE creates an instance of the ~HelloWorldGeneralModule~, by invoking the implicit ~HelloWorldGeneralModule>>#new~ primary factory method. The method body is executed, calling ~'Hello World ' out~. ~#out~ is a method on String; it is implemented in the Wasm version to append a ~<div>'Hello World '</div> element to the IDE's HTML document body, thus displaying the string at the end of the IDE's page. - Similarly, every time just click on the > expand action to the left of the class name, a new instance is created by the IDE, causing one more 'Hello World' to appear. *) 'Hello World ' out ) ( ) : ( )- Click the "Accept"
- Now the class link "HelloWorldGeneralModule" will appear in the list of classes
- Click on the class link, and the class presented appears
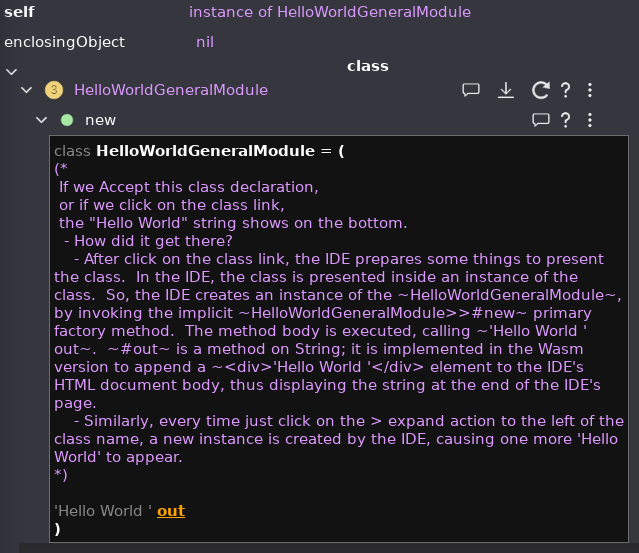
- What happened?
- First of all the "Hello World" shows on the bottom again.
- How did it get there?
- After click on the class link, the IDE prepares some things to present the class. In the IDE, the class is presented inside an instance of the class. So, the IDE creates an instance of the
HelloWorldGeneralModule, by invoking the implicitHelloWorldGeneralModule>>#newprimary factory method. The method body is executed, calling'Hello World ' out.#outis a method on String; it is implemented in the Wasm version to append a ~<div>'Hello World '</div> element to the IDE's HTML document body, thus displaying the string at the end of the IDE's page. - Similarly, every time just click on the > expand action to the left of the class name, a new instance is created by the IDE, causing one more 'Hello World' to appear.
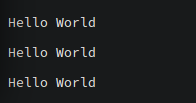
- After click on the class link, the IDE prepares some things to present the class. In the IDE, the class is presented inside an instance of the class. So, the IDE creates an instance of the
This concludes the section on General Module class. Before the next step, please reload the page, and select the third option to start fresh. Alternatively, remove the class HelloWorldGeneralModule. It's presence would repeatedly output "Hello World" at the end of the page body. Class deletion can be done by clicking on the three dot popup menu beside the classname, and selecting "Remove HelloWorldGeneralModule"

For a more complex example of a general module, see 1. General module with NO dependencies: API of module with no dependencies
7.8.4. 3. Hello World from Application
TL;DR: In this section, we will build another Hello World version which is a full blown but rudimentary Newspeak Application. The code for this module is already in https://github.com/mzimmerm/newspeak-doc/blob/main/newspeak---a-few-notes-code/hello-world/3-as-app/HelloWorldApp.ns. To skip the coding details above, we can download the .ns file(s), then "Compile file(s)" to load the fully finished code from there; the loaded class will appear in the IDE.
We now create a class that behaves as a Newspeak Application (as opposed as a general module in the previous section). We need to give the module class two specific "convention methods" described in the sections Newspeak modules API summary and Newspeak modules API zoo.
Here are the steps to create the HelloWorldApp Application in the Newspeak IDE's
As shown in the previous section, click the "+ ", paste the following class to the IDE, and click the "Accept" button.
class HelloWorldApp packageUsing: manifest = () ( public main: platform args: args = ( (* - In the IDE, we should see this class in the top classes list. However, (as opposed to previous example ~HelloWorldGeneralModule~), this class has the links *[deploy] [configurations] [run] [debug]* beside it. This shows as a result of the presence of the convention ~#packageUsing: manifest~ factory method. The tools (the IDE) understand this message and use it to show actions that can be done with an App: run, debug, deploy, show available configurations. In addition, the presence of the ~#main: platform args: args~ instance method makes the module runnable as a standalone Application. - Click the *[run]* link to run the app inside the IDE. The IDE calls first the ~#packageUsing: manifest~, then the ~#main: platform args: args~ which runs, and the text 'Hello World from HelloWorldApp' will be appended at the end of the page, as described in ~HelloWorldGeneralModule~. *) 'Hello World from HelloWorldApp' out. ) )- In the IDE, we should see this class in the top classes list. However, (as opposed to previous section
HelloWorldGeneralModule), this class has the links [deploy] [configurations] [run] [debug] beside it. The links shows as a result of the presence of the convention factory method#packageUsing: manifest. The tools (the IDE) understand this message and use it to show actions that can be done with an App: run, debug, deploy, show available configurations. In addition, the presence of the#main: platform args: argsinstance method makes the module runnable as a standalone Application. - Click the [run] link to run the app inside the IDE. The IDE calls first the
#packageUsing: manifest, then the#main: platform args: argswhich runs, and the text 'Hello World from HelloWorldApp' will be appended at the end of the page. This is similar but not the same as in the General module version 2. Hello World from general module. Here, unlike the General module version, the text is NOT appended when clicking on the class link. That is because, in this Application version, the textoutmessage is in the#main: platform args: argsmethod, which runs after clicking the [run] button. In the General module version, it is in the primary factory, which the IDE runs as it constructs an instance of the class on click.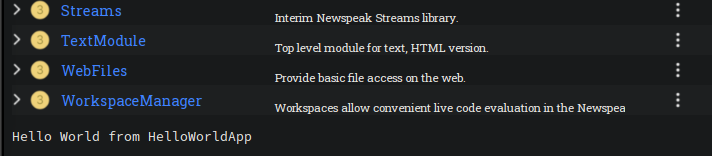
Next, we will show how to deploy our HelloWorldApp as a standalone Application.
From the section 6.4 we know an Application can be packaged and deployed standalone into a local Newspeak webserver.
Follow steps below to create a deployable app HelloWorldApp.vfuel, then deploy it in a local Newspeak installation.
- Action: In the class list, find the
HelloWorldAppagain, and click the [deploy] to the right. - Result: a popup showing deployment options, starting with
asVictoryFuel: - Action: Select
asVictoryFuel. We choose the faster option 'asVictoryFuel' because our Application does not have GUI. Otherwise, we would select 'asVictoryFuelWithMirrors' - Result: After a long wait, a file named
HelloWorldApp.vfuelis created, and asked to be saved. - Action: Save the file
HelloWorldApp.vfuelon our disk to the directory where local Newspeak was deployed - for example$HOME/software/newspeak/my-serve-http/servable - Result: Assuming you installed you local Newspeak webserver as in e 6.3, the app is now deployed to the local Newspeak webserver!
- Action: Navigate to http://localhost:8080/primordialsoup.html?snapshot=HelloWorldApp.vfuel
- Result: We see the output of the standalone-running app
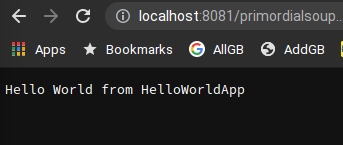
This concludes the section on Application Module class. We have shown how to create an App, run it in IDE, create a deployable .vfuel file, then deploy the Application standalone in local Newspeak webserver.
For a more complex example of an Application module, see 4. Application module: API of module that needs to be distributed as an App
7.8.5. 4. Hello World Application using 3rd party dependency
TL;DR: This section builds, step by step, a Hello World Application named HelloWorldAppUsingLib. The goal of this section is to show how to use a 3rd party Library named HelloTranslatorLib in an application. All code is in https://github.com/mzimmerm/newspeak-doc/tree/main/newspeak---a-few-notes-code/hello-world/4-as-app-using-translator-lib-as-3rd-party-dependency. To skip the coding detailed steps, we can download, then "Compile file(s)" to load the fully finished code; the loaded classes will appear in the IDE. Then you can browse, [run], or [deploy] the Application. Running the Application produces the text translated to German: 
But continuing with the step by step process:
Let's pretend our Application wants to use a Newspeak module produced by a 3rd party (3rd party to us). Call the 3rd party the TranslatorCorp. Let's pretend TranslatorCorp provides the module HelloTranslator, packaged as HelloTranslatorLib.
TranslatorCorp would implement and package their modules as follows:
class HelloTranslator = ()
(
    public translate: text = (
      text = 'Hello World from HelloWorldApp' ifTrue: [^ 'Hallo Welt von HelloWorldApp'.].

      ^ 'unable to translate'.
    )
)
class HelloTranslatorLib packageLibraryUsing: manifest = (

    (* Library (distribution) class provides packaging and building of the HelloTranslator module *)
    |
    HelloTranslator = manifest HelloTranslator.
    |
)
(
   public buildUsing: platform = (
     |helloTranslator|
     helloTranslator:: HelloTranslator new.

     ^helloTranslator.
   )
)
Note that for every module the TranslatorCorp wants to distribute (such as HelloTranslator), they need to create a library module for packaging and disctribution(such as HelloTranslatorLib)
The HelloTranslator, hence the HelloTranslatorLib
- could have used (depended on) other module
HelloTRanslatorHelperdeveloped by the TranslatorCorp - and also depend on a module
LanguageSelectorLibdeveloped by another entity LanguageCorp (so LanguageCorp is "3rd party to TranslatorCorp).
Then, the TranslatorCorp would work in their helper module and the LanguageCorp's module as follows:
class HelloTranslatorLibWithMoreDependencies packageLibraryUsing: manifest = (

  (* This version of HelloTranslatorLib is not ready yet due to missing
     HelloTranslatorHelper and LanguageSelectorLib.
     Use the above version in your IDE experiments
  *)
  |
  HelloTranslator = manifest HelloTranslator.
  HelloTranslatorHelper = manifest HelloTranslatorHelper.
  LanguageSelectorLib = manifest LanguageSelectorLib packageLibraryUsing: manifest.
  |
)
(
  public buildUsing: platform = (
    |defaultlanguageSelector helloTranslator|

    defaultlanguageSelector = LanguageSelectorLib buildUsing: platform.

    helloTranslator = HelloTranslator
                        helpedBy: (HelloTranslatorHelper new)
                        with3rdPartyLanguageSelector: defaultlanguageSelector.
    (* or #usingPlatform:helpedBy:with3rdPartyLanguageSelector: if platform was needed *)

    ^helloTranslator.
  )
)
Either way, we would develop our Application by packaging the 3rd party dependency and storing it on slot as helloTranslatorLib, then at runtime, build instance of the helloTranslator using the packaged helloTranslatorLib, and last, calling the method on helloTranslator which performs the translation:
This is how the Application HelloWorldAppUsingLib would look.
class HelloWorldAppUsingLib packageUsing: manifest = (
  |
  helloTranslatorLib = manifest HelloTranslatorLib packageLibraryUsing: manifest.
  |
)
(
  public main: platform args: args = (
    |helloTranslator|
    helloTranslator:: helloTranslatorLib buildUsing: platform.

    (helloTranslator translate: 'Hello World from HelloWorldApp') out.
  )
)
As shown in the previous section 3. Hello World from Application, we can click [run] to run the Application from the IDE, or package it a ".vfuel" file, and distribute to run as a standalone Application from a local Newspeak webserver (or as an Electon based on Android, iOS, or desktop, but this is not shown yet).
7.8.6. 5. Hello World Application presenting to DOM using Newspeak binding to DOM
A simple DOM-manipulation in Newspeak.
Load and run the application https://github.com/mzimmerm/newspeak-doc/blob/main/newspeak---a-few-notes-code/hello-world/5-as-general-module-to-dom/HelloDOM.ns
This version, when run, completely replaces the body of the IDE page with a formatted Text of the Application.
This concludes the 'Hello World' sections, as well as the broader section Newspeak: An ide-driven journey leading to Hello World.
8. Newspeak: Using it online or installing it locally
TL;DR There are several ways of using Newspeak:
- Using Newspeak online web version from browser. No installation required, see Installation method 1 (online, no local installation)
- Using Newspeak locally from browser, after installing your local Newspeak webserver, see Installation method 2 (local Newspeak webserver)
- Using Newspeak on desktop or as a mobile App, see Chapter System specific methods to install and run Newspeak. This includes installing and using an Electron-based version in Installation method 3.
This section is describing all usage ways and installation methods. Initially, users should consider either Installation method 1 (online, no local installation) or Installation method 2 (local Newspeak webserver).
In this hands-on document we use the Newspeak online version for most chapters; when describing installable Apps, we use the local Newspeak webserver.
8.1. Simple methods to install and run Newspeak
8.1.1. Installation method 1: No installation or setup, run Newspeak online
TL;DR: This section describes the simplest setup - in fact, this is a "no setup, no installation" method. We only need a browser and internet access. This is the recommended method to start with Newspeak.
- Action: Navigate your browser to Newspeak online at https://newspeaklanguage.org/samples/primordialsoup.html?snapshot=HopscotchWebIDE.vfuel,
- Result: You should see a page similar to this
Notes:
- By using this page, you are now using the Newspeak IDE
- click the "Newspeak Source" link to view code, edit edit code and manipulate code.
- Your changes will be stored in the browser local storage.
- A more detailed description of what we can do with Newspeak is in the introduction section 6.1
8.1.2. Installation method 2: Download and start a local Newspeak webserver
This method downloads a pre-packaged Newspeak, and allows you to start your local Newspeak webserver, which starts the pre-packaged Newspeak. This method is described in detail in the "hands on" section 6.3. Follow the steps there.
Differences of this installation from using Newspeak online described in Installation method 1 (online, no local installation)
- If we install using this method 2 (local Newspeak webserver):
- Pros:
- No need for internet access
- Your version does not change if you need stability (this may be a cons too)
- Cons:
- We have to run our own Newspeak server, and reinstall to care of any updates or bugs fixed.
8.1.3. Installation method 3: Download or setup a local Electron version of Newspeak on MacOS or Windows
To install using this method, download the available versions for Windows and Mac, see https://newspeaklanguage.org/downloads.html, section "Downloadable IDE App".
Electron is basically Chromium underneath. It's just set up to read from a page that's built in to the app. So no server needs to be started. It starts with starting the app.
An advantage of Electron that I have seen is a better integration with OS File access dialogues. It doesn't insist on using a downloads directory for everything (and while browsers let you set the directory, they don't let you change it on the fly, on a file-by-file basis).
8.2. System specific methods to install and run Newspeak
8.2.1. Installation method 4: Setup a local Newspeak webserver from code on Github.
This method is described in the "Just in Case" section in https://github.com/newspeaklanguage/newspeak.
8.2.2. Installation method 5: Manual setup which will produce an equivalent of Installation method 2 (local Newspeak webserver)
As this method produces an equivalent that is already downloadable, this is only if we want to dig in more details, but not going all the way to doing all the steps in Installation method 4.
If the build isn't working for you there is one option that hasn't been discussed, which is relevant to Linux folk who don't have an Electron app. You can get the web IDE vfuel file at:
https://newspeaklanguage.org/samples/HopscotchWebIDE.vfuel
BUT … this isn't enough because you need a bunch more stuff, such as primordialsoup.html, primordialsoup.js, primordialsoup.wasm. If you run that, you'll find that you also need a longish list of .png files for the various images used by the IDE. Here they are (probably a few that are no longer used too).
accept16px.png hsHistoryDownImage.png accept16pxDown.png hsHistoryImage.png accept16pxOver.png hsHistoryOutImage.png arrowGreenLeft.png hsHistoryOverImage.png arrowGreenRight.png hsHomeDownImage.png arrowOrangeLeft.png hsHomeImage.png cancel16px.png hsHomeOutImage.png cancel16pxDown.png hsHomeOverImage.png cancel16pxOver.png hsNewDownImage.png classPresenterImage.png hsNewImage.png classUnknownImage.png hsNewOutImage.png clearImage.png hsNewOverImage.png conflictRed.png hsRefreshDownImage.png disclosureClosedImage.png hsRefreshImage.png disclosureMinusImage.png hsRefreshOutImage.png disclosureOpenImage.png hsRefreshOverImage.png disclosurePlusImage.png hsReorderDownImage.png disclosureTransitionImage.png hsReorderImage.png downloadImage.png hsReorderOutImage.png editImage.png hsReorderOverImage.png findImage.png hsToolsDownImage.png findSquareLeftDownImage.png hsToolsImage.png findSquareLeftImage.png hsToolsOutImage.png findSquareLeftOutImage.png hsToolsOverImage.png findSquareLeftOverImage.png itemBothOverride.png helpImage.png itemDeleteImage.png hsAddDownImage.png itemMenuImage.png hsAddImage.png itemReferencesImage.png hsAddOutImage.png itemSubOverride.png hsAddOverImage.png itemSuperOverride.png hsBackDownImage.png languageJS.png hsBackImage.png languageM.png hsBackOutImage.png languageNewspeak3.png hsBackOverImage.png languageSmalltalk.png hsCollapseDownImage.png menu16px.png hsCollapseImage.png menu16pxDown.png hsCollapseOutImage.png menu16pxOver.png hsCollapseOverImage.png menuButtonImage.png hsDropdownDownImage.png metaMenuDownImage.png hsDropdownImage.png metaMenuImage.png hsDropdownOutImage.png metaMenuOutImage.png hsDropdownOverImage.png metaMenuOverImage.png hsExpandDownImage.png operateMenuDownImage.png hsExpandImage.png operateMenuImage.png hsExpandOutImage.png operateMenuOutImage.png hsExpandOverImage.png operateMenuOverImage.png hsFindDownImage.png peekingeye1610.png hsFindImage.png privateImage.png hsFindOutImage.png protectedImage.png hsFindOverImage.png publicImage.png hsForwardDownImage.png repositoryGit.png hsForwardImage.png repositoryMercurial.png hsForwardOutImage.png saveImage.png hsForwardOverImage.png tinySubclassResponsibilityImage.png
You can place it all in the directory of your choice and serve from there (the serve.sh script wants it in the repo, in the out directory). It seems easier to build, but I'm putting it out there.
9. Newspeak: Script which builds deployable vfuel files
TL;DR: This section provides a script which builds both the Wasm VM and deployable .vfuel files from source .ns files (builds .vfuel files for any Newspeak application as well as the NewspeakIDE, called HopscotchWebIDE.vfuel). All .vfuel files are created in Step 7 of the script. Step 7. Step 7 is typically run any time we make a code change in a Newspeak .ns file and want to redeploy it.
9.1. Script to build .vfuel files for Newspeak IDE, and any Newspeak app
The script in this section installs software packages, which enable building .vfuel deployable files from source .ns files (for the Newspeak IDE, as well as tools, and any Newspeak app).
Warning: This script should NOT be run directly, it should be used as a step-by-step process followed manually. Running portions of this script, or in full, as any user WILL OVERRIDE files in the $HOME/software/emsdk and $HOME/software/newspeak-wasm-build directories. In addition, if the user is "root" on OpenSUSE, it will, install some gcc gpp or c++ libraries.
Steps 1. to 6. are one-time (provided they succeed). They provide prerequisits, then build the "primordialsoup" - the executable VM for Newspeak. Primordialsoup is used in step 7 to compile the Newspeak source .ns files into the browser-loaded .vfuel extension files.
Step 7. is intended for repeat. It runs the newspeak/build.sh, which creates deployable .vfuel files. It should be run any time we make a code change in any Newspeak .ns file and want to redeploy it as .vfuel. For example, if we creats a Newspeak app we want to deploy, run only this step.
## 1. Prerequisits: This script downloads projects from github. For this script to work, we need:
#    1.1. A github account with our ssh public key downloaded.
#    1.2. The shell session's ssh keyring loaded with corresponding ssh private key;
#         for example, this can be done as follows:
#            $ ssh-add ~/.ssh/milan.zimmermann_at_gmail.com_id_rsa\:generated-by-ssh
#    Notes:
#    1.3. The ~primordialsoup/SConstruct~ is the configuration file for
#         the scons ~build~ used in primordialsoup.
#
#

## 2. Installing emscripten from github into the directory assumed by primordialsoup/build.
#     If you have emsdk in a different directory, you have to change this, and also primordialsoup/build.

# Assuming this directory for Emscripten SDK
EMSDK_HOME=~/software/emsdk

# Cloning emsdk which creates the emsdk directory
mkdir --parent $EMSDK_HOME
cd $EMSDK_HOME/..
git clone https://github.com/emscripten-core/emsdk.git

# Fetch the latest version of the emsdk (not needed the first time you clone)
git pull

# Download and install the latest SDK tools.
./emsdk install latest

# Make the "latest" SDK "active" for the current user. (writes .emscripten file)
./emsdk activate latest

# Activate PATH and other environment variables in the current terminal
source ./emsdk_env.sh

## 3. Creating the directory structure for the Newspeak Wasm build,
#     and cloning Newspeak and PrimordialSoup from github

# Assuming this directory for the Newspeak build
NEWSPEAK_WASM_BUILD_DIR=$HOME/software/newspeak-wasm-build
mkdir --parent $NEWSPEAK_WASM_BUILD_DIR
cd $NEWSPEAK_WASM_BUILD_DIR

# Cloning newspeak and primordialsoup github, which creates
#   directories newspeak and primordialsoup
git clone git@github.com:newspeaklanguage/newspeak.git
git clone git@github.com:newspeaklanguage/primordialsoup.git

# Checking out the appropriate branch from primordialsoup
cd primordialsoup
git checkout extraRevs

## 4. Downloading CodeMirror in the top directory of newspeak
cd $NEWSPEAK_WASM_BUILD_DIR
cd newspeak
curl https://codeload.github.com/codemirror/dev/zip/refs/heads/main/dev-main.zip  --output dev-main.zip
unzip dev-main.zip # creates dir dev-main
mv dev-main CodeMirror

## 4. Installing Opensuse specific libraries supporting the primordialsoup 32 bit build

zypper install -t pattern devel_basis   devel_C_C++   32bit # !! but maybe we need 32bit-devel which does not exist? So more added below
zypper install glibc-32bit glibc-devel-32bit glibc-devel-static-32bit glibc-locale-base-32bit glibc-profile-32bit
zypper install gcc-32bit gcc-c++-32bit


## 6. Building primordialsoup using "build". This creates the "out" directory.
#     If we encounter errors during build, other OS-level packages may need
#     to be installed, depending on your distro.

cd $NEWSPEAK_WASM_BUILD_DIR/primordialsoup
./build

## 7. Building newspeak using "build.sh". It places output in the "newspeak/out" directory.
#
#     Running the ~build.sh~ builds the psoup VM as well as deployable ~.vfuel~ file
#     for each app listed in ~build.sh~.
#     Currently listed in ~build.sh~ are the Newspeak IDE, the CounterApp, and a few more. Add your app there.
#
#     This step 7. is typically run any time we make a code change in any Newspeak ~.ns~ file and want to redeploy it.
#     For example, if we code a Newspeak app which we want to deploy, we run this step.

cd $NEWSPEAK_WASM_BUILD_DIR/newspeak
source ./build.sh

# Error: bash: RuntimeForCroquet: command not found

# HopscotchWebIDE.vfuel should now exist in the ./out subdirectory of the newspeak repository.

# You can access it by running a web server, using the serve.sh script:

# source serve.sh
10. IN-PROGRESS Programming in Newspeak
10.1. The Newspeak IDE
10.1.1. Updating the IDE
How to update the IDE? The answer differs depending on what version you are using.
10.1.1.1. Updating the online version
If you use Newspeak as online from https://newspeaklanguage.org/samples/primordialsoup.html?snapshot=HopscotchWebIDE.vfuel, no updating is necessary. If a newer version is installed online, a reload will update.
After the update, the system will ask user if to re-apply your browser-local storage changes from the backup and lastSaved. For details of the local changes re-application, see Saving changes in Newspeak.
10.1.1.2. Updating your local Newspeak webserver, installed for all platforms as shown in Installation method 2 (local Newspeak webserver).
To update your local Newspeak webserver to the latest (thus getting fixes done since the last deployment), re-download and unzip as described in 6.3
10.1.2. Updading a single class that was fixed on Github source into local Newspeak webserver (thus IDE)
Could there be situations we do not want to simply reinstall the local Newspeak webserver? Perhaps one example of such situation is that we run our local Newspeak webserver with changed files, and we want to patch a class that has a known fix, without reinstalling the local Newspeak webserver and losing changes.
To describe a concrete (somewhat artificial) situation: Let's say that on Github, there is a bug fix or change in a 'system' class, Browsing.ns, and we want to update this single class locally. We can identify changed files or files with fixes, and compile them in (that is, start using them in) the local version, using the following process:
- Look for files committed on Github.
- Find files changed since your last local install - let's say file
Browsing.nschanged today to fix a bug. As your local server uses the servable.zip file,Browser.nsis already compiled in your local vfuel. - So from the browser IDE, http://localhost:8080/primordialsoup.html?snapshot=HopscotchWebIDE.vfuel from the 3-dot I "compile" the new version of Browsing.ns
- Save the changes from IDE (clicking the save diskette image)
- You can confirm that your changes were "Compile"d, by exporting of Browsing.ns (click the "Save to file" button to export the code).
- The result of the above process is your local server are now using the github-fixed
Browsing.ns.
10.2. Saving changes in Newspeak
TL;DR: By "saving changes" we mean that changes survive browser reload. Changes can be saved either inside the browser in the browser's local storage, or, outside the browser on the filesystem. Any changes you make (for example: you add a class, change a class, evaluate something in the workspace) are stored in the browser local storage in two entries: lastSaved and backup. Clicking the "Accept" button saves the changes in the local storage under the key backup, while clicking the "Save" button , at any time after "Accept", moves the changes from the key backup to key lastSaved and saves the changes there. Alternatively, you can `export` code by clicking the "three dot menu" button to the right of the class, then clicking the "Save to file" item in the popup menu. You can `import` code back to the browser IDE by clicking the "three dot menu" on the top, to the right of "Root +", then selecting the "Compile File(s)" in the popup menu.
10.2.1. Saving changes inside the browser
How is the browser local storage handled, and how is lastSaved different from backup? Here is a detail description of how changes are saved and restored:
- After making a code change or addition, to keep your change, you have to click the "Accept" button . Clicking "Accept" saves the changes in local storage under the key backup.
- while
- Clicking the "Save" button , at any time after "Accept" , saves the changes under the key lastSaved (the changes under backup are added and merged in to the changes under lastSaved). Once saved using the "Save" button, changes are stored "forever", unless you reset browser local storage for the site. So the steps "Accept" , and "Save" are sort of like two phase commit.
- We need to clarify, that making a change, followed by just clicking "Save" without a previous "Accept", nothing is saved.
- You can view the changes made, in the browser debugger. For example, in Chrome or Chromium:
- Press F12 to open Chrome debuger.
- Then click the "Application" tab.
- In the "Storage" section expand "Local Storage".
- You can see our changes in the appropriate URL, both under the key lastSaved and the key backup.
- How does the/lastSaved/ and backup system work on browser restart? On restart, the Newspeak system checks to see if there are any changes under the key backup and/or under the key lastSaved. If lastSaved changes exists, Newspeak checks if there are any subsequent changes under backup. If not, we use the lastSaved version. If there are unsaved changes (backup entry is not empty), a dialog will come up asking you how to proceed:

- This message tells us, we did make code changes, then clicked "Accept" , without pressing "Save" , and reloaded the page. In other words, changes are stored under the key backup but not(yet) under lastSaved. In most situations, pressing Restore from backup is the best choice. Your code will load the changes from the backup key, and contain all your changes. At any time, you can click "Save" and merge the backup changes to lastSaved. After, the question above will not be asked until you made new changes and "Accepted" them.
- For search purposes, here is the text of the message: "You have backup changes that are newer than your last save. Do you want to restore these changes, or load from the last save?"
- This message tells us, we did make code changes, then clicked "Accept"
- Note: There is a fine point we should make. Crudely, we can say that "the Newspeak IDE is the file
HopscotchWebIDE.vfuelinterpreted by the browser when pointing to the URL https://newspeaklanguage.org/samples/primordialsoup.html?snapshot=HopscotchWebIDE.vfuel. This is the default "vanilla" Newspeak IDE available online on a server. However, we need to realize that the browser immediately downloads and caches this file. Changing anything in Newspeak (adding a class, typing to the Workspace), causes the changes to be saved locally in the browser. As long as we accept changes, closing the browser, and visiting the same online URL again, will display the site as we left it - with the local changes "added" to the vanilla Newspeak IDE on the server! Which local changes are "added" (backup or lastSaved or both), is determined by your answer to the dialog above. - Caveats: There are a few caveats - a few classes are exempt from this "backup" and "lastSaved" method, due to bootstrap issues (things like KernelForPrimordialSoup and HopscotchWebIDE). If you tamper with these - save the class explicitly! Also, web storage can surprise you on mobile platforms, where things can be thrown out after a certain amount of time (7 days on iOS?) and the system as a whole may exhibit bugs.
10.2.2. Saving changes outside the browser as text files
During development, any code additions and changes we make, are saved in-browser in the browser local storage, as described in 10.2.1. But if we do clear the browser local storage, our changes will be lost. While the browser local storage can be backed up as part of browser configuration, restoring it is cumbersome.
Consequently, saving our work (source code) outside the browser as text files is valuable.
Current approach to saving our work during development (as text files)
Until source control is integrated into the IDE, the current approach is to `export` ("Save to file") each class we changed into a directory on your system as a file with .ns extension. We can also create a code repository in the directory with the .ns files.
How For how to access the "Save to file" and "Compile File(s)" buttons, see TL;DR in section Chapter Saving changes in Newspeak
Note: To 'import' the saved text *.ns files back to the Newspeak IDE, click on the "Compile File(s)", as also described above.
10.3. Exemplars: Enabling liveliness everywhere
TL;DR: Exemplar is a snippet of Newspeak code in a comment; the snippet starts with the String :exemplar:. The string :exemplar: is metadata which allows the parser to identify the comment innards as a code example. Exemplar's role is to provide live code for browsing, as well as document typical use of a class primary factory or it's methods.
An example
(* :exemplar: BankAccount balance: 100 *)
10.3.1. Exemplars motivation
We often ask "how is this class used"? "What is the result of calling one of it's methods"? Answer can be provided by any of the following mechanisms:
- Reading the class code and deriving a result (in our head).
- Finding a test for the class and the method and analyzing it's code and results.
- Writing a simple example program using the class and method. In Smalltalk and Newspeak, this is done by navigating to "Workspaces" and writing some code - instantiating the class, passing it's factory some arguments, and calling the method you are interested in.
- Right in code: Exemplars provide a class-author supplied mechanism to instantiate the class and run it's methods, as if a user was doing that in the Workspace
10.3.2. Exemplars documentation
Gilad Bracha's blog post https://blog.bracha.org/exemplarDemo/exemplar2021.html?snapshot=BankAccountExemplarDemo.vfuel
Gilad Bracha's BankAccount video https://www.youtube.com/watch?v=qKWPSvcF0zA
10.3.3. A class with an exemplar
A class with exemplar can be found at BankAccount in Newspeak sources.
There are several exemplars pulled from the code link above:
(* :exemplar: BankAccount balance: 100 *)
(* :exemplar: deposit: 100 *)
(* :exemplar: withdraw: 100 *)
The string after :exemplar is expected to be valid Newspeak code.
We can also guess that the :exemplar: code provides a way to instantiate the class and run some methods on it - basically mimicking what we would do in a workspace if we wanted to explore the class instance's behavior.
From the source we can also see the :exemplar: comment is placed before the = sign in a factory or method declaration - that is the only place where the parser is looking for exemplars.
A sample code with an exemplar:
class BankAccount balance: b <Integer>
(* :exemplar: BankAccount balance: 100 *) = ( .. factory code .. )
To make the :exemplar: stand out more, we can format the code so that the comment with exemplar occupies it's own line. The formatting above is "normative" though.
class BankAccount balance: b <Integer>
(* :exemplar: BankAccount balance: 100 *)
  = ( .. factory code .. )
10.3.4. Exemplars role
The role of exemplars is two-fold:
- Provide lively code in the IDE. By adding appropriate exemplars for a class, the IDE, when browsing the class, will use the exemplars code to create the class instance. Once an instance exists, it can call methods on it.
- Provide code examples of class instantiation and running it's methods.
10.3.5. How does the BankAccount class look in the IDE with and without an exemplar?
If a class such as the BankAccount provides an exemplar for the primary factory method, an instance of the BankAccount is presented in the IDE UI; the BankAccount class presenter is also shown, embedded in the instance.
Inclusion of an exemplar allows the IDE to create a live instance, present it's browser, and allows the user to interact with the live instance.
If a class such as the BankAccount does not provide exemplars, only the BankAccount class presenter is shown in the IDE UI. See the section below.
10.3.5.1. BankAccount class with an exemplar in the IDE
Viewed inside the IDE, a class that provides an exemplar:
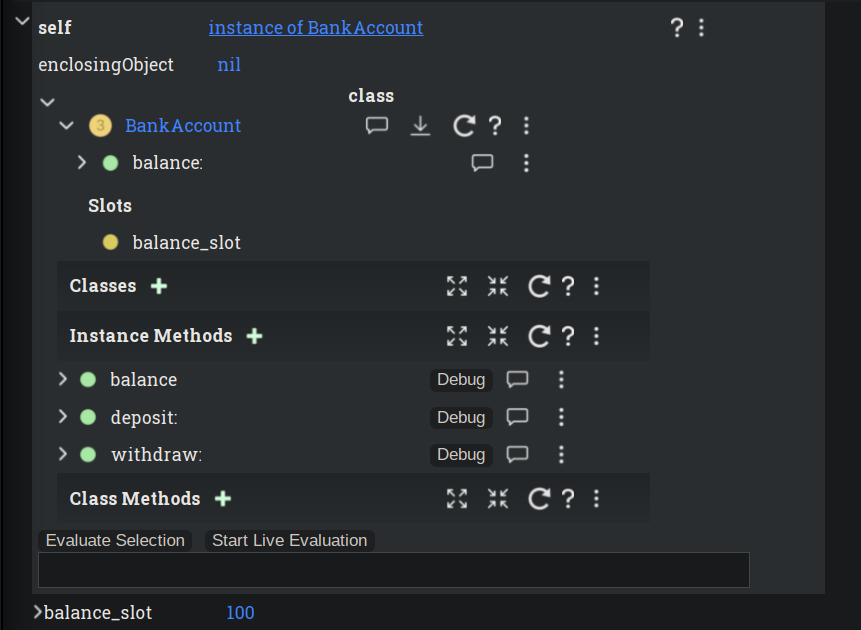
The line on top, starting with self instance of BankAccount is the beginning of the object presenter. The presented object is the object the IDE created using the code in the :exeplar: (s).
The line with the blue link to BankAccount (after the line with class) is the beginning of the class presenter section, embedded in the object presenter. The class presenter section ends just above the line Evaluate Selection.
We can see that the IDE UI presents the instance of the BankAccount, with the BankAccount class presenter embedded. That places the emphasis on liveliness: The IDE user can experiment with the instance behavior inside the "Evaluate Selection" mini-workspace. An example of such experiment:
- In the workspace, type
deposit: 20- a method name, and pass it a value. - Use the key Ctrl-A to highlight the code (This is browser specific, the Mac key for highlight would be different)

- Use the key Shift-Enter to execute the message send. The IDE sends the message
deposit: 20to the instance created by the IDE using the code in the:exemplar:, which immediately updates the value ofbalance_slotfrom 100 to 120.
As we can see, exemplars help to focus to browse instances and experiment with them by sending messages.
We can still browse the classes - in our case the BankAccount class, by clicking on it's link.
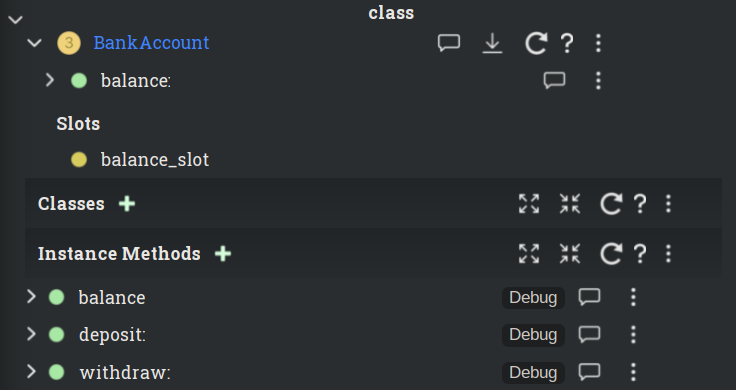
10.3.5.2. BankAccount class without an exemplar in the IDE
To show the contrasting example, this is how the same class looks in the IDE after removal of the :exemplar: sections
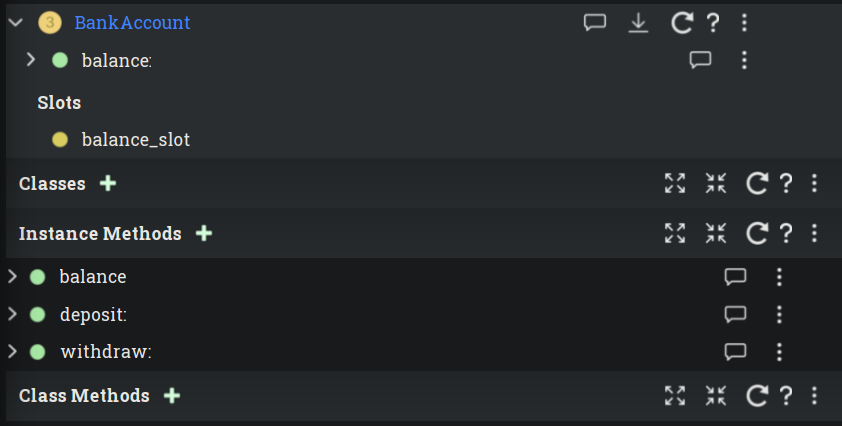
We can see only the class viewer is presented in the IDE (NOT the embedding object browser).
We could still experiment with the BankAccount, but we have to go to Workspaces, or find if a test for the class and methods exists.
10.3.6. More details on exemplars
This section is edited from the Google Groups posts around https://groups.google.com/g/newspeaklanguage/c/cPG5Q6NOwiA/m/fSuol8w_AQAJ
10.3.6.1. The presence of an exemplar factory makes the IDE to create the instance and show the instance browser
In the BankAccount video https://www.youtube.com/watch?v=qKWPSvcF0zA, if the exemplar on the primary factory method
#balance: b was missing, the exemplar instance would not even be shown in the IDE?
Correct. If there isn't an exemplar for self, the method exemplars cannot work.
10.3.6.2. Can there be multiple exemplars in a comment?
There can in fact be multiple exemplar comments. An exemplar comment is one whose identifer (the name given between colons in the tag at the beginning of the comment) starts with #exemplar.
For example, we can define a method #foo:
public foo: x (* :exemplar_1: foo: 3 *) (* an random comment *) (:exemplar_2: foo: 'a' *) = (^x)
In that case, the Debug button will provide a menu of the two exemplars.
10.3.6.3. Are the exemplars always extracted from the comment before the " = (..)" section defining the primary factory method, instance method or class method, OR can they be at any position in the code?
Exemplars must be placed before the method body starts (or for classes, before factory body starts).
For a concrete example, let us look at this pseudo-code of primary factory method balance: b, see markings with <== on the right
class BankAccount balance: b <Integer>
(* :exemplar: BankAccount balance: 100 *) = ( (* <== This, and only this location is parsed for exemplar *)
	|
    balance_slot <Integer> ::= b.
	|
  (* :exemplar: BankAccount balance: 200 *) = ( (* <== This would NOT be parsed for exemplar *)
) (
)
Exemplar comments are just an instance of the general notion of metadata comments. You can have metadata comments everywhere, but there are general rules for what AST node a metadata comment applies to. Metadata must apply to the correct AST nodes. The mirror system looks for metadata for methods and classes in these places. You can look at the methods #metadata and #parseMetadata in MethodMirror and ClassHeaderMirror, to see how this works; also the class MetadataParsing.
10.3.6.4. Exemplars using block and value: How would an exemplar for a more complex object look like?
How do exemplars look in general (for factories or methods), if a parameter is a "complex" object? (rather than an object for which we can create a literal (Number, String, Boolean, List of the above etc) directly in the :exemplar: text like in the BankAccount)
I know the second question is open, but I am now curious how such exemplars are done. I can imagine if a parameter can be constructed from literals, then we just provide those parameter constructions as part of the exemplar. But if it goes deeper?
You may indeed need to build up the object from multiple parts, much as you might do in the #main:args: method of an application. You would want to define local variables for intermediate results etc. So you write all this code in a block and call value on it:
class Complicated usingPlatform: p with: s (* :exemplar: [ | T1 = SomeClass usingPlatform: platform. T2 = AnotherClass with:T1. Complicated usingPlatform: platform with: T2] value *) = ( .. code here .. )
10.3.6.5. What is the purpose of the exemplar on the primary factory method?
Primary purpose of the exemplar on the primary factory method is to provide an instance for life evaluation in the IDE.
Generally, the exemplar on the primary factory method would call the primary factory method (to get us an instance and also document the signature), BUT this is not always the case.
The overriding purpose of such exemplar is to get an instance whichever way possible, such as getting an instance from the Platform object or from the Ide object. On top level classes, which expect platform or ide as an argument, such example would be circular. So, for example, many top level classes have exemplars like this:
class CollectionsForPrimordialSoup usingInternalKernel: ik (* :exemplar: platform collections *) = ( .. slots ..)
todo-00-last above, where does "platform" come from? How can I get "platform" in the IDE?
class Namespacing usingPlatform: p (* :exemplar: ide namespacing *) = ( .. slots .. )
class TextModule usingPlatform: p <Platform> (* :exemplar: platform text *) = ( .. slots .. )
class Debugging usingPlatform: platform ide: ide (* :exemplar: ide debugging *) = ( .. slots .. )
These examples show how to get an instance from the platform, the ide, or similar object available in the IDE.
Note: In fact, whether to use this style is still an open question. Do we want the exemplar to be the same object we use in the system, or a distinct copy? What semantic effects might we see in either case as the user experiments with the exemplar? Using the IDE's own instance makes the system more live, but may allow users to easily shoot themselves in the foot. It was just the easiest thing to do right now. It also has exposed a bug. Changing methods in this case seems to have no effect, unclear why yet.
10.3.6.6. The exemplars are evaluated "as if in a Workspace"
The IDE is the metadata interpreter for comments containing exemplars :examplar: strings, and it uses the same namespace similar to what it creates for workspaces to evaluate them.
This namespace includes top level classes in the root namespace (Root) as well as objects like platform and ide, sort of like the
manifest object + platform object + ide object
The exact mechanism used right now is that Workspace has a number of methods like #ide, #platform and others, and has a #doesNotUnderstand: method that looks up names in the root namespace. The code for it looks like this:
WorkspaceManager>>Workspace>>#doesNotUnderstand: message
protected doesNotUnderstand: message = (
	^Root
		at: message selector
		ifAbsent: [super doesNotUnderstand: message]
)
So calling in Workspace (to be exact, in an instance, e.g. workspace1)
workspace1 ide
returns (via ide selector -> 'HopscotchWebIDE')
Root at: 'HopscotchWebIDE'
10.4. Access control and access modifiers in Newspeak
10.4.1. Introduction
This section describes access control in Newspeak.
The main backround source for this section is the online presentation Can Beautiful Languages Do Access Control?. The text here is based on and borrows from the above, but may introduce terminology that is not part of the presentation.
Access control is a set of rules for class and object members (accessed items).
The access control rules decide whether an expression (a line of code), will be accessible (can be executed) at runtime.
The rules take into account
- Access modifiers "private" "public" and default (protected) on the accessed items;
- Wheather the accessed items are declared in the same class, nested class or enclosing class of the expression for which the rules evaluate access. In other words, access control rules interact with the lexical structure (nesting) of the classes involved: classes where the code is located, in relation to the classes which are used in the code.
- Whether the accessed items are declared in the same class or an inherited class. In other words, access control interacts with inheritance.
Clearly, access control rules are not trivial. This section attempts to explain them, and provide some practical examples.
10.4.2. Access control context, description and terminology
Every expression in Newspeak is a message send. So let us describe what is meant by the term "Access" or "Access rights" of objA to access objB or objA to send message msg to objB.
- Newspeak classes can be nested and also inherited.
- Newspeak classes can have the following members: slots, methods, nested classes.
- Each member may have access modifiers keywords: public, private. No modifier means protected.
- "Access control" describes how objects can access ("have the access rights to") other objects and other objects' members.
- The access rights are determined by rules which navigate in three independent "dimensions"
- The "accessibility dimension": Points on this dimension are access modifiers: public, private, protected (default, no keyword)
- The "lexical dimension" : Points on this dimension are enclosing and nested classes
- The "inheritance dimension" : Points on this dimension are classes on the inheritance chain
- In a Newspeak's (class based) system of objects, each object may contain slots, methods, and nested classes.
- Because in Newspeak runtime, any operation is a message send, we can speak of the following:
- At runtime, in Newspeak's system of objects, object objA may or may not be able to reference (see) another object objB.
- If objA is not allowed to reference objB, a security exception results.
- If objA can reference objB, we say that objA has access (or access rights) to objB. Further, if objA has access to objB, assume there is a method, slot, or nested class named
memberBdeclared on objB. Even though objA has access to objB, objA still may or may not be able to send the messagememberBto objB (executeobjB memberB). If objA has the ability to send message msg to objB, we say that "object objA has access to memberB on objB"
Combined, we say that objA has access (or access rights) to send a message memberB to objB, if a message send objB memberB is allowed to execute at runtime from some place in code of objA.
10.4.3. Slides 61, 62, 63: Rules for accessing members above and below the class in the nesting hierarchy
Slides in this presentation serve as a core source for the rules that define accessibility:
Can Beautiful Languages Do Access Control?.
This section goes over access control rules described in the above slides.
The core slides are slides 61, 62, 63. They describe how Newspeak code in a class accesses members (classes, slots, methods) above and below the class in the nesting hierarchy and the member members, depending on the accessed member's public, private and protected status.
10.4.3.1. Slide 61: public, protected, private
This slide describes that Newspeak provides three levels of accessibility:
- public
- protected (No keyword before the member name makes the member protected)
- private
10.4.3.2. Slide 62: Lexical access rules for private and protected members, and inheritance access rule
This slide describes how Newspeak code in a class can access private and protected members (classes, slots, methods) above and below the class in the nesting hierarchy:
- Rule a) Private and protected members can be seen by nested classes (lexically up, everything is visible)
- Rule b) Enclosing classes cannot see private or protected members of nested classes
- Rule c) Subclasses are never aware of private members of superclasses and vice versa
10.4.3.2.1. Comments on slide 62:
- Rules a) and b) describe lexical scope based access from a class (say named C) to it's nested classe and it's enclosing classes. We can interpret lexical access as 'looking at source code'. If we print the code of the module declaration (the code of a top level class, including all nested classes), and use a finger to browse up and down the enclosing and nested classes, we are using lexical access.
- rule a) can be interpretted as: code in class C can access all members of all classes in the class C’s lexical scope UP
- rule b) can be interpreted as: code in class C can only access public members of nested classes in the class C’s lexical scope DOWN.
- We can remember rules a) and b) using Sky and the Ground memoization of rules a) and b) as follows:
- Imagine looking UP, to the sky: sky is see-through, everything is visible and accessible, all the way to the remote stars. This can be translated as in our situation all members (private, protected, public) lexically UP are visible and accessible.
- Imagine looking DOWN to the ground: the ground stops any visibility below the surface. This can be translated that all private and protected members DOWN below the bottom of our class are invisible.
- Rule c) is for inheritance: private members can be only accessed in the class where they are declared.
10.4.3.3. Slide 63: Is an extension and rewording of slide 62
- An object may access a private or protected member only if
- a) it is a member of the object or
- b) a lexically visible member of an enclosing object
10.4.3.3.1. Comments on slide 63:
- Slide 63 rule a) clarifies that objects can access their own private and protected members
- Slide 63 rule b) is reworded and summarized Slide 62 rules a) and b) (UP and DOWN lexical rules)
- So slide 63 does not adds the intuitive but important rule that an object can access any of it's own members, regardless the member's access modifier.
10.4.3.4. Corollary on slides 61, 62, 63
Corollary 1: Public member on any class ClC is accessible from anywhere. By "accessible from anywhere" we mean "any class ClA which can be lexically anywhere" - we can write an expression which contains a public member of ClC in any code in ClA (even if the module where we write the code is different from the module where the public member is declared).
Corollary 2: Non public member on class ClN is only visible from class ClC, if class ClC is nested in ClN.
10.4.4. Slides describing Newspeak virtual method call lookup: 'lexical chain first, inheritance chain second'
- Newspeak virtual call lookup does NOT use the 'comb rule'
- Newspeak virtual call lookup uses the 'lexical chain first, inheritance chain second' method
- The reason for the choice is described in and after the slides 'A Problem' and 'When code evolves'.
- So virtual method call lookup in summary:
- Newspeak gives priority to lexically visible declarations
- But once a lexical level has been selected, inheritance chain is used. Inheritance can have an effect; lexical declaration can be overridden
10.4.5. Worked accessibility examples, using rules from slides 61, 62, 63
10.4.5.1. Code used in accessibility examples
This section is a step by step experiment accessibility rules described in slides 61, 62, 63.
We will use the following class code. To follow the steps of this section, compile the following class into your IDE. Save the code in a file on your system, then see the paragraph 6 how to compile the code into your IDE.
Newspeak3
'Root'
class C1 = () (

    class ProtC2 = () (
        class ProtC3 = () (
            protM = (
                ^'protC3ProtM'
            )
            public pubM = (
                ^'protC3PubM'
            )
        )
        public class PubC3 = () (
            protM = (
                ^'pubC3ProtM'
            )
            public pubM = (
                ^'pubC3PubM'
            )
        )
        protM = (
            ^'protC2ProtM'
        )
        public pubM = (
            ^'protC2PubM'
        )
    )

    protectedFails = (
        ^'protectedFails'
        (* C1 new protectedFails: Fails.

        Reason:  I feel the reason is not completely obvious, as we are typing code in the Workspace, and it is not immediately clear how code in Workspace is lexically (nesting wise) related to the class ~C1~. A note: The Newspeak IDE provides a Root namespace, all modules are nested in it. Both the Workspace and the C1 module code are nested in the IDE. Having made that note let's work trough why this message send fails: The workspace context is lexically NOT enclosing C1. The code line that we wrote, ~C1 new protectedFails~ is lexically in the workspace module; the member we are trying to access, ~protectedFails~, is lexically in the C1 module.  In summary, this fails because of rule on slide 63 b: An object (workspace where we type the expression) may access private or protected member (~protectedFails~) only if a) it is a member or b) a lexically visible member of an enclosing class (C1 class is not enclosing to Workspace class). In our situation, the code in expressions ~C1 new protectedFails~ typed in the Workspace class cannot see a private or protected member (~C1>>#protectedFails~) of a class (C1) because the method C1>>#protectedFails is neither a member of  Workspace, nor it is in Workspace's enclosing class.

        Note: As a practical result, because we are testing in the workspace, we will make all our test methods in the C1 class public (for example ~public protC2New~, ~public protC2NewProtM~ and we will investigate the access rules on the expressions inside the methods on ~C1~. We name the methods on C1 so the naming reflects what the tested expression in the method does. For example: the name ~protC2NewProtM~ expresses in the name that we call the expression ~ProtC2 new protM~.  Also there is another important point here: For between-modules visibility: A module C1, looking into another module C2, can only see public members in C2. So C1 must make public any of it's members intended to be used outside of C1 - in other words, C1 module's API methods must be public.
        *)
    )

    public publicSucceeds = (
        ^'publicSucceeds'
        (* C1 new publicSucceeds: Success.

        Reason: A public member (message named ~publicSucceeds~ here) is accessible from any lexical context - 'anywhere in code', even from another module (workspace in this case).
        *)
    )

    public protC2 = (
        ProtC2.
        (* Success.

        Reason: According to *Slide 63 a, classes are allowed access to all it's members (even private or protected)*. Here, the code is in class C1 (in it's member method ~protC2~), and accesses ~C1~s member nested class ~ProtC2~, so ~ProtC2~ can be accessed. Same would apply if the member nested class was private (~private PrivC2~ instead of ~ProtC2~).
        *)
        ^ 'ProtC2'
    )

    public protC2New = (
        ProtC2 new.
        (* Success.

        Reason: Similar reason as in ~protC2~ in the section above: . There is a fine print reason here we should add (this reason is not spelled out in the slide rules): The rules on member class visibility transfer to their primary factory methods; so the fact that code in ~C1~ can access it's member ~ProtC2~, transforms to ~ProtC2~'s primary factory, ~new~ in this case. In other words, ~C1~ can access it's member ~ProtC2~, implies that  ~C1~ can access it's member's primary factory (method ~new~, fully described as ~C1>>ProtC2>>#new~).
        *)
        ^ 'protC2New'
    )

    public protC2NewProtM = (
        ProtC2 new protM.

        (* Fails.
           Reason: We showed success all the way before sending ~protM~; sending ~protM~ (fully specified as ~C1>>ProtC2>>#protM~) fails. The code being executed, ~ProtC2 new protM~ is in class ~C1~. Method ~C1>>ProtC2>>#protM~ is a protected member on ~Prot2~, nested in ~C1~. According to *Slide 62 b) Enclosing classes (code in C1) cannot see private or protected members (protected method ~protM~) of nested classes (~ProtC2~).*. Sending message ~ProtM~ in ~ProtC2 new protM~ fails according to this rule, as expected.
        *)
        ^ 'protC2NewProtM'
    )

    public protC2NewPubM = (
        ProtC2 new pubM.

        (* Succeeds
           Reason:  ~pubM~ is public member on a nested class ~ProtC2~ (lexically a member of ~C1~). According to [[* Corollary on slides 61, 62, 63][Corollary on slides 61, 62, 63]] public member (here ~pubM~) is accessible from anywhere (here from ~C1~). Obviously, we have already validated access of the first part of the expression, ~ProtC2 new~.
        *)

        ^ 'protC2NewPubM'
    )
)
Let us describe this class.
- We named the class
C1.C1is a top level class (which makes it a module, see the module section). ClassC1is intended to test a limited subset of accessibility scenarios. Note thatC1is not marked public. However, in Newspeak, all top level classes are public by default! - Naming:
- The strings Prot and Pub in the class names, denotes whether they are declared public or protected. The numbers 1, 2, 3 in the names C1, ProtC2, PubC3 etc express nesting level 'level 1', 'level 2' and 'level 3'.
- The naming of the methods, for example
protC2ProtMstands for "on protected class C2, protected method" and denotes class's and method's public / protected status for a quick lookup.
C1has 1 nested class,ProtC2which in turn has 2 nested classes, protected nestd classProtC3and public nested classPubC3to test public and protected access. Also,ProtC3andPubC3classes has one public and one protected method, named according to their access status, for example,PubC3>>#pubC3ProtMandPubC3>>#pubC3PubM- The methods just generally return a string with it's name, such as
^'protC3ProtM'or return an expression such asProtC2 new protMwhich we are testing for accessibility. - When we want to express the level of nesting in text, we may refer names such as
C1>>ProtC2>>PubC3>>#pubC3PubM - During testing, we will concentrate on why a certain expression evaluation succeeds or fails from the accessibility perspective, and will explain the success or failure based on rules in Slides 61, 62, 63.
10.4.5.2. Execute expressions in C1, gradually adding terms, to study by example
10.4.5.2.1. Structure of examples
Each example we run to test accessibility has the following structure.
- Workspace expression: Here we can see the expression to type in workspace. In most cases, this is a method (message sent) to instance of class. With a few exceptions in methods 'publicSucceeds' and 'protectedFails', this message sent always succeeds; we are testing accessibility in the code which is in the method contents - this is the code listed in 'Examines accessibility using this code:'
- Examines accessibility using this code: Here we can see the contents of the method - the code we are testing for accessibility
- Does: Here we describe in brief what the code in 'Examines accessibility using this code:' does
- Code Result: Success/Fails Here we describe the result of accessibility experiment in the section
- Reason: Here we describe the reason for the Success/Fails result. In most cases, we tie the reason to the accessibility 'theory', generally in slides 61, 62, 63 in n Can Beautiful Languages Do Access Control?
10.4.5.2.2. C1
Go to Workspace and type of paste C1 there, highlight it, and click on 'Evaluate selection' or do Shift+Enter.
- Workspace expression:
C1 - Examines accessibility using this code:
C1in lexical scope of workspace. - Does: Creates and return a class C1.
- Code Result: Success
- Reason: The top level class
C1is always implicitly public, even without a public keyword! This rule is related to accessibility and modularity, but not spelled out in the Slides 60-63. The top level (and implicitly public!) classC1can be accessed in any other top level class, including the workspace where we are typing the expression.
10.4.5.2.3. C1 new
- Workspace expression:
C1 new - Examines accessibility using this code:
C1 newin lexical scope of workspace. - Does: creates a new instance of class C1.
- Code Result: Success
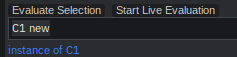
- Reason: Similar to the previous section, the reason is accessibility and modularity related. As mentioned in section aboce, a top level class is always publicly available in any code; here we find this extentds to it's primary factory method
new. A primary factory method on a top level class (module declaration) is always public (even if not explicitly specified).
10.4.5.2.4. C1 new protectedFails
- Workspace expression:
C1 new protectedFails - Examines accessibility using this code:
C1 new protectedFailsin lexical scope of workspace. - Does: Sends a protected message
protectedFailsto instance ofC1 - Code Result: Fails
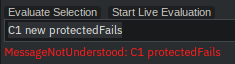
- Reason: I feel the reason is not completely obvious, as we are typing code in the Workspace, and it is not immediately clear how code in Workspace is lexically (nesting wise) related to the class
C1. A note: The Newspeak IDE provides a Root namespace, all modules are nested in it. Both the Workspace and the C1 module code are nested in the IDE. Having made that note let's work trough why this message send fails: The workspace context is lexically NOT enclosing C1. The code line that we wrote,C1 new protectedFailsis lexically in the workspace module; the member we are trying to access,protectedFails, is lexically in the C1 module. In summary, this fails because of rule on slide 63 b: An object (workspace where we type the expression) may access private or protected member (protectedFails) only if a) it is a member or b) a lexically visible member of an enclosing class (C1 class is not enclosing to Workspace class). In our situation, the code in expressionsC1 new protectedFailstyped in the Workspace class cannot see a private or protected member (C1>>#protectedFails) of a class (C1) because the method C1>>#protectedFails is neither a member of Workspace, nor it is in Workspace's enclosing class.
Note: As a practical result, because we are testing in the workspace, we will make all our test methods in the C1 class public (for example public protC2New, public protC2NewProtM and we will investigate the access rules on the expressions inside the methods on C1. We name the methods on C1 so the naming reflects what the tested expression in the method does. For example: the name protC2NewProtM expresses in the name that we call the expression ProtC2 new protM. Also there is another important point here: For between-modules visibility: A module C1, looking into another module C2, can only see public members in C2. So C1 must make public any of it's members intended to be used outside of C1 - in other words, C1 module's API methods must be public.
10.4.5.2.5. C1 new publicSucceeds
Having realized in the section above that expression C1 new protectedFails fails accessibility rules on the protected method C1>>#protectedFails, we now test how things change if we call a public method C1>>#publicSucceeds instead of the protected C1>>#protectedFails. The public method C1>>#publicSucceeds is equivalent to the failing protected method C1>>#protectedFails except it's name and it's public modifier.
- Workspace expression: C1 new publicSucceeds
- Examines accessibility using this code:
C1 new publicSucceedsin lexical scope of workspace.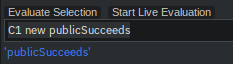
- Does: Sends a public message publicSucceeds to instance of C1.
- Code Result: Success
- Reason: A public member (message named
publicSucceedshere) is accessible from any lexical context - 'anywhere in code', even from another module (workspace in this case).
10.4.5.2.6. C1 new protC2
From this section onward, the method names we run are all public, defined on C1. As public, all methods can be succesfully executed from accessibility perspective by calling the method on an instance such as C1 new. The method names attempt to express the expression executed. For example
- method named
protC2suggests the method creates aProtC2class. - method named
protC2Newsuggests the method creates aProtC2 new- instance of ProtC2 class. - method named
protC2NewPubMsuggests the method runsProtC2 new pubM- sends messagepubMto a new instance of the classProtC2.
- Workspace expression:
C1 new protC2 Examines accessibility using this code:
ProtC2in lexical scope ofC1, in it's methodC1>>#protC2public protC2 = ( ProtC2. ^ 'ProtC2' )- Does: Creates class ProtC2
- Code Result: Success
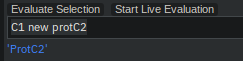
- Reason: According to Slide 63 a, classes are allowed access to all it's members (even private or protected). Here, the code is in class C1 (in it's member method
protC2), and accessesC1~s member nested class ~ProtC2, soProtC2can be accessed. Same would apply if the member nested class was private (private PrivC2instead ofProtC2).
10.4.5.2.7. C1 new protC2New
- Workspace expression:
C1 new protC2New Examines accessibility using this code:
ProtC2 newin lexical scope ofC1, in it's methodC1>>#protC2Newpublic protC2New = ( ProtC2 new. ^ 'protC2New' )- Does: Creates an instance of class ProtC2
- Code Result: Success
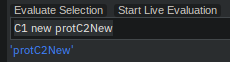
- Reason: Similar reason as in
protC2in the section above: There is a fine print reason here (this reason is not spelled out in the slide rules): The rules on member class visibility transfer to their primary factory methods; so the fact that code inC1can access it's memberProtC2, transforms toProtC2's primary factory,newin this case. In other words, ifC1can access it's memberProtC2, implies thatC1can access it's member's primary factory (methodnew, fully described asC1>>ProtC2>>#new).
10.4.5.2.8. C1 new protC2NewProtM
- Workspace expression:
C1 new protC2NewProtM Examines accessibility using this code:
ProtC2 new protMin lexical scope ofC1, in it's methodC1>>#protC2NewProtmpublic protC2NewProtM = ( ProtC2 new protM. ^ 'protC2NewProtM' )- Does: Creates an instance of class
ProtC2and attempts to send protected messageprotMto it. - Code Result: Fails to send message
protM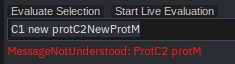
- Reason: We showed success all the way before sending
protM; sendingprotM(fully specified asC1>>ProtC2>>#protM) fails. The code being executed,ProtC2 new protMis in classC1. MethodC1>>ProtC2>>#protMis a protected member onProt2, nested inC1. According to Slide 62 b) Enclosing classes (code in C1) cannot see private or protected members (protected methodprotM) of nested classes (ProtC2).. Sending messageProtMinProtC2 new protMfails according to this rule, as expected.
If we make the method we are calling, the C1>>ProtC2>>#protM, public, then the call to protM in ProtC2 new protM will succeed. We will show it by calling an equivalent but public method C1>>ProtC2>>#pubM in the next section.
10.4.5.2.9. C1 new protC2NewPubM
- Workspace expression:
C1 new protC2NewPubM Examines accessibility using this code:
ProtC2 new pubMin lexical scope ofC1, in it's methodC1>>#protC2NewPubMpublic protC2NewPubM = ( ProtC2 new pubM. ^ 'protC2NewPubM' )- Does: Creates an instance of class
ProtC2and sends public messagepubMto it - Code Result: Succeeds sending public message
C1>>ProtC2>>#pubMfrom code inC1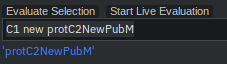
- Reason:
pubMis public member on a nested classProtC2(lexically a member ofC1). According to Corollary on slides 61, 62, 63 public member (herepubM) is accessible from anywhere (here fromC1). Obviously, we have already validated access of the first part of the expression,ProtC2 new.
Note: All along during accessibility discussion, we assumed a message in an expression is understood by the receiver, and merely examined whether the code where the expression is, has access to the message. To make an explicit note in this section: pubM is a member method on ProtC2, so the instance ProtC2 new does understand pubM. Here, C1>>ProtC2>>#pubM is accessible from method C1>>#protC2NewPubM, that is all that matters for accessibility evaluation. The fact that pubM a member (on ProtC2) but that is not relevant in accessibility evaluation, although obviously necessary for understanding.
Summary: This section C1 new protC2NewPubM shows how to 'resolve' the accessibility failure discussed in the previous section. The takeaway is that if a code wants to access members of any nested class, the nested class must make such member public - as we did here (protected protM access failed, changing to public pubM access succeeded).
10.5. Debugging in Newspeak
To debug, insert a line like this in code:
break.
To debug in the slot declaration section, insert a code like this
to debug in here,
| foo = some expression. |
wrap the expression in a block and call value like this:
| foo = [break. some expression] value. |
10.6. Ampleforth and HTML documents in Newspeak
TL;DR: We can create HTML Documents in Newspeak. More precisely, we can create a Document object in Newspeak using the "Add Document" popup action on the "Root-+" button. Such object is a true Newspeak object; it can contain HTML along with Newspeak-defined actions. The document can be saved (exported) to a HTML file using the Download popup action on the "document-3-dot" button. The exported document can be loaded (imported) back the the IDE using the "Load Document(s)" popup action on the "root-3-dot" button. Ampleforth is a framework that allows HTML documents to perform actions, implemented as Newspeak methods .
The chapters below show the steps in detail.
10.6.1. Ampleforth and HTML documents in Newspeak: Creating the document and adding it to the IDE
From the IDE:
- in "Newspeak Source"
- click on the "+" beside Root, in the popup, choose "Add Document"
- give the document a name
- click the "Accept" checkbox.
So far this is equivalent to creating and adding a class, except here we choose "Add Document" rather than "Add Class".
10.6.2. Ampleforth and HTML documents in Newspeak: Editing the document and exporting it as HTML
The newly created document named AMyDocument may look similar to this
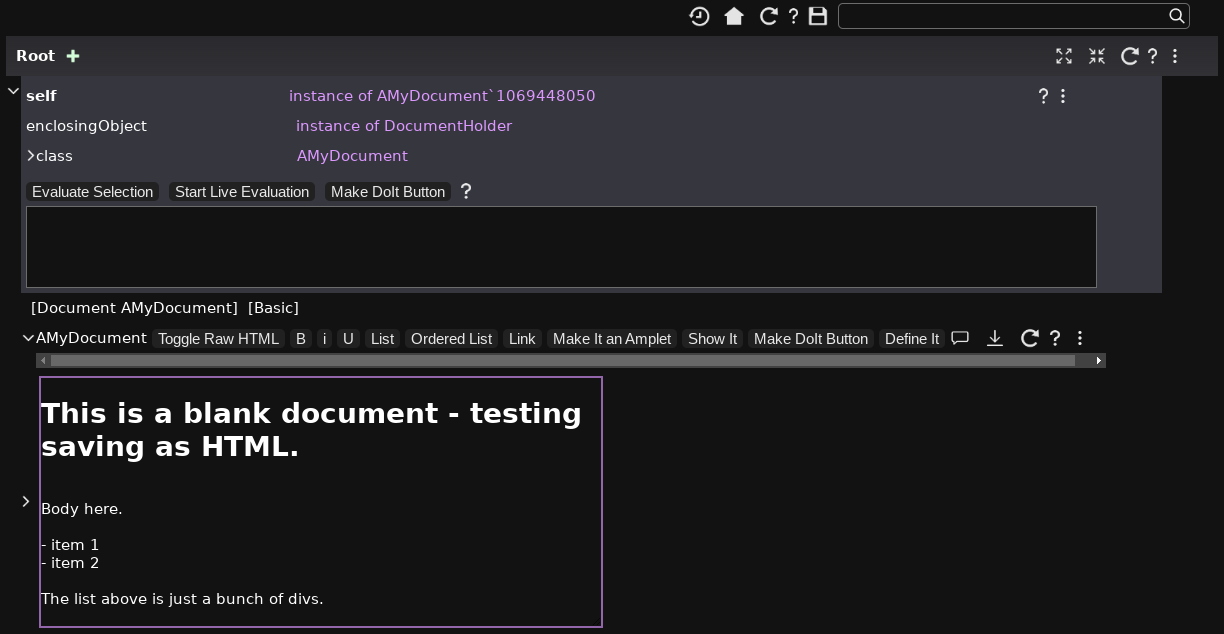
Above is the state after we clicked the ">" widget just above the document text - this revealed an editor line:

To save the document HTML, click on the "download" button  in the above line.
The document AMyDocument will save an HTML file with the document contents stored in a top-level <div> element. The top-level div class name "ampleforthDocumentClass" is known to Newspeak, which can use it to convert this html back to a Newspeak object, from the top-level div attribute "classBody".
The contents of AMyDocument.html is shown below:
<!-- this first div with class ampleforthDocumentClass does not display anything : it contains code for the class AMyDocument.
     It has no methods, but it could have.
  -->
<div class = "ampleforthDocumentClass" name = "AMyDocument" classBody = "() (
) : (
)
"
</div>

<!-- this second div with class ampleforthDocumentBody displays the document -->
<div class = "ampleforthDocumentBody">
  <body>
    <div class="self_ampleforth" contenteditable="true" style="border: 2px solid blue; resize: horizontal; overflow: auto; overflow-wrap: break-word; width: 40em;" onkeyup="updateRawHTML()">
      <h1>This is a blank document - testing saving as HTML.</h1>
      <div><br></div>
      <div>Body here.</div>
      <div><br></div>
      <div>- item 1</div>
      <div>- item 2</div><div>
      <br>
      </div>
      <div>The list above is just a bunch of divs.</div>
    </div>
  </body>
</div>

<!-- the remaining script elements contain support for loading this file if converted to vfuel (??) -->
<script type="text/javascript">
      function scheduleTurn(timeout) {
        if (timeout >= 0) {
          setTimeout(function() {
            var timeout = Module._handle_message();
            scheduleTurn(timeout);
          }, timeout);
        }
      }

      var Module = {
        noInitialRun: true,
        noExitRuntime: true,
        onRuntimeInitialized: function() {
          var url = new URLSearchParams(window.location.search);
          var request = new XMLHttpRequest();
          request.open("GET", url.get("snapshot"), true);
          request.responseType = "arraybuffer";
          request.onload = function (event) {
            var jsBuffer = new Uint8Array(request.response);
            var cBuffer = _malloc(jsBuffer.length);
            writeArrayToMemory(jsBuffer, cBuffer);
            Module._load_snapshot(cBuffer, jsBuffer.length);
            _free(cBuffer);
            scheduleTurn(0);
          };
          request.send();
        },
        print: function(text) {
          if (arguments.length > 1) {
            text = Array.prototype.slice.call(arguments).join(" ");
          }
          console.log(text);
        },
        printErr: function(text) {
          if (arguments.length > 1) {
            text = Array.prototype.slice.call(arguments).join(" ");
          }
          console.error(text);
        },
        setStatus: function(text) {
          console.log(text);
        },
      };
    </script>
    <script async type="text/javascript" src="primordialsoup.js"></script>
    <script src="CodeMirror/lib/codemirror.js"></script>
    <link rel="stylesheet" href="CodeMirror/lib/codemirror.css"></link>
    <script src="CodeMirror/addon/display/autorefresh.js"></script>
Opening the file AMyDocument.html straight in a browser tab (as Ctrl-O, NOT in the contents of Newspeak IDE), displays the pure HTML contents correctly - assuming any resources it references are available. It would not display any "live" elements that would require calling methods
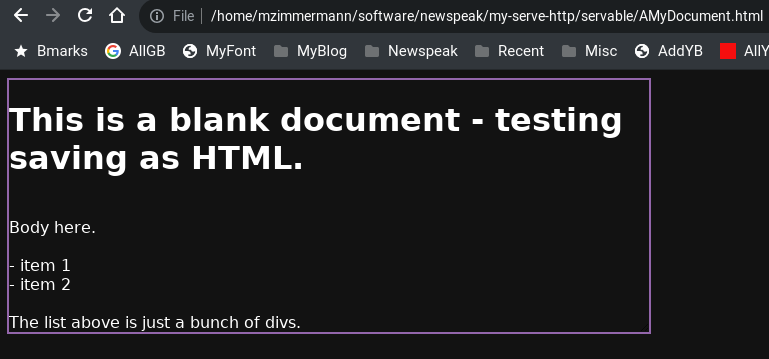
The file AMyDocument.html:
- contains the document class and methods - but using the methods requires a running Newspeak system, NOT just the browser which only displayes the HTML.
- can be fully instantiated as a Newspeak Document by loading it (compiling it) into a running IDE (which does NOT contain the class
AMyDocument). This can be done by clicking the "Load document(s)" on the 3-dot menu in which puts the document class back to the IDE

- also somehow, can be instantiated and run by creating a vfuel from it??
10.6.3. Ampleforth examples
Blogs
- sourced on https://github.com/gbracha/gbracha.github.io
- run URL on https://blog.bracha.org/
| Title | URL | Github Dir | Is HTML Empty (like primordialsoup.html)? |
|---|---|---|---|
| What You Want | https://blog.bracha.org/WYWIWYG/out/WYWIWYG.html?snapshot=WYWIWYGApp.vfuel | WYWIWYG/out | Y |
| Ampleforth: A Live Literate | https://blog.bracha.org/Ampleforth-Live22/out/primordialsoup.html?snapshot=Live22Submission.vfuel | Ampleforth-Live22/out | Y |
| Programmer Like a Pathologist? | https://blog.bracha.org/exemplarDemo/exemplar2021.html?snapshot=BankAccountExemplarDemo.vfuel | exemplarDemo | N |
| Odersky (no contents) | https://blog.bracha.org/OderskyFestschrift23/primordialsoup.html?snapshot=Telescreen.vfuel | OderskyFestschrift23 | Y |
10.7. Examples of applications written in Newspeak
TL;DR: This section collects a few more sophisticated examples, in addition to the introductory Hello World in Newspeak - several versions, and the CounterApp in Code, run, and debug the CounterApp in Newspeak.
10.7.1. Example: Extended CounterApp, the CounterAppWithDependencies
TL;DR: CounterAppWithDependencies is an example of an Application which uses a dependency, the General module ATranslation. We can download and save the code files from https://github.com/mzimmerm/newspeak-doc/tree/main/newspeak---a-few-notes-code/counter-app-with-dependencies. We use "Compile file(s)" to load the saved files; the loaded class will appear in the IDE. Then we can browse, run, or deploy the Application. This version is in Czech: 
Note: In this CounterAppWithDependencies example, the translation class ATranslation was written by us, as a General module, NOT a library. We have another example 4. Hello World Application using 3rd party dependency where the translation class HelloTranslator is wrapped in a Library module HelloTranslatorLib - this mimics a situation where HelloTranslator may NOT be written by us, but by another 3rd party, who packaged packaged HelloTranslator in HelloTranslatorLib for distribution. As a result, the Hello World example is slightly different.
10.7.2. Example: A Hopscotch Model-Presenter-Subject UI Application, the CheckedItemApp
This example Application is in another chapter, as it was developed based on a detail IDE and debug based discovery of Hopscotch UI in that chapter. View it at Using Hopscotch discovery a Model-Presenter-Subject Application, the CheckedItemApp
10.8. IN-PROGRESS-NOW Snippets of wisdom from various sources
Sources are rarely listed by URL BUT are generally those in This document: Introduction to Newspeak on Webassembly (Wasm): Newspeak website, Room 101 and Newspeak user group.
Snippets of wisdom
- Recipy - How to implement what would be static variables in other languages: Anything that you expected to put in a static variable goes in an instance variable of a module. What about singleton classes? How do I ensure that there is only one instance? The easiest way is to initialize a read only slot of a module with an object literal. What happens if there are multiple instances of the module declaration? Well, each module has its own "singleton". That's exactly what happens with singleton classes in Java when they are defined by multiple class loaders.
- From https://bracha.org/newspeak-modules.pdf Like Self, all computation - even an object's own access to its internal structure is performed by invoking methods on objects. Newspeak is class-based. Classes can be nested arbitrarily. Since all names denote method invocations, all classes are virtual; in particular, superclasses are virtual, so all classes act as mixins. Unlike its predecessors, there is no static state in Newspeak, nor is there a global namespace. Modularity in Newspeak is based exclusively on class nesting. There are no separate modularity constructs such as packages. Top level classes act as module definitions, which are independent, immutable, self-contained parametric namespaces. They can be instantiated into modules which may be stateful and mutually recursive.
StringTest>>#testShout is the Smalltalk way of documenting the testShout method of the StringTest class. When you actually type the code into the browser, you don't have to type the class name or the >>; instead, you just make sure that the appropriate class is selected. Documentation example in text should show abstract argument names:
History>>goBackward
  self canGoBackward ifFalse: [self error: 'Already on the first element'].
  stream skip: --2.
  ^ self next.

History>>goTo: aPage
  stream nextPut: aPage.
Modules (top level class instances) can only access other modules and module declarations (module classes) through
a parameter passed in primary factory - the module instantiation methodSo this is a module (termed General, see zoo):class HelloBraveNewWorld usingPlatform: platform = ( (* This works ONLY in the Newspeak on Squeak version *) platform squeak Transcript open show: 'Hello, Oh Brave new world'. )
If we had written
class HelloBraveNewWorld = (
  (* This does NOT work *)
  Transcript open show: 'Hello, Oh Brave new world'.
)
and then created an instance via
HelloBraveNewWorld new(if a class doesn't specify a message for creating instances, new is the default), we would get a doesNotUnderstand: error, because HelloBraveNewWorld does not understand the message Transcript. There simply is no way to access the standard output stream, or any other system state, without having it passed in via a parameter when a module is instantiated.- Workspace evaluation
ide namespacing manifest Collections(* Collections class *)collections(* instance of CollectionForPrimodialSoup *)(ide namespacing manifest ATranslation) new translate: 'aaa'(* 'cannot translate', good, that means the 'translate:' method was called *)
- If you are learning, make everything public. everything = each method, slot, and inner class. It may not be the right thing, but it helps as the error messages are not the best currently. You will just get "Does not understand" too many times. First time it took me a day to figure out hehe.
- so, basically, if I have an HTML string with a <div class='helpButton'>, this code in ClassPresenter>>helpText: can insert a Hopscotch(?) instance of HelpButton (assuming HelpButton was implemented) and the HelpButton instance will present itself as Html on that div? Hmm, maybe that org-to-ampleforth just got more exciting - but I have to hold myselt. – answer: Pretty much. You need to define the mapping from div classes to Newspeak widgets, as ClassPresenter>>helpText: does for the widgets it uses.
- Library is an informal term. Any Newspeak module definition (i.e., a top level class) is a library, and to use, it you call its class methods, most likely to instantiate it. If you want to deploy a module, you need to use it via an app (i.e, define something with #packageUsing: and #main:args:), directly or indirectly.
- Hopscotch: Compositionality is one of the most crucial, and most often overlooked, properties in software design; it's what sets Hopscotch apart.
11. IN-PROGRESS Q&A - answers should be either here directly, or link to an earlier section
11.1. Section goals and resources
To provide no-introduction answers and comments to problems. Some sections grew to large proportions.
Much of this Q&A is sourced and expanded, or simply pasted from the Newspeak google group posts at https://groups.google.com/g/newspeaklanguage
11.2. Newspeak: The price of being principled. The hard parts: namespace, manifest, platform, module, convention methods, packaging. What are these things?
TL;DR: I am a perpetual Newspeak beginner. I have started looking at Newspeak with low intensity early 2010ish. Then I stopped, and started again around 2021. When reading discussions with other Newspeak newcomers, I realized there is some common confusion, that (for me) does not seem to be solvable by reading documents. This section is a collection of information that I hope helps in the understanding of these concepts. The
Most of my confusion was around terms, principles, concepts, convention methods, etc, which are new or different compared to mainstream languages (including Smalltalk which is not mainstream arguably). Let's list some of the terms first, then devote a chapter to each. The list below includes terms for: principles (no global namespace), concepts (module, modularity), names of objects that reflect concepts (manifest, platform), method names (#packageUsing: manifest) etc.
manifestplatformnamespacemoduleand modularity- What role do the convention methods play?
#packageUsing: manifest#packageLibraryUsing: manifest#buildUsing: platform#main:args
For all the above terms, at some point I kept asking: what does this thing actually mean and do? It is hard! Turns out, maybe not hard at all. But that comes with time.
Below are snippets of discussions related to the above concepts (sometimes rephrased, sometimes things added - all errors are mine).
Links where snippets were acquired from : mostly Gilad Bracha answers on the Newspeak Google groups.
https://groups.google.com/g/newspeaklanguage/c/kHAIE_i7gTc/m/OFdtqSnrBAAJ https://groups.google.com/g/newspeaklanguage/c/kHAIE_i7gTc/m/34Qc12XyBAAJ https://groups.google.com/g/newspeaklanguage/c/kHAIE_i7gTc/m/TaCMMqTzBAAJ https://groups.google.com/g/newspeaklanguage/c/kHAIE_i7gTc/m/9DcOV7wzBQAJ https://groups.google.com/g/newspeaklanguage/c/kHAIE_i7gTc/m/p3RYdQ5OBQAJ (! packaging libraries) https://groups.google.com/g/newspeaklanguage/c/27d9nIKKulo/m/Aiq5DHyTAAAJ (! building libraries)
Terminology: Let us call systemPlatform the specific system Newspeak runs on: Wasm, Squeak, etc. These in run on Linux, Mac, Windows, Android. So a systemPlatform may be "Wasm on Linux", but the "on Linux" is not necessary as Wasm has pretty much the same support on all OSes.
11.2.1. What is a module?
- Is instance of a top-level class
- Modules (top-level class instances) are invisible to each other?
- Exactly. This is the result of one Newspeak fundamental design ideas, that make it very different from Smalltalk: "There is no global namespace."
- It has no access to anything except a few basic classes inherited form Object, and whatever is passed into its factory (it need not be platform). The arguments to the factory are capabilities, in the sense of the object-capability security model (ocap). Now to actually build things, you use the IDE as a global namespace to collect the various pieces you need.
11.2.2. What is a platform?
- The platform object reifes the set of standard libraries that one expects to have at any destination.
- In a sane world, this would be the complete story. Alas, we live on Earth instead. We can't expect every device to have Newspeak installed. Therefore, we may need to package an application with additional elements, such as the Newspeak platform and a Newspeak VM. We also need to accommodate different packaging formats and technologies, such as operating systems and web browsers.
- It is a also a message supported by the workspace. It returns an object also termed 'platform'.
- Is there a way to list what variables are there?
- Yes: type platform and evaluate it (make sure you select 'platform' or type it on a new line, so you don't end up evaluating other stuff in the workspace). Then click on the link, which iwll take you to an object presenter (aka object inspector) on the platform object.
- The platform object also provides the API for all things supported by the infrastructure (systemPlatform) where it is running. This APIs should be implemented by all systemPlatforms where Newspeak runs on. But it does not lock you in - that's why you have the option of accessing systemPlatform-specific stuff, by going through an accessor method. On the WASM system, that accessor is #js, and it gives you access to Javascript. So it is also something that gives you the only connections to the world outside Newspeak.
Q: It is usually used in factory method slot declarations, such as
class AClass usingPlatform: platform  = (
  |
  (* imports *)
  private Map = p collections Map.
  private Presenter = p hopscotch Presenter.
  |
)
Why do you not just store the Platform object itself in a slot, and only ask it for these other objects when you need them?
- A: You could do that, but that would be bad coding style. Newspeak is largely about modularity; this is a big part of that story. The code above acts (as the comment says) as a series of imports of classes that the module depends on. If you store the individual modules as above then you (and the system) know, looking at the factory, exactly what the module's dependencies are. If you store the entire platform, you don't know what you're using; it's like a Java program (or a Smalltalk program, for that matter).
- Improved platform story. You might have noticed an annoying quirk in the various GUI apps, where the app has to set up a Hopscotch-enabled platform in its #main:args: method. This deviation from Goodthink has been eradicated. The old HopscotchForHTML5Runtime class is gone. Instead, RuntimeForHopscotchForHTML provides a proper platform that one can deploy Hopscotch apps to, and these apps no longer need to anything special/convoluted to use Hopscotch. The apps and build script have been updated accordingly.
11.2.3. What is a manifest?
- The Newspeak IDE provides a global namespace, which is of course a real object that you can pass around. That object is a manifest.
- Manifests and platforms are totally different. Manifests are a development thing - only available in the IDE. Platforms are a deployment thing.
The platform is something that gives you the only connections to the world outside Newspeak.
11.2.4. What is a namespace?
- The Newspeak language has no global namespace.
- The Newspeak IDE provides a global namespace, which is a real object that you can pass around. That object is a
manifest. The section in IDE UI where it is displayed is called "Root". - Try evaluating
ide namespacing manifestin an IDE workspace. This is the global namespace, but it only exists in the IDE. mz - it does not exist when running an application, unless the application author saves the whole manifest on application's slot. - Of course, you can always override the behavior of a given manifest by wrapping it.
- mz : Each module is also a non-global namespace for it's inner classes. A name (of a slot, method, inner class) in a moduleA will never clash with a name from a moduleB.
11.2.5. What is #packageUsing: manifest and #packageLibraryUsing: manifest?
- Q: At which step of the lifecycle would the
AnApplication>>#packageUsing: manifestandALibrary>>#packageUsing: manifestmethod be used (invoked), where, by whom?- A: Those "convention methods" should be given to Applications and Libraries to enable a instantiation for packaging. They would be invoked as a step to build an Application or Library object for distribution (answering lifecycle), by the IDE (answering by whom) on the source system (answering where). Their invocation would be followed by serializing the object, which would be saved as a .vfuel file for distribution. We could serialize the object in different serialization and distribution formats, and different assumptions about presence of dependencies on the target system. .vfuel file is the main format. The IDE uses the presence of this method (solely) to determine the module is an Application, and displayes on the class line, the [run][debug][deploy] actions. The action code after clicking on [deploy] -> asVictoryFuel(WithMirrors) starts with invoking this method, followed by serialization of the Application object this method creates.
- During creation of a software artifact, all the dependencies of the artifact have to be made available by getting them to the development site or build site (where the build scripts will run). This is commonly addressed by package managers (mz - e.g. zypper install, apt, flutter pub get, pull dependencies from the web to the "build site" - my system - where I want to create and build my newly-coded package). That much is true in Smalltalk as well. In Smalltalk you put these in your image, which provides a global namespace; in most other systems you put them in the file system, which again, is a global namespace. In Newspeak, you put them in the IDE, which as a global namespace as well. I am hoping to avoid the plague of package managers; the IDE should be able to do this based on some metadata conventions.
- Next, there is the question of how you put together your program from the available artifacts, given the global namespace. This is the domain of build scripts in traditional software. In Newspeak, you can write these scripts in Newspeak itself. These would take a namespace object (we often call a manifest) as a parameter. You'd typically pass in the IDE top level namespace. Of course, you can always override the behavior of a given manifest by wrapping it.
- So you write class with a
#packageLibraryUsing: manifestmethod that takes a manifest and instantiates your library as you wish. The manifest needs have all the code you need. Importantly, the manifest is still under 'end user control' and should contain only top level classes (we can also enforce that) so no state or access to the outside world is provided. Thus, the #packageLibraryUsing: methods are like build scripts, and they can call other#packageLibraryUsing: manifestmethods, just like build scripts or makefiles refer to others. The difference being that none of this is hardwired to a specific global namespace. - The above deserves reiterating: Despite the name, the "#packageLibraryUsing: manifest" methods are like build scripts! mz - And, the "#buildUsing: platform" methods are like loading a module provided by the library into memory and linking it to application! See the next section on
#buildUsing: platform - And if I write software library that depends on 20 or 30 third party libraries, I'll have to write a factory with 30 specific arguments?
- No, you can aggregate them into an object (a manifest or submanifest, or even something else), and pass that into the
#packageLibraryUsing: myManifest. That way clients of your library will not break when you add 31st 3rd party library to your library. Also note that in many cases, you will write factories that take actula module instances rather than classes as arguments.
- No, you can aggregate them into an object (a manifest or submanifest, or even something else), and pass that into the
- The "convention methods" names for a Newspeak Library, are confusing: they use the method name starting with the word "package" for a step which is in traditional software termed "build(script)", and they use the method name starting with the word "build" for a step which is in traditional software termed "loading" or "linking".
- package(Library)Using: manifest performs work similar to build scripts to build for deployment - factory method
- buildUsing: platform perform work similar to loading and linking - instance method
- The argument to the factory is the manifest, which is a namespace object where all the dependencies of the application can be found. The factory method of the application is analogous to its build script. To deploy an application, you serialize it (exactly in the sense of object serialization) so that you can then transport it elsewhere, where you can deserialize it, obtaining a live object; then you call #main:args: and run it. Again, it's just like shipping executable. Deserializing is like loading.
11.2.6. What is #main: platform args: args and #buildUsing: platform?
- At which step of the lifecycle would the "#build: platform" method be invoked?
- A: When loading an application.
Details:
The #buildUsing: platform was proposed specifically for the library distribution scenario rather than the application distribution scenario. It's role is analogous to #main:args. You distribute the library, as you distribute the application, as an object with its dependencies (excluding the platform), all serialized.
- You produce (build) the application (respectively library) object using
#packageUsing:(resp.#packageLibraryUsing:). - You then instantiate the application (respectively module object provided by the library object) using
#main:args:(resp.#buildUsing:).
At that the first stage (dev time on source system) you provided a manifest, a global namespace of the classes you need. At the second stage (load time on target system) you provide a platform that ties this code to the standard libraries that provide access to real world capabilities.
11.2.7. Use case and lifecycle for packaging and building: #packageUsing: manifest, #packageLibraryUsing:, #main: platform args: args and #buildUsing: platform
Alice sells a module of type AlicesModule. Alice codes up a Library of type AlicesModuleLib as a wrapper for her module of type AlicesModule. Bob is building an application of type BobsApp which wants to use AlicesModule.
I will drop the word "type" below, and use lowercase for objects, Uppercase for classes.
The lifecycle of a library alicesModuleLib providing the module alicesModule would be:
| 1. | In the IDE of Alice: | |
|---|---|---|
| 1.1. | Alice writes code for AlicesModule, and AlicesModuleLib: on AlicesModuleLib adds the factory packageLibraryUsing: manifest and the instance method buildUsing: platform which returns alicesModule. |
|
| 1.2. | AlicesModuleLib shows up in the IDE and in manifest |
|
| 1.3. | Alice clicks [deploy] (alternatively, this section can be done in a build script) | |
| 1.4. | AlicesModuleLib #packageLibraryUsing:manifest (build-like step) is invoked |
|
| 1.5. | The above produces alicesModuleLib, the library object with AlicesModule and other classes needed by AlicesModuleLib on slots |
|
| 1.6. | Serialization is invoked for alicesModuleLib |
|
| 1.7. | The alicesModuleLib.vfuel is produced and saved from the alicesModuleLib |
|
| 1.8. | Alice pushes the vfuel to a public Newspeak libraries repository (using a button from IDE? Does Alice need to certify self? Who creates the public repository and how is it propagated?) | |
| 2. | In the IDE of Bob: | |
| 2.1. | Bob pulls alicesModuleLib.vfuel from the public repository (by clicking a IDE button?). This also calls code to deserialize alicesModuleLib.vfuel to an object and loads the object (todo mechanism?) into Bobs IDE | |
| 2.2. | Instance alicesModuleLib is now held in Bobs IDE |
|
| 2.3. | Class AlicesModuleLib shows up in Bobs IDE and is placed on Bob IDEs manifest (todo mechanism? probably from AlicesModuleLib class deserialized along with alicesModuleLib ?) |
|
| 2.4. | Bob, in his IDE starts writing BobsApp, and adds the following methods and code: |
|
| 2.5. | : in BobsApp>>#packageUsing: manifest, he writes code to store alicesModuleLib on a slot : alicesModuleLib = manifest AlicesModuleLib packageUsing: manifest |
|
| 2.6. | : in BobsApp>>#main:args: platform he writes code to instantiate alicesModule : alicesModule:: alicesModuleLib buildUsing: platform . This yields the alicesModule instance that provides good service to BobsApp in the following lines. |
|
| 2.7. | Bob can now click [deploy] on BobsApp, with steps equivalent to 1.3 to 1.7 |
I only have questions on
- Items 1.8. and 2.1. : Would this be in principle intended as a sharing mechanism of libraries? Or a different peer to peer method?
- Items 2.1 (again), 2.2 and 2.3. and 2.3 : How are object deserialized from vfuel instantiated and included in IDE? Are there examples in the Newspeak IDE code?
I do not have any questions on the other items, in fact I would be unhappy if I got those other items wrong :) but would be happy to know I got those wrong.
Thanks todo-00-last - ask the above on newspeak list, also comment on conflicting naming as mentioned above.
- package(Library)Using: manifest performs work similar to build scripts to build for deployment - factory method
- buildUsing: platform perform work similar to loading and linking - instance method
11.2.8. What makes the [deploy] [configuration] [run] and [debug] buttons to show in IDE on the class line?
They all show if and only if the the class has the "#packageUsing: manifest"
[run tests] and [show tests] are displyed iff the class has a #packageTestsUsing:manifest class method. Again, a convention indicating that the class is a test configuration.
11.2.9. What are serialization methods and formats?
- Can the 'program package' in Newspeak be something else than a vfuel file?
- A: Yes. Example: you compile the application into Javascript. This too is a way to serialize the application object. Or you might want to deploy your code as an Electron app, packaged as a MacOS application or a Window application, and these may each have variations (are they to be signed for app store use?; are they to include the Newspeak code as vfuel along with a WASM VM, or as Javascript? etc.). More on this below.
- As noted above, there are any number of formats. At the very core, there is a serialized Newspeak object. For a CounterApp, this would be
100Kb. But because we ship the ~platformcode in a vfuel, we get to about 1Mb. Once we add the engine (300K WASM) and other resources, things grow further, and we are distributing something like zipped directory (e.g. server.zip on the downloads page). If we wrap that in an Electron app, and wrap that in a MacOS app, we have 70Mb zipped, or 175Mb unzipped, because we now are shipping Chromium as well.
- I can place .vfuel under a webserver and run the CounterApp, but can I, for example, export some other artifact (zip file with binary or source?) that is later loaded into another persons Newspeak IDE?
- A: In principle, yes, there are other ways to serialize an application. In earlier versions, we would serialize an app without the platform code. This results in very small files (say 100Kb, depending on the app). The IDE (this was the old Smalltalk based system) would deserialze the app object into a regular Newspeak object in memory. In an ideal world, this is all you would need. Alas, this requires a Newspeak engine to be useful, and we cannot realistically assume this. So, the current vfuel files include the entire platform code in them. Now, since many apps do not require features such as reflection, and reflection tends to greatly increase the footprint of the vfuel file (because we must include source code as well as the mirror module) we have options to create vfuels with or without mirrors. The idea of deployment/serialization configurations is to generalize this, so one can describe deployments of varying kinds. This is not really properly supported yet. But you can see that there is a large number of combinations (JS or WASM; GUI or non-GUI; mirrors or no mirrors; MacOS, Windows, ChromeOS, iOS, Android; Electron or PWA) not all of which are valid of course.
11.3. How do I save my changes?
Newspeak doesn't have an image. So what do I actually do to develop software? I mean, I presume I run a copy of Newspeak somehow, and start adding classes to it. But then where / how do my additions get saved if there isn't an image? When I've added a couple of classes to a running Newspeak environment, I presume they don't just disappear when I switch my computer off? So where do they go? Or where do I put them?
Changes in Newspeak are always saved locally, as long as you click the "Accept" button after making changes.
It won't save your state, but it will save your code. Bear in mind that the web-based system is young and will crash occasionally, but also that the system saves your changes as backup regardless of whether you saved explicitly.
For a complete discussion, see Chapter Saving changes in Newspeak.
11.4. How would I build and deploy a Newspeak application?
For HelloWorldApp, see Hello World in Newspeak - several versions.
For the CounterApp example, see section 6.2
11.5. How do I bring dependencies into modules to be distributed?
As discussed in Dependencies and modularity: Important but hard to "get" at firsty:
- Due to Newspeak's modularity, the process of bringing dependencies into a Newspeak program is different from mainstream language platforms.
- The
manifestobject, passed to primary factory of Application and Library, provides the ability to bring dependencies into modules for packaging. Theplatformobject, passed to convention instance methods to the Application and Library objects, provides runtime objects expected to be found on all Newspeak platforms (on all Newspeak deployments).
Folow the above link and also the Hello World in Newspeak - several versions section for concrete examples of bringing dependencies.
Text below provides the example introduced by Gilad Bracha on the Newspeak Google groups list: https://groups.google.com/g/newspeaklanguage/c/kHAIE_i7gTc/m/p3RYdQ5OBQAJ
Imagine a convention whereby every library intended for distribution is sent out as a class which:
- has a factory (or in general, class method) method
#packageLibraryUsing: manifest - has a (build)
#buildUsing: platformmethod - this method, given a platform object, produces a working instance of the module we actually want to distribute
Now developer A (Alice) intends to distribute a module MyMod1. It depends on some other code she developed, say, MyMod2, which in turn depends on a 3rd party library from developer B (Bob). The module Alice distributes is below.
class MyMod1DistributionLib packageLibraryUsing: manifest = (
 (* packageManager: ...  metadata describing the expected dependencies *)
  |
  MyMod1 = manifest MyMod1.
  MyMod2 = manifest MyMod2.
  my3rdPartyDep = manifest My3rdPartyDep packageLibraryUsing: manifest.
  |
) (
   public buildUsing: platform = (
      |
      my3rdPartDependency = my3rdPartyDep buildUsing: platform.
      myMod2 = MyMod2 usingPlatform: platform and: my3rdPartDependency.
      myMod1 = MyMod1 usingPlatform: platform mod2: myMod2.
      |
     (* IMPORTANT: buildUsing: returns the General module instance NOT this MyMod1DistributionLib
                   library instance - the library is only vehicle to build and return
                   the module we are distributing!!
     *)
     ^myMod1
   )
)
The Library instance method #buildUsing: platform encapsulates the knowledge of how to build Alice's code, using an internal library she wrote (MyMod2) and Bob's library.
Note that Alice is using the same convention as Bob, and builds Bob's code with no knowledge of its internal dependencies. Developer C (Carol) uses these same conventions to build Alice's code. She can do so regardless of whether
- she is building an app : she'd call the Library factory
AlicesMyMod1DistributionLib>>#packageLibraryUsing: manifestfrom the app's factory (from theCarolsApp>>#packageUsing: manifest), and callAlicesMyMod1DistributionLib>>#buildUsing: platformfrom the app'sCarolsApp>>#main: platform args: args - or she is building another library: where she'd call
AlicesMyMod1DistributionLib>>#packageLibraryUsing:manifestfrom the library factory (from theCarolsLibrary>>#packageLibraryUsing:manifest).
If Alice decides to replace Bob's code with code from developer D (David), she changes MyModules, but Carol's code does not change. Likewise, if Bob or David change their dependencies, neither Alice nor Carol change their code.
It isn't necessary for everyone to follow the exact same convention - what's critical is that a given module maintains its convention so its build API is stable. Of course, a common convention is good, especially for tools.
Alice could just distribute an instance of MyModules, but this hard-wires the versions of all the dependencies. Assuming she doesn't do that, it is true that Carol needs to download all the pieces and their sub-pieces from Bob and Alice etc. She loads them into the IDE (or the IDE does so by reading the metadata) and the IDE's namespace is used to produce the manifest object passed in when anyone builds an app.
Note that platform and manifest need are quite different. Manifests are a development thing. Platforms are a deployment thing.
Platformsare for runtime capabilities and are security critical. The platform is something that gives you the only connections to the world outside Newspeak.Manifestare for code construction (see#packageUsing: manifest). The Newspeak IDE provides a global namespace, which is a real object that you can pass around. That object is a manifest.
Anyway, hopefully this helps to answer the question.
– Cheers, Gilad Gilad Bracha 29 Apr 2021, 19:32:52 to newspeak…@googlegroups.com (slightly edited and merged from other posts by Milan Zimmermann)
11.6. When or why to refresh the online IDE?
Why will you refresh? Apart from the odd crash, the more common problem is the performance issues that have been discussed in this forum in December/January. Basically, we have an unresolved problem that the system slows down painfully under prolonged/heavy use. Refreshing and loading from backup works fairly well. This is obviously unacceptable as you lose IDE state (debuggers, workspace/inspector contents, unsaved editors, presenter state such as what method presenters are expanded or collapsed) but it's better than an unresponsive (sluggish to dead) system.
11.7. Why do some classes show the [deploy] [run] [debug[ links?
Only classes that the IDE considers apps (applications) show these links.
IDE concludes a class is an app based on a convention: the presence of the method #packageUsing: manifest.
For details see Newspeak modules API summary and Hello World in Newspeak - several versionsy.
11.8. Why do some test classes show the [run tests] [show tests] links?
Only classes that the IDE considers a test configuration show these links.
IDE concludes a class is an app based on a convention: the presence of the method #packageTestsUsing: manifest.
For details see Newspeak modules API summary.
11.9. How would I create and distribute a Newspeak Application to run on the web, on mobile, or on desktop?
TL;DR: We can code an app, then produce it's deployable package (a .vfuel file) in Newspeak, then deploy the .vfuel on the desktop, on the web, and on mobile.
11.9.1. Code the app
The process of coding a Newspeak Application is described in several example in this document, one example is Code, run, and debug the CounterApp in Newspeak. It is also described more succintly in the 'Hello World' programs section 3. Hello World from Application.
11.9.2. Produce the app's deployable package (a .vfuel file)
Once the app is "coded", There are two options of producing the app's deployable package (a .vfuel file)
- From the IDE: There is a 'deploy' option that the IDE displays for apps. This option is slow but simple, and we can deploy small apps that way. The process of building an app, the creating a deployable
.vfuelpackage. This process is described fully in Chapter Deploy CounterApp as standalone app into local Newspeak webserver. - From a script: Slightly more complex to install, but works faster. You use a script that runs the C version of the PSoup VM to do the deployment. This is faster, more reliable and produces smaller deployments. This is done by Step 7 of the script in Newspeak: Script which builds deployable vfuel files.
In either case, .vfuel file is produced. We can then serve that file in a webserver, and run your app.
11.9.3. Deploy the app's package (the .vfuel file)
This .vfuel can then be deployed into a locally installed or a globally installed webserver.
- For instructions on how to install the server see Simple methods to install and run Newspeak
- For instructions on how to deploy a sample app, in particular the
CounterApp, see 6.4.
11.10. How does Ampleforth work to create live literate Newspeak demos such as http://bracha.org/Literate/literate.html?
TL;DR: Newspeak has a module which allows to present the Newspeak objects (the IDE, classes, instances, workspaces etc) live in any suitably marked up HTML page. This results in an experience of a live document and a literate program - a document containing multiple program snippets or whole programs. The program(s) snippet(s) inside the document can be changed, changing the results right inside the document. The program can also be explored (introspected), drilled into, etc. Everything described in this section can be played with in any of the above links:
- http://bracha.org/Literate/literate.html
- https://blog.bracha.org/illiterateProgramming/out/illiterateProgramming.html
- https://mzimmerm.github.io/2021/07/writing-live-documents-in-newspeak-ampleforth-in-org-mode
The last link also shows instructions on how to create an emacs org mode document which, after export to HTML (C-c C-e), supports such lively HTML interaction.
Let's describe the TL;DR: in more details.
The module providing the experience a live document and a literate Newspeak program is called Ampleforth.
Ampleforth is already described in https://blog.bracha.org/illiterateProgramming/out/illiterateProgramming.html by it's author Gilad Bracha. That is definitely the reference description!
This section starts from a slightly different angle.
The Newspeak module AmpleforthEmbedder (source in AmpleforthEmbedder.ns) is responsible for "presenting" Newspeak objects to HTML, and user interaction with the objects. The module, Ampleforth is simply a wrapper, wrapping AmpleforthEmbedder as a Newspeak application.
The liveliness in HTML pages is provided by Ampleforth.js, which is converted from Ampleforth.ns to Javascript.
When Ampleforth.js is placed at the end of any HTML page, it works as follows:
After the HTML is opened in a browser, the included script with Ampleforth.js looks for <div> elements with specific class names, and inserts Newspeak objects converted to HTML in thos places.
For example, if the HTML contains a div with class="evaluator", such as
<div class="evaluator" expression = "11+22"> </div>
Ampleforth.js evaluates the expression, then inserts Newspeak result objects converted to HTML to the page (before, after, or instead of such specific elements). The
The HTML is processed in the following call sequence: AmplefortEmbeddor>>#start -> AmplefortEmbeddor>>#processEvaluators and the methods that follow.
Here is the relevant code:
(* AmplefortEmbeddor>>#start *)
public start = (
  processEvaluators.
  processMinibrowsers.
  processClassPresenters.
)

(* AmplefortEmbeddor>>#processEvaluators *)
public processEvaluators = (
  domElementsWithClass: 'evaluator' do:
    [:element |
    |
    expression = element getAttribute: 'expression'.
    om <ObjectMirror> = platformMirror.
    es = EvaluatorSubject onModel: (EvaluationViewState onModel: om).
    |
    es initialSource: expression.
    es evaluateLive: expression.
    EmbeddedHopscotchWindow
      into: element
      openSubject: es].
)
In the above code we see that for each domElementsWithClass: 'evaluator' found in the HTML, the code will look for contents of attribute named expression. The expression contents is evaluated, then the result of evaluation is passed to EmbeddedHopscotchWindow which is inserted to the DOM after the <div> with class 'evaluator'.
So, as long as the HTML contains a div with class evaluator, such as
<div class="evaluator" expression = "11+22"> </div>
the above code (or rather it's converted Javascript equivalent Ampleforth.js) evaluates the expression 11+22, creates a EmbeddedHopscotchWindow from the evaluated result. The EmbeddedHopscotchWindow then embeds the result (instance of Number 33 presented as a div) in the DOM inside the original div.
We can look in the browser debugger how the result looks after the result div is inserted. After evaluating 11+22, the result 33 is inserted in it's own <a href> link:
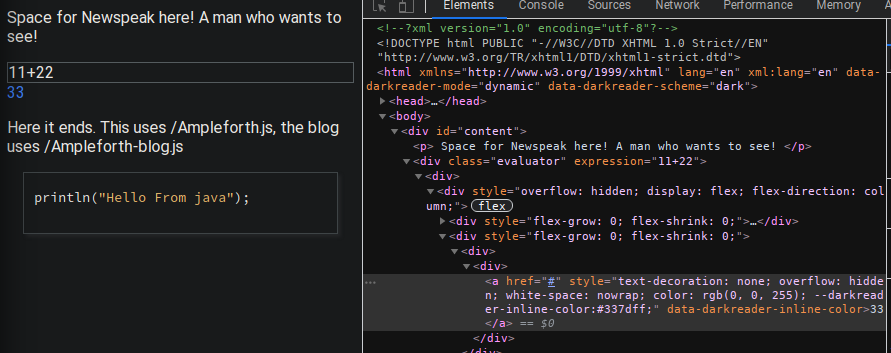
Not only that, clicking on the 33 link leads to Newspeak class presenting the instance of 33! See TL;DR for links.
11.11. How does Newspeak display something in DOM and HTML?
In addition to the Ampleforth class which can "insert" Newspeak elements live in any HTML page, there is a method that does a similar work for the purpose of presenting Newspeak IDE elements in the browser (when we run the IDE).
This method that does this work is HopscotchForHTML5>>Presenter#:ampleforth: h <String> mapping: m <Map[String, Fragment]>. It is responsible for presenting the whole Newspeak IDE as HTML.
Let us look at this method first, before we look at an example of it's application:
ampleforth: h <String> mapping: m <Map[String, Fragment]> = (
  ^AmpleforthFragment html: h mapping: m
  )
To investigate how HopscotchForHTML5>>Presenter>>#:ampleforth:mapping: results in presenting something in the IDE (that is, in the DOM) on an example, let us look at the Browsing>>ObjectPresenter class in the Browsing.ns module.
We will show how clicking on the "Help" button  on an object will call a method of
 Browsing>>ObjectPresenter>>helpText, and how this results in presenting the help text in the IDE.
The ObjectPresenter class provides a viewer for objects in the IDE. An example of Browsing>>ObjectPresenter's work is result of clicking on the "Help" button on an object.
For the Browsing>>ObjectPresenter to be used, we need a place in the IDE where we see a blue link which presents an object (rather than for example class, which would use Browsing>>ClassPresenter). Go to "Workspaces" where we see a situation similar to
This shows instance of an object. To activate Browsing>>ObjectPresenter>>helpText, click on the beside Workspace1. The help coming from the ObjectPresenter shows:
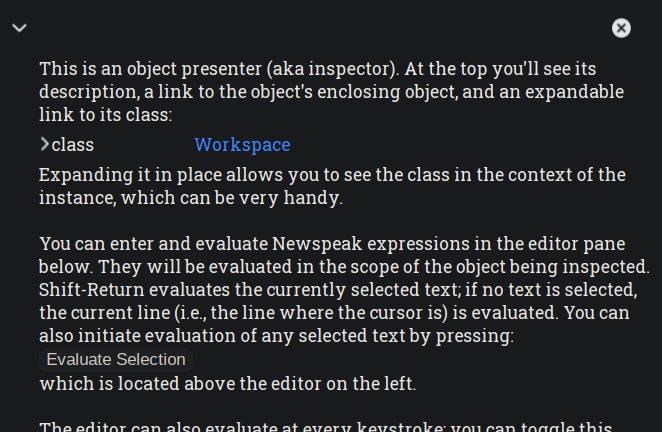 (we cut the text here)
Let us investigate how the Newspeak IDE arrives at presenting the above shown help in the IDE's DOM. As mentioned above, the core of this functionality is the method HopscotchForHTML5>>Presenter>>#:ampleforth: h <String> mapping: m <Map[String, Fragment]> .
But we need to start one level above to explore this step by step:
- Open code for
Browsing>>ObjectPresenter>>#helpText. It shows clearly the text is the same as the one displayed in the help text above:
helpText ^ <Fragment> = ( | mapping = Map new. | mapping at: #hopscotchClearResultsButton put: subject evaluator presenter clearResultsButton; at: #classExpander put: classExpansionLink; at: #evaluateSelectionButton put: subject evaluator presenter evaluateSelectionButton; at: #invertEvalStatusButton put: subject evaluator presenter invertEvalStatusButton. ^ampleforth: 'This is an object presenter (aka inspector). At the top you''ll see its description, a link to the object''s enclosing object, and an expandable link to its class: <div class="classExpander"> </div> Expanding it in place allows you to see the class in the context of the instance, which can be very handy. <br><br> You can enter and evaluate Newspeak expressions in the editor pane below. They will be evaluated in the scope of the object being inspected. Shift-Return evaluates the currently selected text; if no text is selected, the current line (i.e., the line where the cursor is) is evaluated. You can also initiate evaluation of any selected text by pressing: <div class = "evaluateSelectionButton"></div> which is located above the editor on the left. <br><br> The editor can also evaluate at every keystroke; you can toggle this behavior using <div class = "invertEvalStatusButton"></div> also located above the editor. <br><br> Evaluation results, if any, are displayed below the editor pane. Each result is a link; clicking on it takes you an object inspector on the result. You can clear the results list by pressing the clear button to its right: <div class="hopscotchClearResultsButton"> </div> <br> If there are no results to display, the results list area is blank. Below the results list you will typically see the slots of the object listed; this the basic view of objects. Some objects, such as integers or strings, have customized views. An object can have multiple views (and you can define new views as well). If there are multiple views, tab links appear underneath the results list, and you can select between them.' mapping: mapping )- In the code, we can see how it first prepares a
mappingmap, then returns a result of message send to selfampleforth: aHTMLString mapping: mapping. The message accepts the long pure HTML string we see above, and the mapping.- In the Html snippet, we can find references to 'special' class names:
<div class="hopscotchClearResultsButton"> </div><div class="classExpander">- .. etc ..
- Note those class names (e.g. classExpander) are equivalent to the 'special' class name evaluator used by AmpleforthEmbedder, in the section 11.10
Clearly those class names are keys in the
mappingsmap.mapping at: #hopscotchClearResultsButton put: subject evaluator presenter clearResultsButton; at: #classExpander put: classExpansionLink; .. etc ..
- In the Html snippet, we can find references to 'special' class names:
We can look at "find references" on this method, and find it is defined by
HopscotchForHTML5>>Presenter>>#ampleforth:mapping:ampleforth: h <String> mapping: m <Map[String, Fragment]> = ( ^AmpleforthFragment html: h mapping: m )
- Also note that from the ObjectPresenter primary factory method it is clear ObjectPresenter implements ProgrammingPresenter which implements Presenter where the method
HopscotchForHTML5>>Presenter>>#ampleforth:mapping:is defined.
- Also note that from the ObjectPresenter primary factory method it is clear ObjectPresenter implements ProgrammingPresenter which implements Presenter where the method
The above method constructs instance of
HopscotchForHTML5>>AmpleforthFragmentas followspublic class AmpleforthFragment html: h <String> mapping: m <Map[String, Fragment]> = HTMLFragment html: h ( | mapping <Map[String, Fragment]> = m. document_slot <Alien[Document]> | processMappings. )In turn the
HopscotchForHTML5>>AmpleforthFragment>>#processMappingsdoes the following work - the core of the work is call the method#visualon all Fragments in themappings:public processMappings = ( mapping keysAndValuesDo: [:k <String> :v <Fragment> | v parent: self. domElementsWithClass: k do: [:element | element appendChild: v visual] ] )The
#visualsimply calls#createVisualand decorates it. But where is#createVisualdefined?public visual = ( visualX isNil ifTrue: [visualX:: decorate: createVisual]. ^visualX )
- which in turn calls
HopscotchForHTML5>>Fragment>>createVisual, then decorates the visual result. The important item here is
createVisual = (
  subclassResponsibility
)
which is implemented in a large number of
Fragmentsubclasses, such as:createVisual in CheckboxFragment in HopscotchForHTML5 createVisual in ColorPickerFragment in HopscotchForHTML5 createVisual in DatePickerFragment in HopscotchForHTML5 createVisual in PickerFragment in HopscotchForHTML5 createVisual in ProgressBarFragment in HopscotchForHTML5 createVisual in RadioButtonFragment in HopscotchForHTML5 createVisual in RectangleFragment in HopscotchForHTML5
From the last list, we can see those are all UI elements- checkboxes, pickers, radio buttons etc. Their concrete
createVisualimplementations use the document object to create a representation of UI elements which are clearly equivalent to DOM object, and can be converted to DOM objects. Let's look atCheckboxFragment#createVisualas an example:createVisual = ( | container <Alien[Div]> = document createElement: 'div'. label <Alien[Element]> = document createTextNode: text. | container at: 'id' put: 'CheckboxContainer'. (container at: 'style') at: 'display' put: 'flex'; at: 'flex-direction' put: 'row'; at: 'align-items' put: 'center'; at: 'justify-content' put: 'flex-start'. checkbox:: document createElement: 'input'. checkbox at: 'type' put: 'checkbox'; at: 'checked' put: checked; at: 'oninput' put: [:event | checked:: checked not. holder isNil ifFalse: [ holder value: checked. ]. action isNil ifFalse: [ action value: checked. ]. false ]. container appendChild: checkbox. container appendChild: label. (checkbox at: 'style') at: 'min-width' put: styleCheckboxSize; at: 'min-height' put: styleCheckboxSize; at: 'margin-right' put: '5px'. ^container.
Seeing the creation of an Alien DOM <div> equivalent object in this last method, we conclude our discovery of this section, How does Newspeak display something in DOM and HTML?.
Summary of the discovery:
The
#helpTextcontains a (almost) pure HTML andmappingsof special class names such ashopscotchClearResultsButton,classExpander, etc.mapping at: #hopscotchClearResultsButton put: subject evaluator presenter clearResultsButton; at: #classExpander put: classExpansionLink; .. etc ..
- We saw the
#helpText, by calling#ampleforth:mapping:created and returned an instance of classHopscotchForHTML5>>ApleforthFragment - During creation, in it's factory
HopscotchForHTML5>>AmpleforthFragment class>>#html:mapping:applies on each value frommappingtheHopscotchForHTML5>>Fragment>>#createVisualat the end of the chain - building the DOM-like objects (called Fragments). Those visual instances are then inserted in the DOM, putting together the Newspeak IDE!.
Conclusion of sequence of calls from the "Help button" click to creation of DOM elements with Help contents
We followed the sequence of method calls after the "Help button" was clicked:
Browsing>>ObjectPresenter>>#helpText- calls Presenter self by returning:HopscotchForHTML5>>Presenter>>#ampleforth:mapping:- Presenter constructs and returns a Fragment^AmpleforthFragment html: h mapping: mby calling:HopscotchForHTML5>>AmpleforthFragment class>>#html:mapping:- This AmpleforthFragment constructor does the core of the DOM-like child fragments creation by looping through mappings in:HopscotchForHTML5>>AmpleforthFragment>>#processMappings- For each mapping entry, one visual is created from "entry value" in the calls below; once the visual is returned back here, it is immediately inserted here into element with class="entry key" intodomElementsWithClassHopscotchForHTML5>>Fragment>>#visual- which calls "#createVisual" belowCheckboxFragment#createVisual- This uses "document createElement" to create, for each mapping entry, and return an Alien DOM <div> equivalent - it contains a DOM element such as a checkbox.
We saw how this sequence is responsible of presenting Help Text (with embedded Newspeak objects) as an navigatable live HTML browser-presented in the IDE, where we can explore and drill in instances, classes, or other Newspeak artifacts.
11.12. What are Newspeak "Exemplars"?
Exemplars are small Newspeak code examples placed inside comments. Their role is to provide live examples of code, as well as document typical use of a class and it's methods.
See Exemplars: Enabling liveliness everywhere for details.
11.13. Why are slot instances sometimes using uppercase name?
Here we just produce instance of hopscotchIDE on slot (note: this is instance, despite the uppercase name HopscotchIDE)
class Ampleforth packageUsing: manifest = (
  |
  private AmpleforthEmbedder = manifest AmpleforthEmbedder.
  private HopscotchIDE = manifest HopscotchWebIDE packageUsing: manifest.
  |
)
Still not sure why??
12. The Newspeak UI, HopscotchForHTML5: Analysing it by code browsing; Discovering Subject, Model, Presenter, Fragment; Writing CheckedItemApp sample App
TL;DR: This section is a code-browsing tour which discovers Hopscotch, discovering the Hopscotch MVC: the Subject, Model, Presenter, as well as Fragment, the class that translates Hopscotch classes to HTML. We use the acquired insights to write a sample App with an UI, the CheckedItemApp. If you prefer to learn from complete code, jump to the end of that section.
12.1. Discovery of the HopscotchForHTML5 class basics
12.1.1. Chapter goal
Hopscotsch is the Newspeak module used to write UIs in Newspeak. The version of Hopscotch used in today's (year 2021) Newspeak is called Hopscotch for HTML5. It is implemented in classes nested in the module's class (top level class) named HopscotchForHTML5.
The intent of this chapter is to discover things about HopscotchForHTML5 mostly by browsing it's code in the IDE, plus some previously developed intuition :)
I am trying to make the process of this chapter to be like discovering things about nature by observation. In our discovery, observation = browsing code only the Newspeak IDE. By observing, we should be able to extract knowledge and make generalizations and predictions. In our discovery, extract knowledge = understand the core API; make generalizations and predictions = be able to write a simple UI Application of our own.
Note: One important discovery tool is missing - in the current Newspeak, debugging anything in the UI is impossible, due to some known bugs.
In other words, during our discovery process in this chapter:
- Most of the information should come from browsing through the Newspeak IDE in the top level class
HopscotchForHTML5. - The end goal of our process is to write a simple Newspeak Application with UI in Hopscotch. This simple Newspeak Application is developed in chapter Using Hopscotch discovery a Model-Presenter-Subject Application, the CheckedItemApp.
- There was also the benefit of previously looking at the
CounterApp(aka cheating), but as much as possible, we are trying to extract everything we need from the "first principles" of browsing the Newspeak IDE top level classHopscotchForHTML5.
Two most important nested classes in HopscotchForHTML5 are Subject, Presenter. This statement did not come necessarily from observation (although we could claim that), but from a bit of a "previously developed intuition", as well as from the paper "Hopscotch: Towards User Interface Composition" by Vassili Bykov, 8 pages https://citeseerx.ist.psu.edu/viewdoc/download?doi=10.1.1.478.1098&rep=rep1&type=pdf. Note that the paper is about the original Hopscotch, not the HTML5 specific version. But I feel the core of the two versions seems close enough to start with the paper.
So this chapter makes a reasonable assumption that the Subject and Presenter classes are of core importance in building UIs in Newspeak. Further, opening class Presenter in the Newspeak IDE, we see that it has a parent class Fragment. Fragment is new to the new version HopscotchForHTML5 as opposed to the original Hopscotch. Because we consider Presenter important, so must be Fragment.
So, enough meta talk, and let us browse the most important code of classes Subject and Presenter - their primary factory methods. As with any Newspeak class, we should start at the primary factory methods to understand the class. Primary factory method is the only code which defines slots (slots as similar to members in other OO languages). Also we see that Fragment is parent of Presenter. So Fragment must be important; we added it's primary factory method to the constructor summary as well.
public class Subject onModel: aModel = (
  |
	public model = aModel.
  presenterSlot <Presenter>
  public helpActive <Boolean> ::= false.
  |)

public class Presenter onSubject: aSubject <Subject> = Fragment (
  |
  public subject <Subject> ::= aSubject.
  substanceSlot <Fragment>
  public generation <Number> = uiGeneration.
  |)

class Fragment = (
  |
	visualX
	public parent
	public size ::= nil.
	public expansibility ::= 0.
	public compressibility ::= 0.
	decorators
	|)
From the primary factory methods, it is immediately clear that:
- For a subject to be created, a model is required. So model must be created before subject.
- For a presenter to be created, a subject is required. So subject must be created before presenter.
12.1.2. Chapter conclusion
Lifecycle of any Hopscotch UI code:
- We need to instantiate a Model first.
- We need to instantiate a Subject on the model next.
- We need to instantiate a Presenter on the subject last.
This is quite clear from the signatures of those classes primary factory methods - there can be no other way.
A note on Newspeak syntax: while the Subject>>model slot and Presenter>>subject slots are public, they have no setters, so they are final. The value they acquire in the primary factory method cannot be changed. This is because the slots are defined using " = ", for example in public model = aModel. If the " ::= " was used instead of " = " to define the slot model, then the slot would not be final - a setter would exist. But as is, we cannot, even in principle, create the instances of Model/Subject/Presenter with null slots, change the creation order, and set the slots later.
Next two chapters will look into details of Presenter, Subject, and Model classes, and associations between them. The associations may not be important for writing UIs, but they are for understanding the Hopscotch framework.
12.2. The formulaic required repetitive methods of #isMyKind: and #isKindOfX
This chapter is jumping right into a piece that is a bit difficult to understand: The required repetitive methods of #isMyKind: other and #isKindOfX.
Comments in Fragment and Subject talk about this:
Subclasses must implement #isMyKind: which tests whether another instance is of the same kind. The implementation is #isMyKind: is formulaic, calling #isKindOfX for whatever type X the instance represents
Because Presenter is a subclass of Fragment, the equivalent of the above statement applies to Presenter.
Also, the statement indicates that #isKindOfX must be also implemented, as it should be called from #isMyKind:.
Let us summarize a practical translation of this piece of documentation:
Any time we write a concrete implementation of Presenter, Subject or Fragment, we must implement two methods. Suppose a concrete Presenter class is named MyConcretePresenter. In this class, we have to implement methods #isMyKind: other and #isKindOfMyConcretePresenter as follows:
isMyKind: other <Fragment> ^ <Boolean> = (
  ^other isKindOfMyConcretePresenter.
)

isKindOfMyConcretePresenter <Boolean> = (
  ^true.
)
Similar code needs to be added to any concrete implementation of Fragment or Subject. Just replace the "Presenter" with "Fragment" or "Subject".
In the chapters below, we will always add such methods in our code.
12.3. The Subject class: primary factory method, instance methods, how Subject knows Presenter
12.3.1. Chapter goal: Overview of the Subject class
This chapter is about the Subject class, in particular about three "important parts" we should know to understand the Newspeak UI. Those parts are also important when we write code for concrete implementations of Subject.
Let us show the code for the Subject class, keeping only the "important parts" - each of them is discussed in subchapters below.
From class Subject
(* 1. The primary factory method *)

public class Subject onModel: aModel = (
  |
  public model = aModel.
  presenterSlot <Presenter>
  public helpActive <Boolean> ::= false.
  |
) (


  (* 2. The methods that deal with associating Subject and Presenter instances *)

  public createPresenter ^<Presenter> = (
    subclassResponsibility
  )
  public presenter ^<Presenter> = (
    presenterSlot isNil ifTrue: [presenterSlot:: createPresenter].
    presenterSlot generation < uiGeneration ifTrue: [
      presenterSlot:: createPresenter.
      ].
    ^presenterSlot
  )


  (* 3. Unimplemented (abstract) methods which a concrete Subject implementation must provide *)

  isMyKind: s <Subject> ^ <Boolean> = (
    subclassResponsibility
  )


  (* Several other methods *)
)
In the subchapters below, we go over each of the "important parts".
12.3.2. The primary factory method public class Subject onModel: aModel = (..)
This is the code which creates instances, and should be called from implementations' primary factory methods. The code hold slots for model, the associated presenterSlot and a help slot. For a practical purpose of writing UIs, this is the most important code.
Concrete implementations of Subject, should (in fact must, it is enforced) invoke the Subject's factory as
public class MyConcreteSubject onModel: aModel = Subject onModel: aModel (|pseudeSlots|) (pseudoInstanceMethods) : (pseudoClassMethods)
This should be sufficient for most concrete implementations of Subject.
12.3.2.1. Note on extending a Newspeak class
The syntax above shows how to extend a class in Newspeak. Here is how we read (parse) the syntax
public class MyConcreteSubject onModel: aModel = Subject onModel: aModel (|pseudeSlots|) (pseudoInstanceMethods) : (pseudoClassMethods)
- The section
public class MyConcreteSubject onModel: aModel =defines the primary factory as usual, with nameMyConcreteSubject>>onModel: - However, the "inserted" section
Subject onModel: aModeldefines:- The superclass of
MyConcreteSubjectto beSubject - The primary factory of
Subject - That at runtime, when the primary factory of
MyConcreteSubject(theMyConcreteSubject>>#onModel:) is invoked, Newspeak will first invoke the 'superclass primary factory', theSubject>>#onModel:.
- The superclass of
- The last section
(|pseudeSlots|) (pseudoInstanceMethods) : (pseudoClassMethods)is the usual syntax which continues with the definition of the slots, instanceMethods, and classMethods ofMyConcreteSubject.
12.3.3. The unimplemented (abstract) methods: Subject>>#createPresenter and Subject>>#isMyKind: otherSubject
The full signatures of the unimplemented methods which each concrete Subject implementation must provide are:
Subject>>#public createPresenter ^<Presenter>should return the concrete Presenter instance which will present the subject. This was also discussed in the chapter above.Subject>>#isMyKind: otherSubject ^<Boolean>is repetitive but required. We have a common chapter for this, see The formulaic required repetitive methods of #isMyKind: and #isKindOfX
public createPresenter ^<Presenter> = (
  subclassResponsibility
)

isMyKind: s <Subject> ^ <Boolean> = (
  subclassResponsibility
)
In any concrete implementation of Presenter, those methods must be provided.
12.3.3.1. The method #Subject>>createPresenter discovery from existing implementations
Let us discover, from code browsing, what a concrete implementation of Subject>>#createPresenter should do.
From the name and signature, clearly the Subject>>#createPresenter should return a new instance of Presenter. Supposedly this is the actual UI instance.
We can get some hints about Presenter implementations in existing Subject extensions from the IDE. Here is an example of #createPresenter from HomeSubject. All Subject implementations do something equivalent:
From class HomeSubject
public createPresenter = (
	^HomePresenter onSubject: self
)
Conclusion: It seems clear that in any concrete implementation of Subject the method #createPresenter is intended to create and return the Presenter we want to use to present the Subject.
12.3.4. The method Subject>>#presenter creates the subject's presenter by calling the Subject>>#createPresenter, then associate the instances
12.3.4.1. Chapter goal
Goal is to discuss how a Presenter instance is created, and where are the Subject <-> Presenter associations created.
12.3.4.2. Where is Subject -> Presenter association created? In Subject>>#presenter
The exact signature is Subject>>#public presenter ^<Presenter>.
Subject holds association to it's Presenter in the Subject>>presenterSlot. This slot is instantiated lazily in Subject>>#presenter by calling Subject>>#createPresenter, then storing the instantiated presenter on the presenterSlot:
Subject
public presenter ^<Presenter> = (
  presenterSlot isNil ifTrue: [presenterSlot:: createPresenter].
  presenterSlot generation < uiGeneration ifTrue: [
    presenterSlot:: createPresenter.
    ].
  ^presenterSlot
)
So as long as something calls Subject>>#presenter, after a Subject is created, then the Subject knows about it's Presenter and keeps in on slot presenterSlot, establishing the Subject->Presenter association - which is what we wanted to show.
12.3.4.3. Where is Presenter -> Subject association created? In the Presenter primary factory method Presenter>>#class Presenter onSubject: aSubject = Fragment
The exact signature is public class Presenter onSubject: aSubject <Subject> = Fragment (..)
We can find our answer in a few steps, starting with Subject>>#presenter:
Subject>>#public presenter ^<Presenter>callsSubject>>#public createPresenter ^<Presenter>Subject>>#public createPresenter ^<Presenter>creates the Presenter. While this method is abstract, we can discover what it is intended to do:- a) From its signature
Subject>>#public createPresenter ^<Presenter> b) By looking as a concrete Presenter implementations in the IDE. Here is an example of a concrete
#createPresenterfromHomeSubjectFrom class HomeSubjectpublic createPresenter = ( ^HomePresenter onSubject: self )
Clearly the conclusion from both is this: The intent of
Subject>>#public createPresenter ^<Presenter>is to create a presenter which presents theSubjectinstance, and return it
- a) From its signature
Next, let us study the concrete discovered example of
HomePresenter's primary factory method.class HomePresenter onSubject: s = Presenter onSubject: s ( )
This is a standard Newspeak syntax for a super call. The primary factory method
HomePresenter>>#onSubject: subjectcalls the superclassPresenter>>#onSubject: subjectHaving shown that, we can get back to this line:
HomePresenter onSubject: self- note that self is subjectThis will cause the call to the "super"
Presenter>>#onSubject: subject. This "super"Presenter>>#onSubject: subjectcall places the passed subject on slot "subject" in the Presenter's primary factory method:public class Presenter onSubject: aSubject <Subject> = Fragment ( | public subject <Subject> ::= aSubject. substanceSlot <Fragment> public generation <Number> = uiGeneration. |)
- So this line
public subject <Subject> ::= aSubjectcreates the association from Presenter -> Subject. The associated subject instance is kept on slotPresenter>>subject.
This is what we have shown in summary: Calling a concrete subject's #presenter such as HomeSubject#presenter will associate Presenter -> Subject.
Also, along with the previous chapter, callin Subject>>#presenter also creates the association "the other way". By calling Subject>>#presenter, the bidirectional associations Presenter <-> Subject is established.
"Some code" must call the Subject>>#presenter though.
12.3.5. Chapter conclusion about principles of writing rudimentary Hopscotch UI
In the conclusion of chapter Discovery of the HopscotchForHTML5 class basics we already discovered an important lifecycle any UI code need to perform: Create an instance of a Model first, a Subject next, a Presenter last.
In this chapter The Subject class: primary factory method, instance methods, how Subject knows Presenter we added the following conclusions:
Conclusion 1: As long as the Subject>>#presenter is invoked (on an existing subject instance), two important things happen:
- A
Presenterinstance is created. - The bidirectional association between the subject and presenter instances is established.
Conclusion 2: So, when creating UIs, our code must invoke the Subject>>#presenter method, directly, or indirectly by calling some other method that ends up calling Subject>>#presenter.
Conclusion 3: Model can be any object. ConcreteSubject must extend the Subject. Also the ConcreteSubject primary factory method must declare the primary factory method on the superclass Subject - see The primary factory method public class Subject onModel: aModel = (..) ; chapters below come to the equivalent conclusion for ConcretePresenter.
Based on the conclusions 1, 2, 3, we can already write some pseudocode for writing core UI:
intermediary code - do not use yet
|concreteModel concreteSubject concretePresenter| concreteModel:: ConcreteModel new. concreteSubject:: ConcreteSubject onModel: concreteModel. concreteSubject presenter.
Note the last line concreteSubject presenter.: Why did we not use concreteSubject:: ConcretePresenter onSubject: concreteSubject. instead, as seemingly this would achieve the presenter creation anyway?
The answer to this question is as follows: While the latter code is certainly possible to use in principle, we have seen in the overview of Subject APIs above, that Hopscotch provides the method Subject>>#presenter which not only creates the Presenter instance by calling Subject>>#createPresenter, but also wires up the Presenter <-> Subject associations!
Clearly, the framework intents application code not to create Presenter instances directly, but intends for application code to call Subject>>#presenter. However, this call should not be made directly in application code either. In chapter HopscotchForHTML5: Analyzing senders of Subject>>#presenter and why HopscotchWindow>>#openSubject: subject should be invoked instead we provided some long reasoning for the following conclusion:
Conclusion 4: The root level of an application should not create Presenter directly or by calling Subject>>#presenter directly. Instead, application should invoke
HopscotchWindow>>#openSubject: subject
This invocation eventually invokes Subject>>#presenter as intended, but does additional work of placing the creater Presenter instance in the context of the container body.
So we arrived at a summary conclusion.
Summary conclusion: Here is the code for a barebones Hopscotch App
|concreteModel concreteSubject concretePresenter| concreteModel:: ConcreteModel new. concreteSubject:: ConcreteSubject onModel: concreteModel. hopscotchWindow openSubject: concreteSubject.
The last line will create instance of ConcretePresenter by calling ConcreteSubject>>#presenter and open it in a new window where the Application will live! This snippet does not show code of ConcreteModel ConcreteSubject ConcretePresenter, or how we obtain the hopscotchWindow. We will get to that when creating a concrete Application in Using Hopscotch discovery a Model-Presenter-Subject Application, the CheckedItemApp
12.4. The Presenter class: primary factory method, instance methods, how Presenter knows Subject
12.4.1. Chapter goal: Overview of the Presenter class
This chapter is about the Presenter class, in particular about three "important parts" we should know to understand the Newspeak UI. Those parts are also important when we write code for concrete implementations of Presenter.
Let us show the code for the Presenter class, keeping only the "important parts" - each of them is discussed in subchapters below.
(* The primary factory method.
The constructor also creates the association from Presenter instance to Subject instance
by keeping the associated subject slot
*)
public class Presenter onSubject: aSubject <Subject> = Fragment (
|
public subject <Subject> ::= aSubject.
substanceSlot <Fragment>
public generation <Number> = uiGeneration.
|
) (
(* The unimplemented (abstract) method "definition"
which a concrete Presenter implementation must provide.
Implementations should return a Fragment - something that shows a UI.
*)
public definition ^<Fragment> = (
subclassResponsibility
)
(* Further unimplemented (abstract) methods inherited from Fragment *)
isMyKind: f <Fragment> ^ <Boolean> = (
subclassResponsibility
)
(* A few selected methods which allow Presenter instances to create instances of Fragments - Fragments are UI Widgets
*)
row: definitions = (
^RowComposer definitions: definitions
)
button: label <String> action: block <[]> = (
^ButtonFragment label: label action: block
)
checkbox: text <String> value: v <Holder> action: a <[:Boolean]> = (
^CheckboxFragment text: text value: v action: a
)
radioButton: text <String> value: v <Holder> group: g <Integer> action: a <[:Boolean]> = (
^RadioButtonFragment text: text value: v group: g action: a
)
rectangle = (
^RectangleFragment new
)
)
In the subchapters below, we go over each of the "important parts".
12.4.2. The primary factory method class Presenter onSubject: aSubject = Fragment (..)
The primary factory method has the exact signature
public class Presenter onSubject: aSubject <Subject> = Fragment (..)
It creates a presenter on subject, and also establishes the association from Presenter instance to Subject instance as slot Presenter>>subject.
12.4.3. The unimplemented (abstract) methods: Presenter>>#definition and Presenter>>#isMyKind: fragment
The precise signatures of unimplemented methods that each concrete Presenter must provide:
Presenter>>#public definition ^<Fragment>should create and return the actual "widget" (presentation view)Presenter>>#isMyKind: f <Fragment> ^<Boolean>is repetitive but required. It is inherited from classFragment. We have a common chapter for this, see The formulaic required repetitive methods of #isMyKind: and #isKindOfX
12.4.3.1. The method Presenter>>#definition - provides the UI view
Full signature is Presenter>>#definition ^<Fragment>.
This method is of core significance when writing UIs.
The concrete implementations should return the actual "widget" (presentation) - basically, this method returns the widget we want to see in the UI.
public definition ^<Fragment> = ( subclassResponsibility )
For a sample implementation, see the #definition method in Class CheckedItemPresenter, or in the complete code in 5. Complete code and UI of the CheckedItemApp.
12.4.4. Instance methods on Presenter that create instances of Fragments
Fragments are UI Widgets.
It is worth realizing there are instance methods on Presenter which can create Fragments (widgets). Such widgets perform
- layout (see method
#row:or#column:on class Presenter) - "atomic" widgets (see method
#button: labelorcheckbox: text
Browse the IDE for more details.
12.4.5. Presenter extends Fragment
In addition, from the Presenter factory
public class Presenter onSubject: aSubject <Subject> = Fragment (
  |
  public subject <Subject> ::= aSubject.
  substanceSlot <Fragment>
  public generation <Number> = uiGeneration.
  |)
we see that Presenter extends Fragment.
What is Fragment and what is it's role? Let us look at Fragment in a separate chapter.
12.5. The Fragment class
From looking at Presenter, we have already seen that Fragment is a base class for Presenter. Fragment is the root of the hierarchy for logical UI tree nodes.
Although an important part of HopscotchForHTML5, we will not talk about Fragments beside showing it's slots - reason is we will not need Fragment to write our concrete simple app.
class Fragment = ( | visualX public parent public size ::= nil. public expansibility ::= 0. public compressibility ::= 0. decorators |)
12.6. Summary of Subject and it's model, Presenter and Fragment, their associations, and their lifecycle
Let us summarize the core classes of Hopscotch: Subject and it's model, Presenter and Fragment described in chapters above.
Subject: can be thought of as "address + viewport"; is passed to NavigationHistory; instantiates it's Presenter;See The Subject class: primary factory method, instance methods, how Subject knows Presenter
Presenter: presents domain objects; is part of hierarchical structure of presenters; instantiates and controls Widgets (Fragments); once instantiated, is the UI presentation of it's Subject;See The Presenter class: primary factory method, instance methods, how Presenter knows Subject
- Important methods:
Subject>>#presenter- callsSubject>>#createPresenterthen associates Subject -> Presenter. See Where is Subject -> Presenter association created? In Subject>>#presenterSubject>>#createPresentercreates and returns the presenter instance by calling the concrete Presenter's primary factory method. See The unimplemented (abstract) methods: Subject>>#createPresenter and Subject>>#isMyKind: otherSubjectPresenter>>#definitioncreates the Fragment the presenter uses to present itself (view). See The unimplemented (abstract) methods: Presenter>>#definition and Presenter>>#isMyKind: fragmentclass Subject>>#onModel: aModel- primary factory method associates Subject -> Model. See The primary factory method public class Subject onModel: aModel = (..)class Presenter>>#onSubject: selfSubject- primary factory method associates Presenter -> Subject. See The primary factory method class Presenter onSubject: aSubject = Fragment (..)
We established that associations between
*Subject* and it's model, *Presenter* and *Fragment*are as follows:- Presenter -> Subject -> Model
- Presenter <- Subject <-w Model (-> and <- means association, <-w means weak association- may not exist in some implementations)
- Both directions in the Presenter <-> Subject association are established by calling the
Subject>>#presentermethod - The Subject -> Model association is established in the Subject primary factory method
Subject class>>#onModel: aModel.
See Where is Subject -> Presenter association created? In Subject>>#presenter and Where is Presenter -> Subject association created? In the Presenter primary factory method Presenter>>#class Presenter onSubject: aSubject = Fragment
- Lifecycle discoveries: We need to create a model first, a subject next, a presenter last. See Chapter conclusion about principles of writing rudimentary Hopscotch UI for many details and also Discovery of the HopscotchForHTML5 class basics
- Presenter should not be constructed in code directly using it's primary factory method. It should be constructed indirectly as
hopscotchWindow openSubject: concreteSubject.. See Chapter conclusion about principles of writing rudimentary Hopscotch UI. - To implement some concrete UI, developer should:
- implement classes for
ConcreteModel,ConcreteSubject, andConcretePresenter - All abstract methods in the above classes must be implemented. In particular, code methods to implement are
ConcreteSubject>>#createPresenterwhich should create and return presenter for the subject. This should return typically,ConcretePresenter onSubject: selfConcretePresenter>>#definewhich should create and return the Fragment (Presenter). This is a widget or multiple widgets layed out (e.g. row with a checkbox, label, and an icon)
- Write rudimentary code in Chapter conclusion about principles of writing rudimentary Hopscotch UI
- implement classes for
The above steps should be sufficient to write a basic Application with Hopscotch UI, which we will do in later chapter Using Hopscotch discovery a Model-Presenter-Subject Application, the CheckedItemApp.
12.7. Back to HopscotchForHTML5 and how it relates to HopscotchForHTML5Runtime
12.7.1. Chapter goal
The goal of this chapter is to discover more about HopscotchForHTML5 and how it relates to HopscotchForHTML5Runtime.
Ok, so we "know" that HopscotchForHTML5 provides the Newspeak UI for the web version. We have seen it defines (as nested classes) the core UI classes Subject, Presenter, and Fragment.
Looking at the top level, we see two related classes, HopscotchForHTML5 and HopscotchForHTML5Runtime. So what is the latter class good for?
12.7.2. The HopscotchForHTML5 class
Let us get back for a minute to HopscotchForHTML5. We have seen, that is has a ton of slots and classes we would associate with UI elements, such as
(* primary factory method *) class HopscotchForHTML5 usingPlatform: p images: images ducts: ds = ( | (* Imports *) private Color = p graphics Color. private Context = p graphics Context. private Holder = ds Holder. private Font = p fonts Font. .. etc .. public styleZebraPrimaryColor = Color white. public styleZebraSecondaryColor = Color gray: 0.97. |)
(* Selected nested classes *) class ButtonFragment class DatePickerFragment .. etc .. class Subject class Presented class Fragment .. etc ..
We alreary concluded that we will need an instance of HopscotchForHTML5 if we want to build any UI for our Apps.
12.7.3. The HopscotchForHTML5Runtime class
Analyzing the class HopscotchForHTML5Runtime, we see that:
It has the primary factory method
#packageUsing: manifest. From the Api chapters, for example 4. Application module: API of module that needs to be distributed as an App we know that such top level classes are apps, but, lacking the#main: platform args: argsmethod, such module is used as library module. The primary factory which packages the UI class,HopscotchForHTML5, on it's slotHopscotchalong with other UI-required classesFonts,Graphics, etc:(* primary factory method *) class HopscotchForHTML5Runtime packageUsing: manifest = ( | private Fonts = manifest FontsForHTML5. private Graphics = manifest GraphicsForHTML5. private TextModule = manifest TextModule. private Hopscotch = manifest HopscotchForHTML5. private Ducts = manifest Ducts. private images = Images packageUsing: manifest. | )
It also has an instance method
#using: platform, which calls the primary factory method ofPlatformWithHopscotchand returns it's instance. When running the web-based Newspeak, the returned instance is theplatform <PlatformWithHopscotch>object, passed to any primary factory of any module that needs a platform,public using: platform = ( ^PlatformWithHopscotch usingPlatform: platform )
The presence of the two methods clearly shows HopscotchForHTML5Runtime packages all three classes (HopscotchForHTML5, Ducts, images) that we will need to create HopscotchForHTML5 using its primary factory method HopscotchForHTML5>>#usingPlatform: p images: images ducts: ds.
So, the HopscotchForHTML5Runtime packages everything we need for HopscotchForHTML5
In addition, we see that the inner class HopscotchForHTML5Runtime>>PlatformWithHopscotch is a convenience class which already pre-creates instance of HopscotchForHTML5 in this PlatformWithHopscotch snippet:
class PlatformWithHopscotch usingPlatform: platform = (
(* primary factory method *)
|
public isKindOfPlatformWithElectron = platform isKindOfPlatformWithElectron.
public kernel = platform kernel.
public collections = platform collections.
public actors = platform actors.
public mirrors = platform mirrors.
public js = platform js.
public operatingSystem = platform operatingSystem.
public fonts = Fonts usingPlatform: self.
public graphics = Graphics usingPlatform: self.
public text = TextModule usingPlatform: self.
public hopscotch = Hopscotch usingPlatform: self images: images ducts: (Ducts usingPlatform: self).
public local = platform.
public victoryFuel = platform operatingSystem = 'emscripten' ifTrue: [platform victoryFuel].
|
)
A core question: what object is in the slot hopscotch in the above factory? Let's follow these points:
HopscotchForHTML5Runtime, the outer class ofPlatformWithHopscotchcreates this slot:private Hopscotch = manifest HopscotchForHTML5.clearly, the
Hopscotchslot onHopscotchForHTML5Runtimeholds the classHopscotchForHTML5.Next we see this line in the
PlatformWithHopscotchprimary factory method above - theclass PlatformWithHopscotch usingPlatform: platform:public hopscotch = Hopscotch usingPlatform: self images: images ducts: (Ducts usingPlatform: self)uses the expression
Hopscotch. What does it refer to?? In Newspeak, an expression like this used in a primary factory method slot, must be somewhere in the scope of the primary factory method's scope! The only items in scope there, must be in a slot of a parent class! Parent class ofPlatformWithHopscotchisHopscotchForHTML5Runtime. So thisHopscotchwe are talking about here refers to aHopscotchslot inHopscotchForHTML5Runtime. And we have seen in item 1, that it holds the classHopscotchForHTML5. As a result, the primary factory method inpublic hopscotch = Hopscotch usingPlatform: self images: images ducts: (Ducts usingPlatform: self)is the same as
public hopscotch = HopscotchForHTML5 usingPlatform: self images: images ducts: (Ducts usingPlatform: self)
From there we have the answer to our core question of this paragraph: The slot hopscotch in the factory for PlatformWithHopscotch is instance of HopscotchForHTML5
Now let's draw two conclusions we arrived at in this paragraph:
- Conclusion 1. The module HopscotchForHTML5Runtime is a packaging library for instances of HopscotchForHTML5. By packaging the runtime, everything we need to write UI code is available in the HopscotchForHTML5 instance. How do we get such instance? This is described in Conclusion 2.
Conclusion 2. Any code that is able to create
hopscotch, an instance ofHopscotchForHTML5Runtimewill have access to instance ofHopscotchForHTML5using the second line below:hopscotch using: platform.<== this is instance of PlatformWithHopscotch(hopscotch using: platform) hopscotch.<== hopscotch is the slot on PlatformWithHopscotch.hopscotchis instance of HopscotchForHTML5 as we have seen above.- Conclusion 3. The module HopscotchForHTML5Runtime can be asked for the
platformobject. Theplatformtype is<HopscotchForHTML5Runtime>>PlatformWithHopscotch>, and is passed to any module when running in context of the Web based Newspeak.
Summary: In this chapter, we deduced code we need to obtain hopscotch, an instance of HopscotchForHTML5. This instance is all we need to write any Newspeak UI.
12.8. Using Hopscotch discovery a Model-Presenter-Subject Application, the CheckedItemApp
12.8.1. Chapter goal
This chapter uses Hopscotch knowledge acquired in the above chapters, to develop a sample UI Application in Newspeak.
As with other Applications with UI, we will need two top level classes. Let us name the Application class CheckedItemApp and it's UI class CheckedItemUI. The basic structure of an Application with UI was already described on several examples, including Code, run, and debug the CounterApp in Newspeak .
The knowledge about a structure of a UI class, the Model-Presenter-Subject was developed by browsing the HopscotchForHTML5 in Discovery of the HopscotchForHTML5 class basics, and is used below in 3. Write code for CheckedItemUI, the class showing the UI.
12.8.2. 1. Start coding the Application class CheckedItemApp
We will use information about APIs that define a Newspeak Application from chapter 4. Application module: API of module that needs to be distributed as an App and 3. Hello World from Application to create the application class CheckedItemApp.
First, we create the class for a top level Application module. We can create this class in the IDE, or create the class in a text file, then "Compile file(s)". We start with a text file.
Regarding the methods the CheckedItemApp class should have, there should be a primary factory #packageUsing: manifest and an instance method #main: platform args: args. This makes the class a packageble, distributable, and runnable Newspeak app (an Application module). See Newspeak modules API zoo for Newspeak "convention methods" signatures.
class CheckedItemApp
class CheckedItemApp packageUsing: manifest = ()
(
public main: platform args: args = (
'Hello World from HelloWorldApp' out.
)
)
12.8.3. 3. Write code for CheckedItemUI, the class showing the UI
Chapter introduction and goal: In this chapter, we will write CheckedItemUI, the UI of the application. The UI code will be spread over several nested classes of the top level class CheckedItemUI. To write this UI, we will use the knowledge discovered and summarized in chapter Summary of Subject and it's model, Presenter and Fragment, their associations, and their lifecycle. We will need to create concrete nested classes for the Model, Subject and Presenter, then we will need to instantiate those classes (in that order) to form the UI.
The UI will be extremely simple: a label with text "check this", and one check box. We should be able to check the checkbox. That is all.
Note that we will not write any Fragment (Widget) classes, we only use some preexisting fragment-creation methods discovered by browsing HopscotchForHTLM5>>Presenter such as #row:, #label: and #checkbox:.
Chapters below describe writing the code for CheckedItemUI step by step.
12.8.3.1. Class CheckedItemUI
Let's add a new top level class CheckedItemUI.
We plan for the new top level class CheckedItemUI to contain:
- Slots needed to create elements in the instance of this class.
- Nested classes
CheckedItemModel,CheckedItemSubjectandCheckedItemPresenterwhich we will create below. Important: Notice that these classes are nested in the top level class (module)CheckedItemUI. This is a natural modularization we would use in Newspeak; so the classes' naming prefixCheckedIteminCheckedItemModeland other nested classes introduced in this chapter is not needed. We will keep the class names prefix for the purpose of clarity of the text. Also notice this nesting mimics the nesting ofSubjectandPresenterin the moduleHopscotchForHTML5.
We can start only with the barenones of our UI, like this:
class CheckedItemUI
class CheckedItemUI = () ()
We will add it's primary factory method, slots, and it's nested classes along the way in later chapters. In particular we will add:
- The nested classes will be added naturally by adding them inside
CheckedItemUIin the IDE. This happens in chapters Class CheckedItemModel, Class CheckedItemSubject, and Class CheckedItemPresenter . - The primary factory method and slots will be added once we finish the rest of the app code and the UI code - in chapter When the app runs in the #main:args: method, instantiate the CheckedItemUI and its subchapters.
12.8.3.2. Class CheckedItemModel
As discussed in Summary of Subject and it's model, Presenter and Fragment, their associations, and their lifecycle, we start writing UI with writing the model class. As this is a part of the UI, a natural way to express such composition is to make the model class a nested class in CheckedItemUI.
Let's name the model class CheckedItemModel.
To support the UI, we need two slots in our model: a string for the itemText, and a Boolean isChecked, representing if the checkbox was selected. We also add a third slot itemTextWithStatus for tracking the isChecked as text. Our model class extends Object by default; it's primary factory method is the default #new method. Neither the default parent class Object nor the default primary factory method #new need to be specified in Newspeak.
class CheckedItemModel
public class CheckedItemModel = ( | public itemText = 'Not Editable Todo itemText: '. public itemTextWithStatus ::= itemText, ' : STILL TODO'. public isChecked ::= false. | ) ( )
12.8.3.3. Class CheckedItemSubject
Having defined a model class CheckedItemModel, we need to define our UI's concrete Subject class, let's name it CheckedItemSubject. Naturally, it will be an extension of Subject. As mentioned, it will be nested in CheckedItemUI.
Recall from The Subject class: primary factory method, instance methods, how Subject knows Presenter that the primary factory method of Subject is Subject>>#onModel: model. This will associate subject with it's model. We will use the same name for the primary factory method for our CheckedItemSubject and call the super factory from Subject.
We will also use the knowledge from the same chapter regarding it's primary factory method and abstract methods we need to implement. Let us summarize it here again:
- The primary factory method of our
CheckedItemSubjectwill call the primary factory method of it's parent,Subject>>#onModel: model. This is expressed by the signaturepublic class CheckedItemSubject onModel: model = Subject onModel: modelwhere our new class calls the super primary factorySubject>>#onModel: model. Subjectclass has an abstract method#createPresenter(indicated by "subclassResponsibility") which should return a presenter. In the same link, we saw that#createPresentershould create an instance of Presenter (the yet-to-be-createdCheckedItemPresenter). The instance should then be returned.- We need to add the formulaic implementations of
#isMyKindand#isKindOfCheckedItemSubject. See The formulaic required repetitive methods of #isMyKind: and #isKindOfX.
So the code for our concrete Subject CheckedItemSubject which implements the desired primary factory method and all abstract methods implemented should be:
class CheckedItemSubject
public class CheckedItemSubject onModel: model = Subject onModel: model (
) (
(* Important override: Creates Presenter. Called by the framework in openSubject called
from ~CheckedItemApp>>#main:args:~ when calling ~HopscotchWindow openSubject: checkedItemSubject.~
Framework also associates Subject -> Presenter via Subject>>#presenterSlot:: ^createPresenter
*)
createPresenter = (
^CheckedItemPresenter onSubject: self.
)
(* required isMyKind and isKindOfX formulaic methods *)
isMyKind: other = (
^ other isKindOfCheckedItemSubject.
)
isKindOfCheckedItemSubject = (
^ true.
)
)
12.8.3.4. Class CheckedItemPresenter
Having defined a model class CheckedItemModel and a subject class CheckedItemSubject, we will need the last piece of our UI, the concrete Presenter class.
Presenter is the class which does the work of creating the UI widgets. We have seen in chapter The Presenter class: primary factory method, instance methods, how Presenter knows Subject that Presenter is created in the primary factory method Presenter>>#onSubject: subject, and it contains important wiring of the subject and presenter associations. Our concrete class primary factory method must do the same, so it needs to call this parent factory. This is done using primary primary factory method CheckedItemPresenter onSubject: subject = Presenter onSubject: subject ()
For a concrete UI, method which creates the UI view is #definition. It does that by creating and returning Fragmets or Presenter objects. The created objects can be a composition of both layout elements such as rows and columns, and widgets such as checkboxes and labels.
Also, we will need The formulaic required repetitive methods of #isMyKind: and #isKindOfX.
As with the model and subject, we make the CheckedItemPresenter an inner class of CheckedItemUI, by clicking the + beside Classes inside CheckedItemUI.
class CheckedItemPresenter
public class CheckedItemPresenter onSubject: subject = Presenter onSubject: subject (
) (
public definition = (
^column: {
(* Note: #label: and #checkbox:value:action: are methods on presenter *)
label: 'Rudimentary TODO App'.
checkbox: subject model itemTextWithStatus
value: subject model isChecked
action: [ :aaachecked | updateGUI:
[ (subject model isChecked)
ifTrue: [
subject model isChecked: false.
subject model itemTextWithStatus: subject model itemText, ' : STILL TODO'.
]
ifFalse: [
subject model isChecked: true.
subject model itemTextWithStatus: subject model itemText, ' : DONE'.
]
]
]
.
}.
)
isMyKind: other = (
^other isKindOfCheckedItemPresenter.
)
isKindOfCheckedItemPresenter = (
^true.
)
)
12.8.4. 4. Integrate the CheckedItemUI into the CheckedItemApp
So far we have prepared two separate classes:
CheckedItemApp: We created this class as a (so far almost empty) top level class in 1. Start coding the Application class CheckedItemApp. We equipped the class with API methods that make the class instance an application.CheckedItemUI: We added this class in step 3. Write code for CheckedItemUI, the class showing the UI. In that step, we also added the code that creates a row of widgets (fragments) in theCheckedItemUI>>#definemethod.
In the rest of this chapter, we finish integrating the CheckedItemUI into the CheckedItemApp by creating an instance of CheckedItemUI in the main method of the CheckedItemApp. This instance creation will perform the process of showing our UI, defined in the CheckedItemUI>>#define method.
12.8.4.1. Package the CheckedItemUI class into the CheckedItemApp
As we know, Newspeak must explicitly package all dependencies that may not exist on the target system where we deploy our CheckedItemApp app.
The packaging is done inside the IDE in "convention method" named CheckedItemApp>>#packageUsing: manifest.
The code changes we need to make to achieve the dependency packaging is marked here:
class CheckedItemApp
class CheckedItemApp packageUsing: manifest = ( | (* Added 1-line to package the CheckedItemUI class on slot with same name *) CheckedItemUI = manifest CheckedItemUI. | )
The CheckedItemUI class is pulled (from manifest) and stored on a slot named CheckedItemUI (this is customary, to name the slot same as the class name, but does not have to be). This is similar to importing the class CheckedItemUI into CheckedItemApp in other languages.
However, packaging in Newspeak performed by placing some object or class on slot does more. Apart from declaring the dependency of CheckedItemApp on CheckedItemUI, the actual CODE for the class CheckedItemUI will be serialized and shipped with the CheckedItemApp, when it is serialized as CheckedItemApp.vfuel.
12.8.4.2. When the app runs in the #main:args: method, instantiate the CheckedItemUI
When the CheckedItemApp starts (which we know is in the #main:args method), we need to create an instance of CheckedItemUI. Once we have the instance, we need to create instances of the nested model, then subject, then presenter.
In the summary conclusion in Chapter conclusion about principles of writing rudimentary Hopscotch UI we have summarized how a rudimentary Hopscotch UI should be created. Let us repeat it here:
|concreteModel concreteSubject concretePresenter|
concreteModel:: ConcreteModel new.
concreteSubject:: ConcreteSubject onModel: concreteModel.
hopscotchWindow openSubject: concreteSubject.
So let us expand this snippet to the full UI code that will run when the app starts. Instead of the above snippet names starting with Concrete start them with CheckedItem.
class CheckedItemApp
public main: platform args: args = (
  |
  (* WHILE WE DEDUCED HOW THIS BEHAVES IN THE IDE, THE VFUEL BEHAVIOR IS ONLY DESCRIBED HERE.
     In IDE: When main is invoked by clicking [run] or [debug] in the IDE,
       we just pass it the platform. Note that calling 'platform hopscotch' returns hopscotchForHTML5.

     Electron and vfuel: platform behaves same as IDE platform.

     LEGACY vfuel note: When main was invoked in the vfuel app, the passed platform
               did not contain hopscotch. That is why the legacy primary factory
               App>#packageUsing: manifest had to package slot hopscotchForHTML5Runtime, then use it here.
               This is no longer needed.
  *)

  (* Added 1-line to instantiate CheckedItemUI from the platform - which has hopscotch available *)
  checkedItemUI = CheckedItemUI usingPlatform: platform.

  (* Added 3 temporary slots to verbosely process *)
  checkedItemModel
  checkedItemSubject
  |

  (* Added 3-lines to show steps very verbosely.
     The last line creates a window, instantiates a Presenter
     and it's definition fragments.
  *)
  checkedItemModel:: checkedItemUI CheckedItemModel new.
  checkedItemSubject:: checkedItemUI CheckedItemSubject onModel: checkedItemModel.
  platform hopscotch HopscotchWindow openSubject: checkedItemSubject.

  (* Note that the above code does NOT EXPLICITLY instantiate the Presenter here -
     that is already done implicitly by the super Subject,
     during ~checkedItemSubject:: checkedItemUI CheckedItemSubject onModel: checkedItemModel~
     by the super calling the ~Subject#createPresenter~
  *)

  (* also removed: 'Hello World from HelloWorldApp' out. *)
)
See 13.1 for how Subject#createPresenter is implicitly invoked.
Let's go over the added lines, and why they were added this way.
12.8.4.2.1. Why did we add, in CheckedItemApp, the line calling primary factory method of CheckedItemUI?
So, why did we add this line to the CheckedItemApp>>#main:args: method:
checkedItemUI = CheckedItemUI usingPlatform: platform.?
Explanation:
- The Application module
CheckedItemAppis merely a (packagable) wrapper around the general moduleCheckedItemUI. TheCheckedItemUIneeds a primary factory method such asCheckedItemUI>>#usingPlatform: platform.which is passed a platform object. At runtime, during their instantiation, instances of top level classes "import" dependencies from theplatform. All top level classes that are general modules need such primary factory method. It was discussed at length in the early sections, around and after section Application and library modules in Newspeak and summarized in Newspeak modules API zoo. This is what the added line expresses: It creates an instance of CheckedItemUI and stores it on a local variable. - Looking back to chapter Class CheckedItemUI, we did not add any slots or constructors for the top level class
CheckedItemUIso far. OurCheckedItemUIwill definitely need to "import" and "hold on" classes or instances ofSubjectandPresenterfor use in it's nested classesCheckedItemSubjectandCheckedItemPresenter.
This explanation also leads to the need to beef up the module CheckedItemUI by adding both a primary factory method and slots for classes needed by nested children.
So as discussed in the explanation, let's add the primary factory method and it's slots to CheckedItemUI.
Replace the CheckedItemUI>>#new constructor with the following:
class CheckedItemUI
class CheckedItemUI usingPlatform: platform = (
(* Added this primary factory method and slots for Subject and Presenter *)
|
Subject   = platform hopscotch Subject.
Presenter = platform hopscotch Presenter.
|
)
platform hopscotch returns instance of HopscotchForHTML5 which has access to the HopscotchForHTML5>>#Subject and HopscotchForHTML5>>#Presenter nested classes (among others). The added code above just stores them on slots of CheckedItemUI with same names.
To recap, the classes stored on slots Subject and Presenter are needed in the CheckedItemUI for use by its nested classes, the CheckedItemPresenter and CheckedItemSubject. When the nested classes refer to Subject and Presenter in their code - for example in the constructor line CheckedItemSubject onModel: model = Subject onModel: - the Subject can only be found if it is on a slot of either the CheckedItemSubject or the owner CheckedItemUI. As always in Newspeak, all dependencies must be found somewhere in the slot scope going up.
A note: The need to put Subject on slot of CheckedItemUI rather than (for example) on the CheckedItemSubject is due to the fact that any element used in the constructor of CheckedItemSubject must be available in the scope of slots in nesting classes all the way up, when the contructor is called.
In summary, as the CheckedItemApp>>#main:args: is called, it should:
- instantiate the class on it's slot
CheckedItemUIand store instance on local slotcheckedItemUI - declare some local variables checkedItemModel/Subject/Presenter for their instances
- create model instance using
checkedItemModel:: checkedItemUI CheckedItemModel new. Note how inner classCheckedItemModelis referred to from instancecheckedItemUI - create subject instance using
checkedItemSubject:: checkedItemUI CheckedItemSubject onModel: checkedItemModel. - open hopsotch window on the subject using
platform hopscotch HopscotchWindow openSubject: checkedItemSubject. - See 13.1 on how Presented is instantiated and Subject -> Presenter associated
The local variable checkedItemUI will be used to create and show the UI in the code detailed in the next chapter.
12.8.4.2.2. What are the lines at the end of CheckedItemApp#main:args?
This is the last step we need to discuss!
The last three lines below create the rudimentary Hopscotch UI with a window, and an instance of CheckedItemPresenter placed in the window. For details, see When the app runs in the #main:args: method, instantiate the CheckedItemUI and in detail in Chapter conclusion about principles of writing rudimentary Hopscotch UI.
class CheckedItemApp
(* Added 3-lines to show steps very verbosely.
   The last line creates a window, instantiates a Presenter
   and it's definition fragments.
*)
checkedItemModel:: checkedItemUI CheckedItemModel new.
checkedItemSubject:: checkedItemUI CheckedItemSubject onModel: checkedItemModel.
platform hopscotch HopscotchWindow openSubject: checkedItemSubject.
Notice this code is at the very end of the method CheckedItemApp>>#main:args: which we know as the "convention method" that executes the Application. The line
platform hopscotch HopscotchWindow openSubject: checkedItemSubject.
is the last line of our application. Executing this line, Hopscotch takes over, creates the UI and starts interaction with user's input devices.
In the last chapter, we merely summarize code for all classes we created for our App, the CheckedItemApp.
12.8.5. 5. Complete code and UI of the CheckedItemApp
The complete code and UI of the CheckedItemApp can be found here:
https://github.com/mzimmerm/newspeak-doc/tree/main/newspeak---a-few-notes-code/checked-item-app
To skip the coding details above, we can "Compile file(s)" to load full finished code from there and study it. The classes will appear in the IDE.

Clicking the [run] executes the app from the IDE, and presents its UI:

and after checking the item we get

You can also package it and run the Application as a standalone .vfuel file from the IDE, by clicking the [deploy] link beside the class name, then selecting "As VictoryFuel with Mirrors".

More details on deployment for another sample Application is in the intro section around Make deployment file for CounterApp
Note: The code for the CheckedItemApp built here is as simple as it can be, to focus on understanding HopscotchForHTML5. The Application should be improved in the future. The main weakness of the current version is that it exposes model publicly - model should be private wrapped in Subject.
This concludes the chapter that explores writing UIs in HopscotchForHTML5.
13. Analyzing classes HopscotchForHTML5, Browsing, etc
13.1. HopscotchForHTML5: Analyzing senders of Subject>>#presenter and why HopscotchWindow>>#openSubject: subject should be invoked instead
Motivation: We know that Subject>>#presenter is a crucial method that creates a presenter for an existing subject, and establishes their association. We want to find the method or methods applications should invoke that eventually lead to calling Subject>>#presenter.
We know Subject>>#presenter invokes Subject>>#createPresenter. This seems a good indication that the Hopscotch framework creators wanted us to invoke Subject>>#presenter to get us from a Subject instance to a Presenter instance (the one created in Subject>>#createPresenter); the Presenter instantiated there would then present the UI. (We already discussed that it is reasonable to assume that implementations of Subject>>#createPresenter should create and return a concrete Presenter.)
But do we know whether:
- We are supposed to invoke
Subject>>#presenterdirectly in our application? - Or is the intent of Hopscotch that our application should invoke some other method and through several steps inside the Hopscotsch framework eventually call
Subject>>#presenter?
Well that is a good detective story. Let us take a wild assumption that item 2 is the intended method.
There is a vague weak supporting reason for possibility 2. An Application will have to create something like a Window, a Frame, or some such object into which our app will be presented. So maybe, a good place to look for a method our application should invoke (instead of Subject>>#presenter, is some kind of Window creation in HopscotchForHTML5 (where we would expect Subject#presenter to be invoked).
Let us investigate that direction.
A) First, let's look for senders of Subject>>#presenter, all the way up. There are only four senders of #presenter in Hopscotch classes:
#enterSubject:in Subject in HopscotchForHTML5#enterSubject:in HopscotchShell in HopscotchForHTML5#refreshin HopscotchShell in HopscotchForHTML5#refreshmentPresenterin Presenter in HopscotchForHTML5
Here, 1. just calls 2.
class Subject
enterSubject: s = (
	(* TODO: use sendUp and open a new window if undelivered *)
	^shell enterSubject: s
)
We can ignore 3. and 4., as they have to do with refresh. That leaves us with the second, HopscotchShell>>enterSubject:. If we find who sends this message, (maybe following up a few of its senders) we should arrive at the method our application should invoke (which then would end up calling #createSubject, the method we are intrested in calling.
B) So next, let's look for senders of HopscotchShell>>#enterSubject: subject only in Hopscotch classes, we get
enterSubject:in ToolbarPresenter in HopscotchWindow in HopscotchForHTML5enterSubject:in Presenter in HopscotchForHTML5enterSubject:fromSnippet:in EmbeddedHopscotchWindow in HopscotchForHTML5find:in ToolbarPresenter in IDEWindow in BrowsinggoHomein HopscotchShell in HopscotchForHTML5homeButtonin Presenter in HopscotchForHTML5into:openSubject: in HopscotchWindow in HopscotchForHTML5openSubject:in Window in HopscotchProxy in AppPlatform in Browsing
Now a detective story becomes more of a guessing game. But anything that is creating a Window or invoked from a Window is a good guess, as any application would have to place it's Presenter into a Window or Frame or some such.
So let's look further at 7.
HopscotchWindow>>#into: container openSubject: subject
This seems to be doing something useful, it creates a toolbar, adds it to container, etc.
C) So let's look for senders of HopscotchWindow>>#into:openSubject: only in Hopscotch classes, we get
into:openSubject:in EmbeddedHopscotchWindow in HopscotchForHTML5openSubject:in EmbeddedHopscotchWindow in HopscotchForHTML5openSubject:in HopscotchWindow in HopscotchForHTML5
The item 3. HopscotchWindow>>#openSubject: subject
public openSubject: s = ( ^into: body openSubject: s )
is promising.
HopscotchWindow>>#openSubject: subject looks like may be the method that we should invoke in our app to eventually create the Presenter.
The invocations sequence would be
HopscotchWindow>>#openSubject: subject invokes ->
HopscotchWindow>>#into: container openSubject: subject invokes ->
HopscotchShell>>#enterSubject: subject invokes ->
Subject>>#presenter invokes ->
Subject>>#createPresenter
The last method creates and returns the presenter; which is then entered and placed to the page container (body).
Conclusion: We found through some assumption, a bit of detective work through code that included guesses, that our application should not create Presenter directly or by calling Subject>>#presenter directly. Instead, our application should invoke
HopscotchWindow>>#openSubject: subject
this invocation will do the work of creating the Presenter for the Subject, and entering the presenter into the appropriate place in the container body.
We will use this conclusion as a core conclusion when writing our sample Application.
13.2. Browsing.ns: Analysing how a vfuel file is created by clicking the [deploy] link on an App.
TL;DR: This section browses code following code execution after we click [deploy] on an Application module in IDE. Application is a top level class with factory #packageUsing: manifest and instance method #main: platform args: args, as explained in Newspeak modules API zoo. This section will show both methods are called, followed by serialization, and the serialized bytes stored as .vfuel. The result is not clear. This is still a low priority todo.
Let's say the App name is MyApp.
The code executed after we click [deploy] starts in instance of Browsing.
Browsing.ns
class Browsing usingPlatform: p ide: webIde = (
  |
  ..
  ide = webIde. (* ide BECOMES hopscotchWebIDE *)
  ..
  |
)

(* Inner class ClassActionsPresenter is the presenter of the line where
   the [deploy] action is.
   Somehow this presenter subject name = MyApp ????????
*)
public deployAction = (
        subject isApplicationConfiguration ifFalse: [^nothing].
        ^(link: '[deploy]' action: [
                        openMenu:: menuWithLabelsAndActions: {
                                {'as VictoryFuel'. [deployAsVictoryFuel]}.
                                {'as VictoryFuel with Mirrors'. [deployAsVictoryFuelWithMirrors]}.    (* 1 *)
                                {'as Web Page'. [deployAsWebPage]}.
                                {'as Web Page with Mirror Builders'. [deployAsWebPageWithMirrorBuilders]}.
                        }
                ]).
)
)

(* 2 *)
deployAsVictoryFuelWithMirrors = (
      (* subject name is MyApp by the speculation above *)
      | bytes = subject bytesForVictoryFuelWithMirrors. |
        ide webFiles downloadFileName: subject name, '.vfuel' fromBytes: bytes.
)

(* 3 *)
public bytesForVictoryFuelWithMirrors ^ <ByteArray> = (
  (* this becomes:
     bytesForVictoryFuelWithRuntime: hopscotchWebIDE RuntimeWithMirrorsForPrimordialSoup.
  *)
  ^bytesForVictoryFuelWithRuntime: ide psoupWithMirrorsDeploymentRuntime
)

(* 4 *)
public bytesForVictoryFuelWithRuntime: runtimeClass ^ <ByteArray> = (
        (* name is the name of appDef becomes MyApp *)
        | appDef <Class> =  ide namespacing Root at: name. |
        (* call 5 *)
        ^ide deployment PSoupPackager packageApplicationConfiguration: appDef withRuntimeConfiguration: runtimeClass  usingNamespace: ide namespacing Root
)

also see

public runApp = (
        | appDef <Class> app <Object> |
        appDef:: ide namespacing Root at: name.
        app:: appDef packageUsing: ide namespacing manifest.
        app main: cachedPlatform args: {}
)
DeploymentManager.ns
public class PSoupPackager = (
) (
(* 5 *)
public packageApplicationConfiguration: appDef <Class> withRuntimeConfiguration: runtimeClass <Class> usingNamespace: ns  ^ <ByteArray> = (
        |
    app <Object>
    runtime <Object>
    accessedResources <List> = List new.
    |

    runtime:: runtimeClass packageRuntimeUsing:
                (RecordingManifest namespace: ns accessedResources: List new).

        (* this instance seems just lost  *)
        appDef packageUsing:
                (RecordingManifest namespace: ns accessedResources: accessedResources).

        (* ****** THE PACKAGING OF appDef == MyApp is done here - MAYBE - UNCLEAR :
           this is in out/WebCompiler.ns>>Preloader:

               ~^(applicationConfiguration packageUsing: manifest) main: platform args: args~

          the result (the package instance initialized) is set on app:
        *)
        (* calling 6 with appDef == MyApp *)
        app:: Preloader
                resources: (Array withAll: accessedResources)
                applicationConfiguration: appDef.

        (* The app == initialized package instance IS SNAPSHOTTED TO BYTES, AND THE BYTES RETURNED.
           BYTES GO BACK TO bytesForVictoryFuelWithRuntime
         *)

        ^Snapshotter new snapshotApp: app withRuntime: runtime keepSource: runtimeClass keepsSources.
)
out/WebCompiler.ns>>Preloader
(* 6. a == MyApp *)
class Preloader resources: r <Array[{String. String. String | Class}]> applicationConfiguration: a <Class> = (
        |
        protected resources <Array[{String. String. String | Class}]> = r.
        protected applicationConfiguration <Class> = a.
        (* **** I think we need to instantiate: applicationConfiguration packageUsing: manifest here.
                without it, I do not understand where the MyApp is instantiated before serialization.
                Unless Preloader>>#main:args: is called, but where?
        *)
        |
) (
public main: platform args: args ^ <Object> = (
        | namespace <Map[String, Class | String | Alien]> manifest <Manifest> |
        namespace:: platform collections Map new.
        resources do:
                [:resource <{String. String. String | Class}> |
                | name <String> type <String> payload <String | Class> |
                 name:: resource at: 1.
                 type:: resource at: 2.
                 payload:: resource at: 3.
                 namespace
                        at: name
                        put: (unpackResourceType: type payload: payload platform: platform)].
        manifest:: Manifest forNamespace: namespace.

        (* *** If this is called, it would do the work:
               instantiate, run, return MyApp instance for serialization
               but I cannot find where it is called *)
        ^(applicationConfiguration packageUsing: manifest) main: platform args: args
)
HopscotchWebIDE.ns
class HopscotchWebIDE usingPlatform: p = (
  |
  ..
  public browsing = Browsing usingPlatform: p ide: self.
  ..
  public psoupWithMirrorsDeploymentRuntime = RuntimeWithMirrorsForPrimordialSoup.
  ..
  |
14. Elements of GUI in HopscotchForHTML5
14.1. TL;DR: The top level class HopscotchForHTML5 is the Newspeak GUI library.
This module is distributed (and contained in) the module RuntimeForHopscotchForHTML.
- When writing code (that needs GUI) inside the Newspeak Web IDE https://newspeaklanguage.org/webIDE/, we obtain an instance of
HopscotchForHTML5inside as follows:- In the workspace, the workspace variables
hopscotchandplatform hopscotchboth provide us with an instance ofHopscotchForHTML5that we can use to experiment with GUI code in the workspace. - In the IDE, when writing our own module (top level class) we typically need to add a primary factory method that passes
platformto our module. In our module's code, we can ask forplatform hopscotchwhich will give us aHopscotchForHTML5instance. An example is https://github.com/mzimmerm/newspeak-doc/tree/main/newspeak---a-few-notes-code/hello-world/6-as-general-module-with-GUI-using-platform (todo-00-last-last add this as the example from Newspeak on Squeak)
- In the workspace, the workspace variables
- Structure of the class
HopscotchForHTML5:- The most important nested class of
HopscotchForHTML5isFragment.Fragment's instance is like a DOM element - an object that generates a section of GUI. - A Hopscotch GUI is composed by composing Fragments
- Other important nested classes of
HopscotchForHTML5arePresenterandSubject - A GUI application in Hopscotch is MVC-like Model-Presenter-Subject. It would typically contain at least 2 classes, one extending
Subject, another extendingPresenter. - The
Subjectclass provides instance methods that return Fragments for 'standard' GUI elements. Some examples:Presenter#text:creates a Fragment that (when converted to GUI) becomes a text field.Presenter#button:actioncreates a Fragment that becomes a button with action.Presenter#link:actioncreates a Fragment that becomes a link with action.Presenter#menuWithLabelsAndActions:creates a Fragment that becomes a multi-select menu- etc.
- Typically, each of the above methods return instances of
Fragmentextensions.TextBlockFragmentfor text.ButtonFragmentfor button with actionHyperlinkFragmentfor link
HopscotchForHTML5#document
- The most important nested class of
Sections below we provide a 'deep delve' into some of such presenter methods.
14.2. Hopscotch DropDownMenuFragment: A drop down menu, created using Presenter#dropDownMenu:menu
14.2.1. TL;DR: To create a drop down menu we need two objects, a menu label/actions list, and a dropDownMenuFragment fragment
Use the following code to create a dropDownMenuFragment instance in our ConcretePresenter class.
menu, (which is simply an instance of a list of menu label/menu action tuples). For future proof, call the methodPresenter#menuWithLabelsAndActions:labelActionListto create the menu, for examplemenu = menuWithLabelsAndActions: { {'Save to File'. [respondToSave]}. #separator. {'Delete'. [respondToDelete]}. }dropDownMenuFragment, an instance ofDropDownMenuFragment, which is a wrapper for themenu. This instance is created by calling the#Presenter#dropDownMenu:menu. Using this line in our code will wrap the menu into a drop down menu shown in the GUI with two items: 'Save to File' and 'Download'.dropDownMenuFragment:: dropDownMenu: menu.
14.2.2. Hopscotch DropDownMenuFragment: Story of adding it to a MyWidgetPresenter#definition, and how it works at runtime.
When we want to add to GUI a popup menu which shows after clicking on an image, and understand it's working internals, follow this section.
14.2.2.1. Write the GUI in our application: Code in MyWidgetPresenter#definition
Follow these steps in our application GUI in MyWidgetPresenter to add a drop down menu.
In
MyWidgetPresenter#definitionadd call to#Presenter#dropDownMenu:[#Presenter#menuWithLabelsAndActions: Save], for example:definition = ( ^ row { someFragments. dropDownMenu: [classActionsMenu]. } )
Add a method
MyWidgetPresenter#classActionsMenu. This answers a label -> action list. It may look like this:classActionsMenu = ( ^ menuWithLabelsAndActions: { {'Save to File'. [respondToSave]}. #separator. {'Delete'. [respondToDelete]}. }
Add a method
MyWidgetPresenter#respondToSave, this may look like this:respondToSave = ( ide webFiles downloadFileName: subject name, '.ns' fromString: subject compilationUnitSource. )
- Add a method for the delete action, similar to above.
14.2.2.2. Processing during the call to MyWidgetPresenter#definition
This sections describes Processing during the call to MyWidgetPresenter#definition
The call to
#definition(which callsdropDownMenu: [classActionsMenu]) returns instance ofDropDownMenuFragmentwhich is added into the GUI treedropDownMenu: menu <[Menu]> ^ <DropDownMenuFragment> = ( ^DropDownMenuFragment menu: menu )
The
DropDownMenuFragmentlooks like thisclass DropDownMenuFragment menu: ms image: img <Image> alignment: side <Symbol> = ImageButtonFragment ( | menuSupplier <[Tuple[Symbol | Tuple[String, []]]]> = ms. alignment <String> = side asString. image = img. action = []. width = styleButtonSize. height = styleButtonSize. isActive ::= false. | )
it extends
class ImageButtonFragment = LeafFragment ( (* A button displayed as an image; or an image that acts as a button. *) | public action <[]> public image <Image> |)
- The above ties to the DropDownMenuFragment an
imageand emptyaction; I do NOT know when they are set.
14.2.2.3. Fragment#createVisual: Processing during GUI DOM composition (when Newspeak code is converted to DOM document)
When the UI is composed as a Newspeak object graph of the Fragment s instances, AT SOME POINT (which point??) THE NEWSPEAK Fragment graph is converted to Javascript DOM document (Javascript objects graph). This process calls #createVisual on every Fragment instance in the GUI fragments tree (How and where in code does this composition and calling createVisual happens??) During this process, each Fragment#createVisual does BOTH create a DOM elements from the Fragment AND adds listeners to them, as directed by the code in #createVisual.
Calling the DropDownMenuFragment#createVisual executes it's code:
DropDownMenuFragmentis converted toDOM elementandDOM element Listeners are declaredfor 'click', 'mousedown', mouseup etc :createVisual ^ <Alien[Element]> = ( | menu = super createVisual. | (* calls ImageButtonFragment createVisual which creates an div -> img element *) (* If DropDownMenuFragment isActive, and received (another) click, close the menu, otherwise delay call to updateContent. The updateContent shows the popup menu: *) menu addEventListener: 'click' action: [:event | isActive ifTrue: [isActive: false. shell closeActiveMenu] ifFalse: [updateContent]. (* HERE, SELF=button=DropDownMenuFragment *) nil ]. (menu at: 'style') at: 'cursor' put: 'pointer'. (* image is slot on ImageButtonFragment *) image addEventListener: 'mousedown' action: [:event | (image at: 'style') at: 'filter' put: 'brightness(130%)'. nil]; addEventListener: 'mouseover' action: [:event | (image at: 'style') at: 'filter' put: 'brightness(50%)'. nil]; addEventListener: 'mouseout' action: [:event | (image at: 'style') at: 'filter' put: ''. nil]. (* The created visual - the Alien DOM element - with children and listeners is returned. *) ^menu )
14.2.2.4. DOM is ready, code execution after user click on the menu IMG (the DropDownMenuFragment#image visual)
Now the DOM UI is ready, and waits for user interaction with the elements created from the DropDownMenuFragment. The following may happen:
- User clicks on the
DropDownMenuFragment#image The 'click' event listener on the image which was installed above in
DropDownMenuFragment#createVisualis executed. This code is (again)[:event | isActive ifTrue: [isActive: false. shell closeActiveMenu] ifFalse: [updateContent]. (* HERE, SELF=button=DropDownMenuFragment *) nil ].
We show and describe what happens in terms of the original Newspeak code. If the DropDownMenuFragment isActive, and received (another) click, close the menu, otherwise call to updateContent.
The
DropDownMenuFragment#updateContentis executed (again described in Newspeak code, although this runs in JS DOM). This is the core leaf process that happens after the image click.updateContent ^ <Alien[Element]> = ( | menu <Alien[Div]> = computeContentForMenu: menuSupplier. | isActive: true. showMenu: menu forShell: shell inVisual: visual. (* HERE: menu = the popup menu (div with menu lines) DOM element created by computeContentForMenu: menuSupplier. One line for each menu item, line has attached action code from menu definition. visual = self's visual = aDropDownMenuFragment's visualX = the result of DropDownMenuFragment#createVisual, which is div with IMG!! *) ^menu. )
- The code execution summary is explained just below, in detail in items 4. and 5.
- creates and returns
menu, the DOM element for the menu with child elements one for each menu item - this is inHopscotchForHTML5#computeContentForMenu: menuSupplier - attaches the
menuto theDropDownMenuFragmentvisualwhich was previously created in theDropDownMenuFragment#createVisual- this attachement is done inHopscotchForHTML5#showMenu:forShell:inVisual:visual
- creates and returns
- The code execution summary is explained just below, in detail in items 4. and 5.
The code that creates the menu DOM element with child item elements
computeContentForMenu: menuSupplier <[Menu]> ^ <Alien[Div]> = ( | dropDownContent = document createElement: 'div'. | (dropDownContent at: 'style') at: 'backgroundColor' put: styleMenuBackgroundColor; at: 'position' put: 'absolute'; at: 'z-index' put: 10; at: 'padding-top' put: '8px'; at: 'padding-bottom' put: '8px'; at: 'border' put: styleMenuBorderColor, ' solid 1px'; at: 'border-radius' put: styleDefaultRadius; at: 'box-shadow' put: '0px 0px 15px ', styleMenuShadowColor; at: 'display' put: 'inline-block'; at: 'outline' put: 0; at: 'cursor' put: 'default'. menuSupplier value do: [:menuItem <MenuItem | Symbol> | | itemContent <Alien[Element]> | (* For each menuItem, create content, which is the text of the menu item. *) (* This is another huge DOM creation, described just a bit below. *) itemContent:: contentFor: menuItem within: dropDownContent. dropDownContent appendChild: itemContent]. ^dropDownContent )
The code that shows the menu (the visual=aDropDownMenuFragment) in shell and positions it in the shell.
showMenu: menu <Alien[Div]> forShell: s <HopscotchShell> inVisual: v <Visual> = ( v appendChild: menu. positionMenu: menu at: (v at: 'offsetTop') forShell: s. menu focus. s activeMenu: menu. s activeMenuParent: v. )
- In detail:
visualis the visual DOM element created for theDropDownMenuFragment- it is a div with IMG.menuis the popup menu DOM element (div with menu lines) created by computeContentForMenu: menuSupplier.menuelement is appended as child of thevisualIMGmenuelement is positioned in the DOM (theshell)menuelement is set as activeMenu onshellpositionMenu: menu <Alien[Div]> at: y <Float> forShell: s: this positins the menu based on the ~visual~(IMG) position
14.2.2.5. The menu DropDownMenuFragment DOM element is poped up, waiting for user click on one menu item. Actions after user click on one menu item
Now, the menu DropDownMenuFragment DOM element is poped up, and waiting for another user click, this time on one of the menu items
We recall in the code above, that the menu items are DOM elements created in method HopscotchForHTML5#contentFor:within:
contentFor: menuItem < MenuItem | Symbol> within: dropDownContent ^ <Alien[Element]> = ( | entry separator <Alien[Element]> | menuItem = #separator ifTrue: [ separator:: document createElement: 'hr'. (separator at: 'style') at: 'height' put: '1px'; at: 'background-color' put: styleBorderColor; at: 'border' put: 'none'; at: 'margin-left' put: styleMenuInset; at: 'margin-right' put: styleMenuInset. ^separator ]. entry:: document createElement: 'div'. entry at: 'textContent' put: menuItem first. (entry at: 'style') at: 'color' put: styleDefaultInterfaceTextColor; at: 'font-family' put: styleFontFamilySansSerif; at: 'font-size' put: styleFontSizeMenu; at: 'padding-left' put: styleMenuInset; at: 'padding-right' put: styleMenuInset; at: 'height' put: styleMenuItemHeight; at: 'line-height' put: styleMenuItemHeight; at: 'white-space' put: 'nowrap'. entry addEventListener: 'mouseover' action: [:event | (entry at: 'style') at: 'background-color' put: '#C8C8C8'. nil]; addEventListener: 'mouseout' action: [:event | (entry at: 'style') at: 'background-color' put: '#F6F6F6'. nil]; addEventListener: 'click' action: [:event | menuItem last value. nil]. ^entry )
This code have run already in #computeContentForMenu and have created the popup menu, menu items, and added listener on mouse 'click' with action from the Presenter#menuWithLabelsAndActions, originally declared in
menu = menuWithLabelsAndActions: {
    {'Save to File'. [respondToSave]}.
    #separator.
    {'Delete'. [respondToDelete]}.
  }
So now, if user clicks on one of the menu items, say 'Save to file', the menu action [respondToSave] value is executed, poping a save to file dialog.
THIS CONCLUDE THE WHOLE LIFECYCLE OF MENUS!!!!
15. Todos todo-00
- todo-00-last-last : PlatformWithHopscotch disappeared. The only lines remaining are isKindOfPlatformWithHopscotch which are probably all obsolete. Go over the document, investigate and change.
- todo-00-last : Document
WorkspaceManager= module created fromplatform(instance ofRuntimeWithMirrorsForPrimordialSoup>>Platform) andide(instance ofHopscotchWebIDE) both available in the IDE Workspace as objects by this name - bothplatformandideare instance methods onWorkspaceManager>>Workspace todo-00-last where does "platform" come from? How can I get "platform" or "ide" in the IDE?
class CollectionsForPrimordialSoup usingInternalKernel: ik (* :exemplar: platform collections *) = ( .. slots ..)
- todo-00-last : For the Zoo, there is also a Runtime module, identified by primary factory :
#packageRuntimeUsing:inRuntimeWithMirrorsForPrimordialSoup#packageRuntimeUsing:. investigate it, ask, add to docs. - todo-00-last: In Workspace, evaluate:
ide namespacing manifestandRoot. They are both maps. They seem the same, but are not =. What are the diffs? Where is Root member of? - read https://newspeaklanguage.org/ns101/ns101.html
- Reactivity: Hudak's book The Haskell School of Expression
- What is "Hopscotch's component model* Gilad mentions as reactivity he added?
- change begin_example to begin_src?? - when the block is named such as
MyClass, add ".ns" to class,MyClass.ns - clarify - throughout the document, we should clarify that 'deploy' means 'create deployable artifact' - a file that can be deployed!! Also go over all text talking about 'deploy'
- Look for "Module type", and come up with a term for it - maybe just module type.
- generally replace 'are called' 'abc is called' with 'are termed', 'abc is termed'
- Add to blog:
- around descriptrion of sections: class MyClass primaryFactorySignature = (|instanceSlots| primaryFactoryCode ) (innerClassesCode instanceMethodsCode ) : (classMethodCode ) clarify that the first section is definition of primary factory! Technically, the class line in IDE is Primary factory, NOT class
- Check where in code the class names ampleforthDocumentBody, and ampleforthDocumentClass and self_ampleforth are used.
- Figure out how servable.zip is built.
16. IN-PROGRESS-NOW Current work : Classes of objects available in Workspace. Add to a new Zoo
| object | is instance of class (from top) | class has slots (only important) |
|---|---|---|
| platform | RuntimeForHopscotchForHTML>>Platform | RuntimeForHopscotchForHTML>>Platform #slots# kernel, hopscotch, collections, mirrors, js, etc |
| , cont | RuntimeForHopscotchForHTML #slots# Kernel, HopscotchForHTML5, Collections, Mirrors, JS, etc | |
| platform hopscotch | HopscotchForHTML5 (UI framework) | HopscotchForHTML5 #slots# Color, window_slot, DOMParser_slot |
| hopscotch | same object as above | as above |
| hopscotch core | same object as above | as above |
| hopscotch HopscotchWindow | HopscotchForHTML5>>HopscotchWindow | HopscotchForHTML5>>HopscotchWindow #slots# NONE but see super HopscotchShell |
| , cont | , cont extends HopscotchForHTML5>>HopscotchShell | HopscotchForHTML5>>HopscotchShell #slots# navigator, currentPresenterX, toolbarHolder, contentHolder, activeMenu |
| ide | HopscotchWebIDE>>HopscotchWebIDE (top is App) | HopscotchWebIDE>>HopscotchWebIDE #slots# namespacing, browsing, localStorage |
| , cont | HopscotchWebIDE #slots# Namespacing, Browsing | |
| ide namespacing | Namespacing | Namespacing #slots# manifest, Root (is Map with all classes in IDE Root) |
| ide namespacing manifest | Namespacing>>Manifest | Namespacing>>Manifest #slots# namespace (private back to owner Namespacing>>Namespace) |
| ide namespacing Root | Map | N/A, but contains all classes visible in IDE Root namespace |
| ide namespacing Categories | Namespacing>>Namespace | Namespacing>>Namespace #slots# _dictionary |
| ide browsing | Browsing | Browsing #slots# currentWindow, body, localStorage, compiler, Snapshotter etc |
| ide browsing ProgrammingPresenter | Browsing>>ProgrammingPresenter | Browsing>>ProgrammingPresenter #slots# see Presenter slots, none added |
| ide minitest |
todo-00-last IN-PROGRESS-NOW : add rows above on testing, minitest todo-00-last IN-PROGRESS-NOW : add whole section on testing, minitest. Notes on that:
- minitest = testFramework (in naming methods, look for it and explain more)
- TestingConfiguration is like App (has [run tests] instead of [run])
todo-00-last IN-PROGRESS-NOW : add section on how Help is presented
To add the Help (the ? on aneed the following things in MyComponentPresenter#definition:
Adding (to the
#definitionrow) the ? imageButton, with Action code for clicking on it. Simply by calling the defaultPresenter#helpButtonfromMyComponentPresenter#definition.public definition = ( ^ row: { (image: ide images classIcon) height: styleButtonSize. row: coreOfThisSectionLine. saveButtonWithAction: [respondToSave]. refreshButton. helpButton. dropDownMenu: [classActionsMenu]. } )
Note only: the default
Presenter#helpButtoncode which adds the#imageButton:action:. Normally, it does not need to change.helpButton = ( ^(imageButton: helpImage action: [helpHolder content: helpContents]) height: styleButtonSize )
Implementing
#helpTextwhich is called from default#helpContentsabove.helpText ^ <Fragment> = ( |mapping = Map new.| mapping at: #classTestActions put: classActions testActions; ^ampleforth: 'A class presenter for Simple IDE Browser.' mapping: mapping )
Class Help appears unused
class Help contentBlock: blk <[AmpleforthFragment | HTMLFragment]> = (
        |
        helpHolder <HolderFragment> = holder: nothing.
        helpBlock<[AmpleforthFragment | HTMLFragment]> = blk.
        |
    )
- When we add a
Presenter#helpSectionFragment in#definitionof a presenter, theHolderComposerFragment is returned by this sequence of callsCalling
helpSection(* returns HolderComposer extends Composer extends Fragment *) public helpSection ^ <HolderComposer> = ( ^helpHolder
calls:
holder: def <Fragment | [Fragment]> = (
    ^HolderComposer withContent: def
)
calls:
class HolderComposer withContent: definition <Fragment | [Fragment]> = Composer (|
  contentSource <Fragment | [Fragment]> ::= definition.
  actualContent <Fragment>
|)
Next, when the HolderComposer#definitions are called, either the contentSource or the actualContent value Fragment is shown.
todo-00-last IN-PROGRESS-NOW : add section on UI building:
Fragment->Composer->HolderComposer,SequenceComposer,etc: implements#definitions <List<Fragment>Fragment->Presenter: implements#definition <Fragment>- todo : find where
Composer#definitionsandPresenter#definitionare called in UI to create UI. - todo : describe what
Presenter,HopscotchShell,etc#enterSubject:subjectis doing: Looks like makes itself the presented Fragment on the new subject! Either way, the presenter or shell show themselves in the UI!
todo-00-last IN-PROGRESS-NOW : add section on Mirrors
- classes with DeclarationMirror as part of their name, reflect source code except MethodMirror which is misnamed, should be MethodDeclarationMirror
ClassextendsBehaviorMirrorGroupextendsCollection- We have the following Mirror classes:
ClassMirror(defines structure: slots, nestedClasses, methods) ANDClassDeclarationMirror(defines source and access for class and mixin)- ONLY
SlotDeclarationMirrorNOT SlotMirror - ONLY
MethodMirrorNOT MethodDeclarationMirror BUT MethodMirror functions as MethodDeclarationMirror - ONLY
MixinMirrorNOT MixinDeclarationMirror. MixinMirror is equivalent to ClassMirror - So we can say that Class has ClassMirror and ClassDeclarationMirror, but slots, methods, and nested classes have only DeclarationMirror
- If I create a
Mirror(e.g. of class), everything I can pull from it isDeclarationMirrors(e.g. of slots, nestedClasses, methods) ClassMirror reflecting: klass <Behavior>- reflects Class
- has members:
slots<Collection[SlotDeclarationMirror]> = <MirrorGroup[SlotDeclarationMirror]>nestedClasses<Collection[ClassDeclarationMirror]> = <MirrorGroup[ClassDeclarationMirror]> why not Collection[ClassMirror]>??methods<Collection[MethodMirror]> = <MirrorGroup[MethodMirror]>
ClassDeclarationMirror reflecting: mixin <InstanceMixin>- reflects mixin's code
- There is NO ClassDeclaration or MixinDeclaration or SlotDeclaration, only
ClassDeclarationMirror,MixinMirror,SlotDeclarationMirror aClassMirror mixin => MixinMirror- THERE IS A SORT-OF-CIRCULARITY BETWEEN
ClassMirrorANDClassDeclarationMirror, WE CAN GET ONE FROM THE OTHER AS FOLLOWSaClassMirror mixin declaration => ClassDeclarationMirroraClassDeclarationMirror instanceSide => MixinMirroris API equivalent to ClassMirror MixinMirror, so both provides slots <MirrorGroup>, nestedClasses <MirrorGroup>, methods <MirrorGroup> TheinstanceSideis implemented as follows:public instanceSide ^<MixinMirror> = ( (* Note: The mixin is slot on ClassDeclarationMirror from which the ClassDeclarationMirror was created. *) ^MixinMirror reflecting: mixin )
- Note: there is also
ClassDeclarationMirror#definingMixinmethod which answers the MixinMirror (type) of the enclosing instance.
Example of mirrors investigation mirrors of A1_TestSubjects in workspace:
Newspeak3
'Root'
class A1_TestSubjects = (
(* Testing class for the benefit of A1_SimpleIDEBrowser. *)
) (
public class Nested1 = (
	|nested1Slot1|
) (
instanceMethod1_on_Nested1 = (^'instanceMethod1_on_Nested1')
) : (
)
public class Nested2 = (
	|nested2Slot1|
) (
instanceMethod1_on_Nested2 = (^'instanceMethod1_on_Nested2')
) : (
)
instanceMethod3_on_A1_TestSubjects= (^'instanceMethod3_on_A1_TestSubjects')
instanceMethod2_on_A1_TestSubjects= (^'instanceMethod2_on_A1_TestSubjects')
instanceMethod1_on_A1_TestSubjects= (^'instanceMethod1_on_A1_TestSubjects')
) : (
classMethod1_on_A1_TestSubjects= (^'classMethod1_on_A1_TestSubjects')
)
|classMirror classMirrorMixin classDeclarationMirror classNestedClassesMirrorGroup classDefiningMixin mirrors|
mirrors:: platform mirrors.
classMirror::  mirrors ClassMirror reflecting: A1_TestSubjects.
classNestedClassesMirrorGroup:: classMirror nestedClasses. (* Similarly to nestedClasses, we can send methods, slots, obtaining MirrorGroup *)
classMirrorMixin:: classMirror mixin.
classDeclarationMirror:: classMirrorMixin declaration.
classDefiningMixin:: classDeclarationMirror definingMixin.

{
  classMirror.                   (* ClassMirror. has methods to get groups: nestedClasses, methods, slots, lazySlots, allInstances *)
  classNestedClassesMirrorGroup. (* MirrorGroup[ClassDeclarationMirror] = list of ClassDeclarationMirror, for each nested class. *)
  classMirrorMixin.              (* MixinMirror. has methods to get groups: method names SAME as ClassMirror but NOT allInstances. BUT RESULTS ONLY CONTAIN nestedClasses, methods, slots, lazySlots added in this mixin - see results a few lines below *)
  classDeclarationMirror.        (* ClassDeclarationMirror. has methods to get: code, accessor, primary factory name (nowhere else), classSide, classSide, instanceSide (instanceSide gets back InstanceMirror ~ ClassMirror API). Does NOT have messages methods, nestedClasses, slots, lazySlots *)
  classDefiningMixin.            (* MixinMirror. nil - because enclosing instance mixin does not exist*)

  classMirror methods size.                          (* 24 = 21 from Object + 3 from A1_TestSubjects=this mixin, expected *)
  classMirrorMixin methods size.                     (* 3 from A1_TestSubjects=this mixin, expected; mixin shows only synthetic (mixin added) methods *)
  classDeclarationMirror instanceSide methods size.  (* 3, as above *)

  classMirror nestedClasses size.                          (* 2 from A1_TestSubjects=this mixin, expected *)
  classMirrorMixin nestedClasses size.                     (* 2 from A1_TestSubjects=this mixin, expected *)
  classDeclarationMirror instanceSide nestedClasses size.  (* 2 as above  *)
}.
I think the reason ClassMirror and MixinMirror despite almost the same API are different, is that the MixinMirror only shows increments.
So use ClassMirror to get methods, nestedClasses, slots, use ClassDeclarationMirror to get code???
BUT WHAT CAUSES THE ASSYMETRY BETWEN methods and nestedClasses?
todo-00-last IN-PROGRESS-NOW : add TO section on namespacing
Namespacing>>Manifest class has only 1 method,
doesNotUnderstand, yet, we can doide namespacing manifest MyClassand it showsMyClass, how? #+doesNotUnderstandprotected doesNotUnderstand: message <Message> = ( ^namespace at: message selector ifAbsent: [ (namespace at: 'Icons' ifAbsent: [super doesNotUnderstand: message]) at: message selector ifAbsent: [super doesNotUnderstand: message] ] )
namespaceis a private map with key = class name, value = class,
Where are some of the above classes instantiated?
| class | primary | where instantiated? |
|---|---|---|
| HopscotchForHTML5 | HopscotchForHTML5 usingPlatform: self images: ducts: | inside primary of: RuntimeForHopscotchForHTML>>Platform#internalKernel: ik |
| HopscotchForHTML5>>HopscotchWindow | HopscotchWindow into: container openSubject: s = HopscotchShell new (call shell methods) | |
| RuntimeForHopscotchForHTML | RuntimeForHopscotchForHTML packageRuntimeUsing: manifest | inside instance of: DeploymentManager>>PsoupPackager#packageApplicationConfiguration: appDef <Class> withRuntimeConfiguration: runtimeClass <Class> usingNamespace: ns |
| , cont | cont | , also primary of: PrimordialSoupTracer packageUsing: manifest = runtime = manifest RuntimeForPrimordialSoup packageRuntimeUsing: manifest. |
| HopscotchWebIDE | HopscotchWebIDE packageUsing: manifest | inside primary of: AmpleforthEditorApp |
| , cont | , also primary of: Ampleforth | |
| , cont | , ALSO I THINK MUST INSTANTIATE IN NEWSPEAK IN BROWSER LOAD OF HopscotchWebIDE.vfuel, BUT WHERE? maybe vfuel is just a serialized HopscotchWebIDE instance? | |
17. IN-PROGRESS-NOW HopscotchForHTML5 API notes
In this chapter, items marked by BB -> AA nesting indicates inheritence: BB inherits from AA. Items without the -> indicate members. All classes listed are nested just under HopscotchForHTML5.
HopscotchForHTML5
Fragmentpublic width: w elasticity: e = ( size: w )widthissizeby default.- But, if
sizeis part ofBlankFragmentwhich live blank:
- ->
LeafFragment- ->
BlankFragmentsize
- ->
HopscotchForHTML5>>Presenter
- Instance Methods: They just instantiate and return UI classes nested in
HopscotchForHTML5. Instance Method examples:blank: 2.creates a padding rectangle size 2; size is horizontal (width) if inrow:but somehow becomes vertical (height) if incolumn:- Fragment combinators:
elastic: fragment.- makes its argument stretchable to fill up the available spacerow: {fragments}column: {fragments}collapsed: blockAnsweringCollapsedFragment expanded: blockAnsweringExpandedFragment initiallyExpanded: bool